
Creating an Android App User Interface - Login Screen
Estimated time: 30 minutes
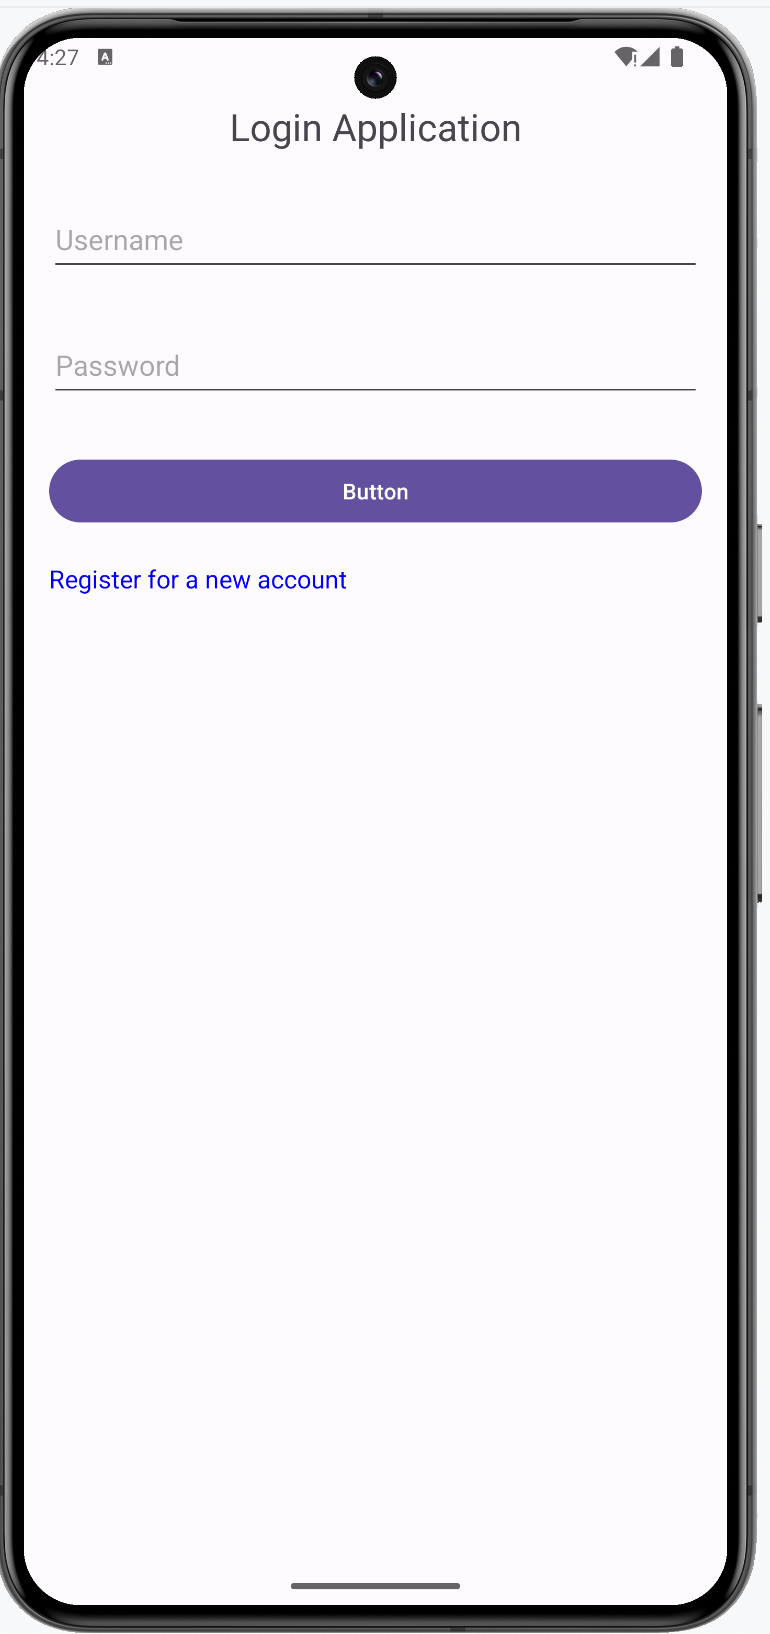
Welcome to the lab on building your first user interface in Android Studio. You will build a login screen in this lab. The final result would look something like this:

Objectives
After completing this lab, you will be able to:
- Understand the importance of mobile UX design
- Create a login screen UI using LinearLayout
- Utilize different Android widgets, themes, and styles
Running the lab
This is an instructional lab that does not require a Skills Network lab environment. You will follow this lab on your local machine using Android Studio.
Key terms
- LinearLayout: A view group that aligns all children in a single direction, either vertically or horizontally. You will be building the Login screen using a Linear layout in this lab.
- RelativeLayout: A view group that displays child views in relative positions.
- ConstraintLayout: A more flexible layout that allows you to position and size widgets in a way that is similar to RelativeLayout but with more power.
- FrameLayout: A placeholder on the screen that you can use to display a single view.
- There are multiple ways to measure UI elements.
- Density-independent Pixels (dp): A unit of measurement for UI elements. One dp is equivalent to one pixel on a screen with a density of 160 dots per inch. It helps in creating consistent UI across different screen sizes and densities.
- Scale-independent Pixels (sp): Similar to dp but also scales with the user's font size preference. It is mainly used for defining font sizes.
Understanding mobile UX
User experience (UX) design for mobile applications is crucial because it directly impacts user satisfaction and engagement. Good UX design ensures that the app is intuitive, efficient, and enjoyable to use. Key elements include ease of navigation, aesthetic appeal, and responsiveness.
Components of mobile UX
- Ease of navigation: Users should be able to find what they need quickly without confusion.
- Aesthetic appeal: Visually pleasing designs make the app more engaging.
- Responsiveness: The app should work well across different devices and screen sizes.
- Accessibility: Ensure that the app is usable by people with various abilities.
Creating UX
Creating a good UX involves careful planning and consideration of various elements such as layouts, widgets, themes, and styles. Android provides a range of tools and components to help you build a great user interface.
Different widgets available
- TextView: Displays text to the user.
- EditText: Allows the user to enter text.
- Button: A clickable button that performs an action.
- ImageView: Displays an image.
- CheckBox: A checkbox that can be checked or unchecked.
- RadioButton: A radio button for selecting one option from a set.
- Switch: A switch that can be toggled on or off.
Themes and styles
Themes and styles in Android help to maintain a consistent look and feel across the app. A style is a collection of attributes that specify the appearance for a single View. A theme is a style applied to an entire Activity or application, not just an individual View.
XML layout file
Extensible Markup Language (XML) is used to design the UI layout in Android. Each XML file represents a screen or a part of a screen. XML allows developers to separate the design from the logic, making the code easier to manage and maintain. You will not touch the XML file directly in this lab, but it is important to understand their role in Android application development.
Instructions
Step 1: Create a new project
You can skip this step if you already have a project from the previous lab.
- Open Android Studio and start a new project.
- Select
Phone and TabletandEmpty Views Activityas the project type. - Name your project and choose Java as the language.
- Select
Finishto create the project.
Step 2: Change the main layout to Linear Layout
Open the
activity_main.xmlfile in theres/layoutdirectory. This is the main view of the project that opens when the app is launched. Switch to theDesignview by selecting the "Design" on top of the window (indicated by number 3 in the screenshot).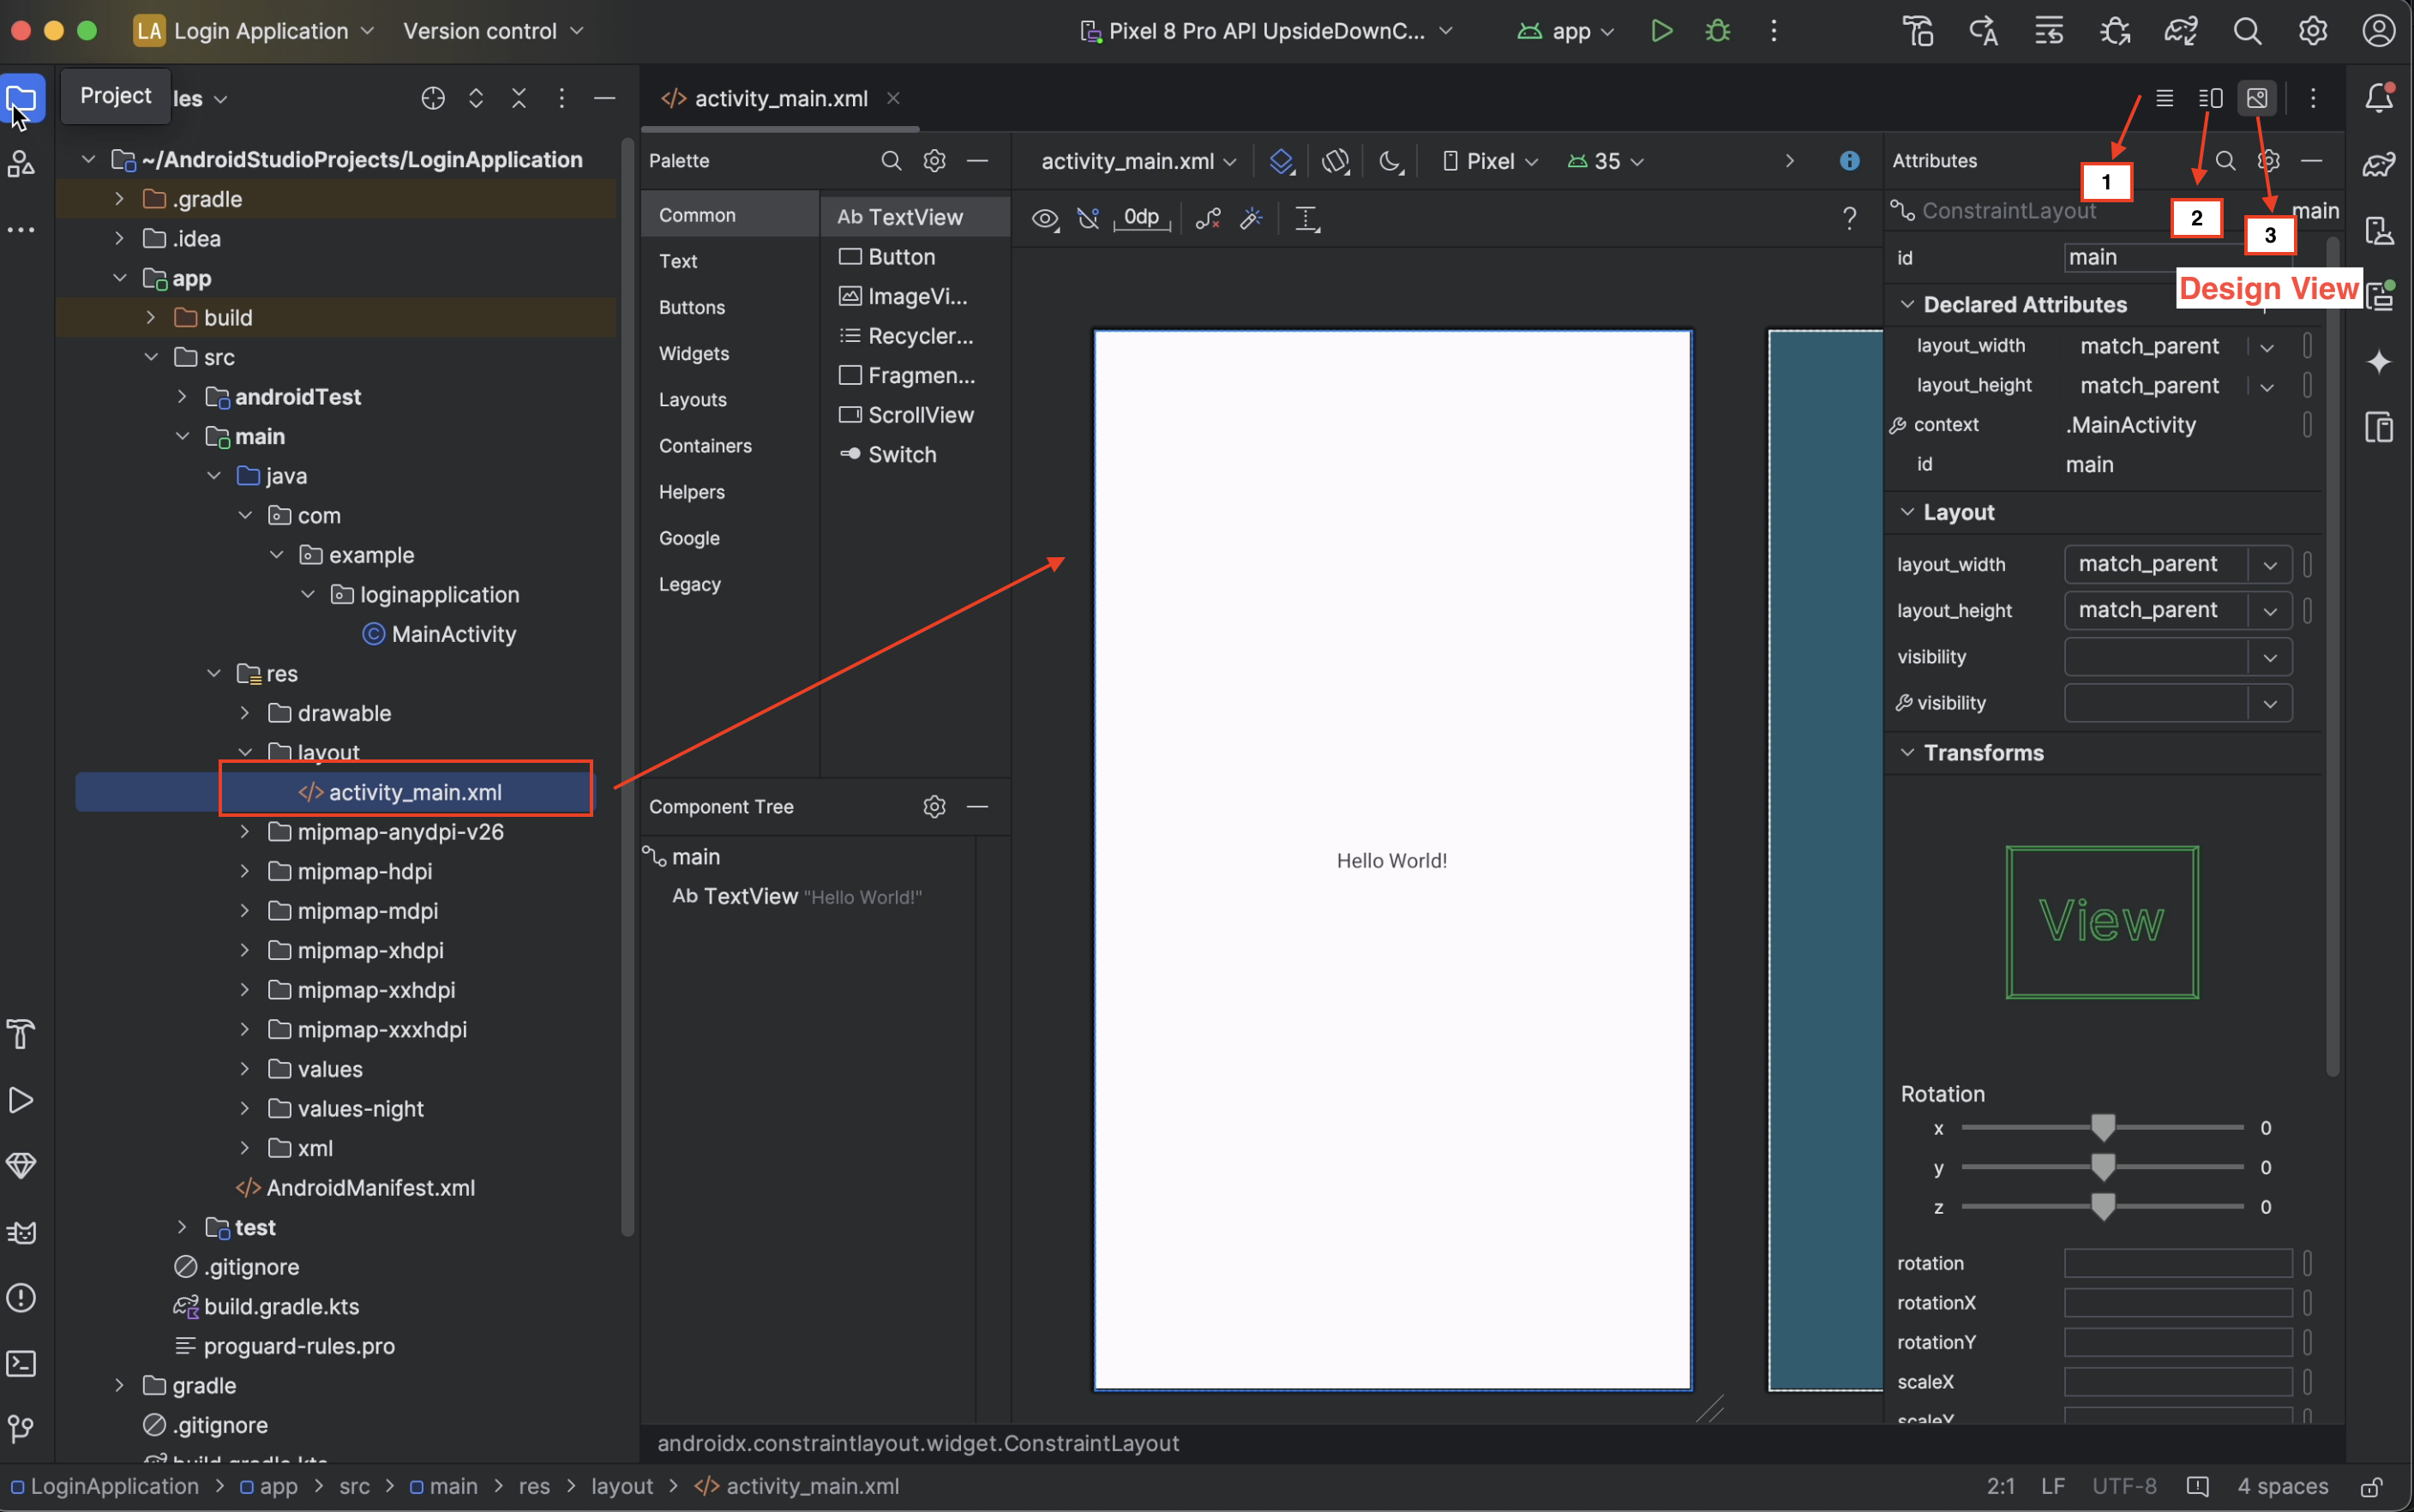
Select and delete the existing text box that says "hello world" in the middle of the screen. You can delete by simply selecting Delete or backspace on the keyboard. Alternatively, right click and select
Delete.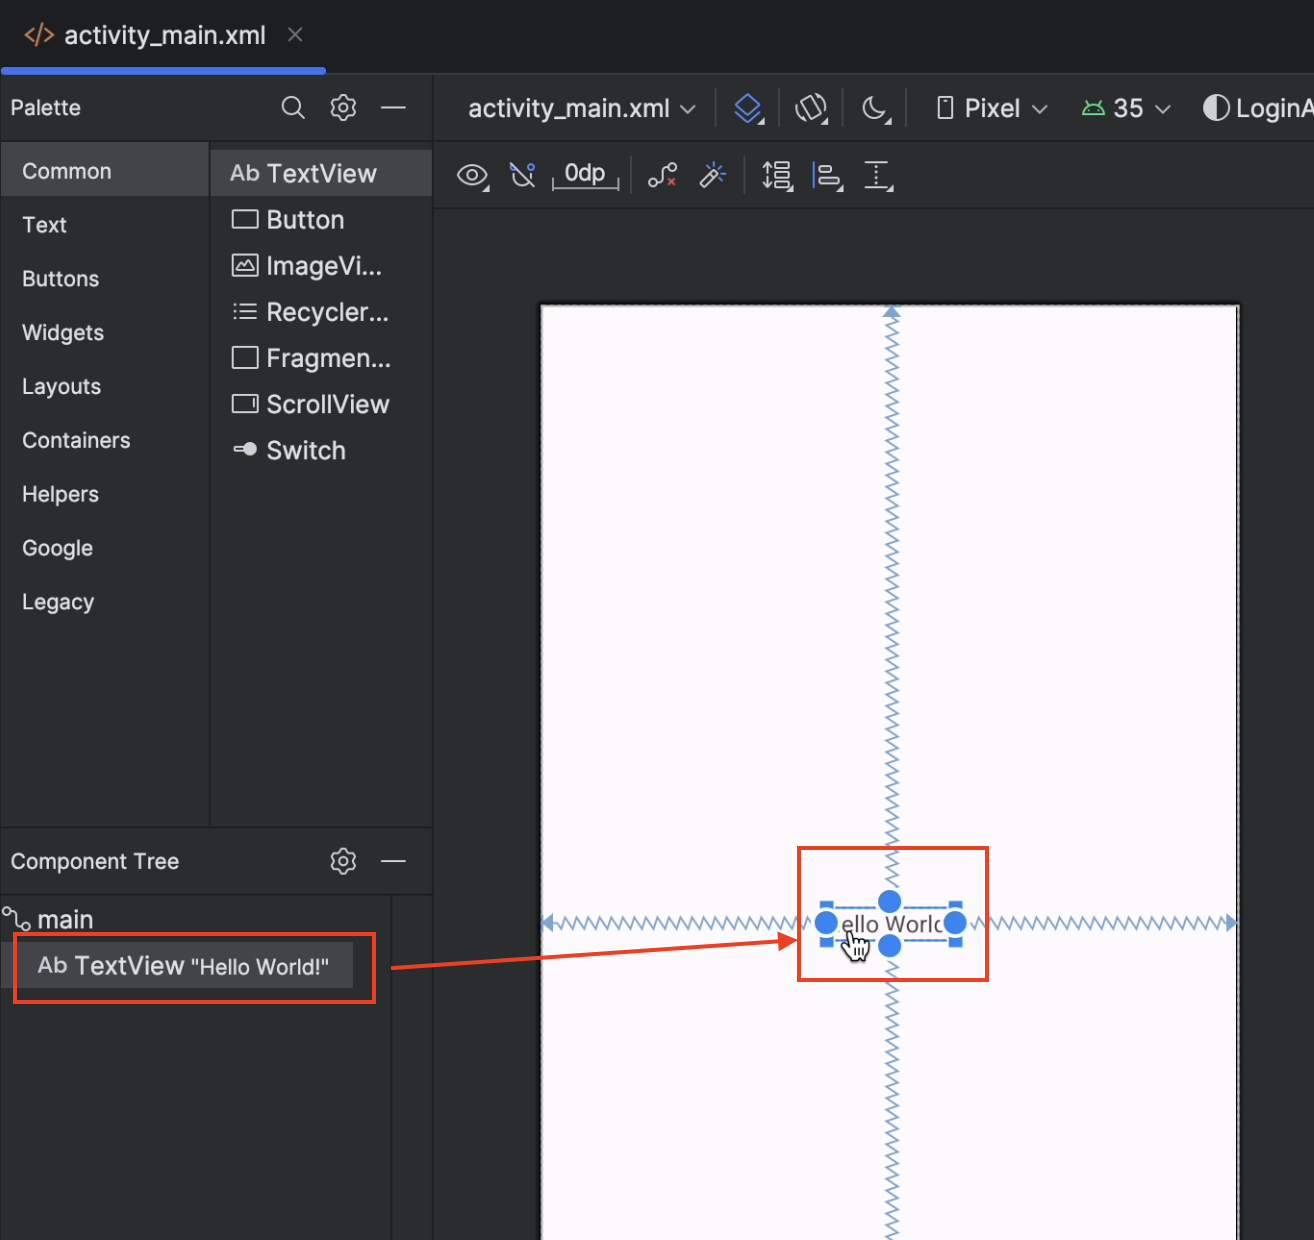
You should be left with an empty parent view.
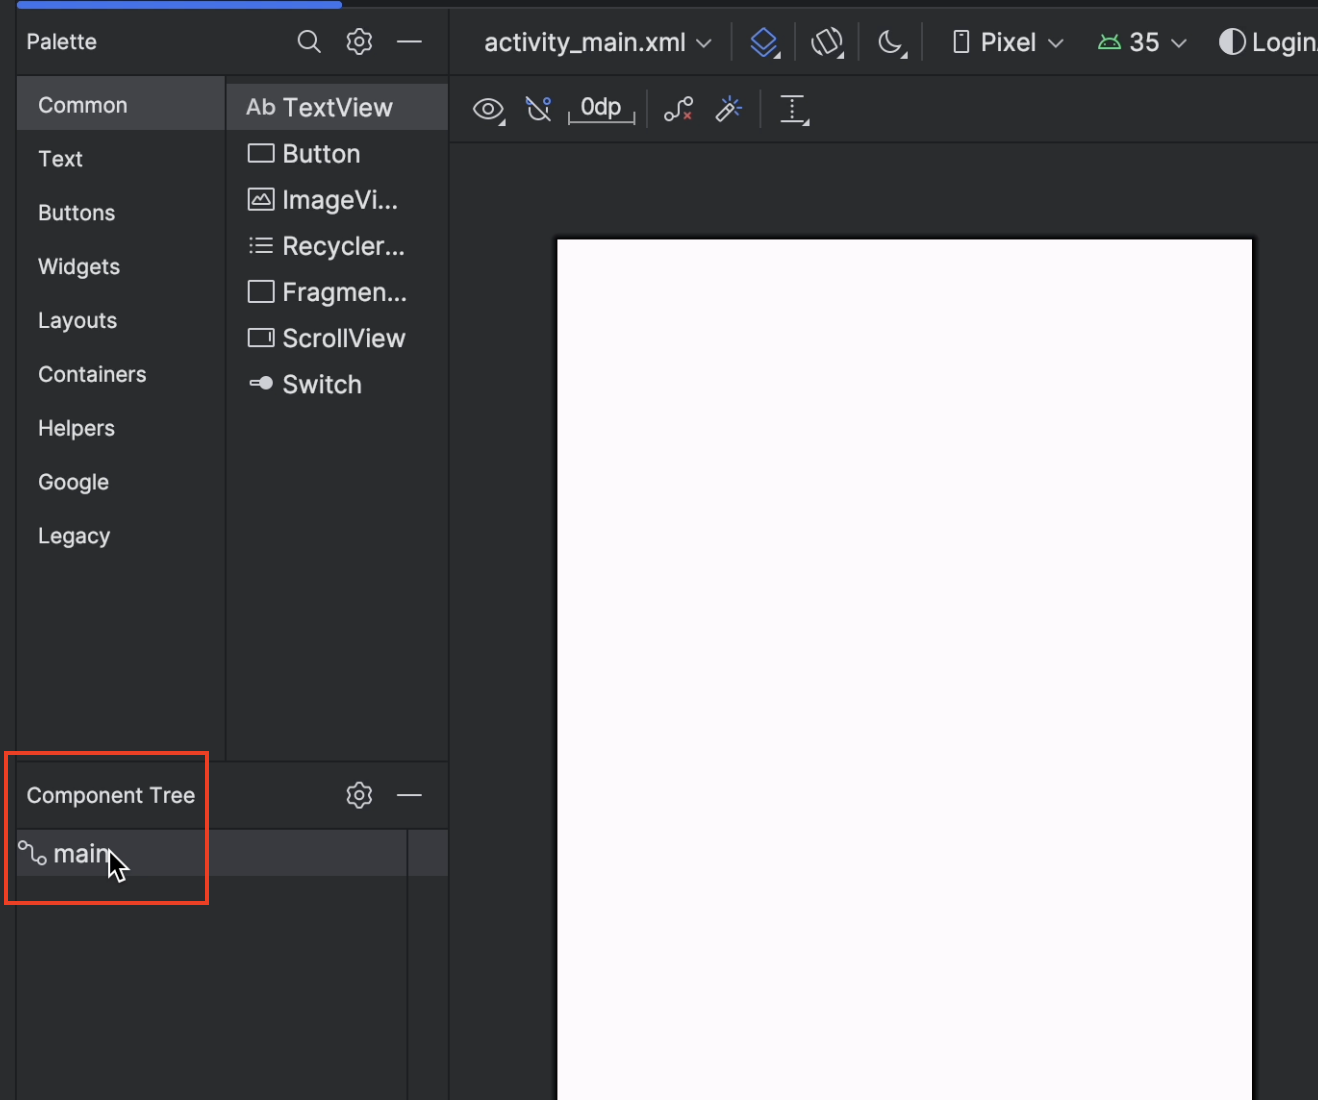
In the
Component Treeon the left, right click on the existingConstraintLayoutand selectConvert view.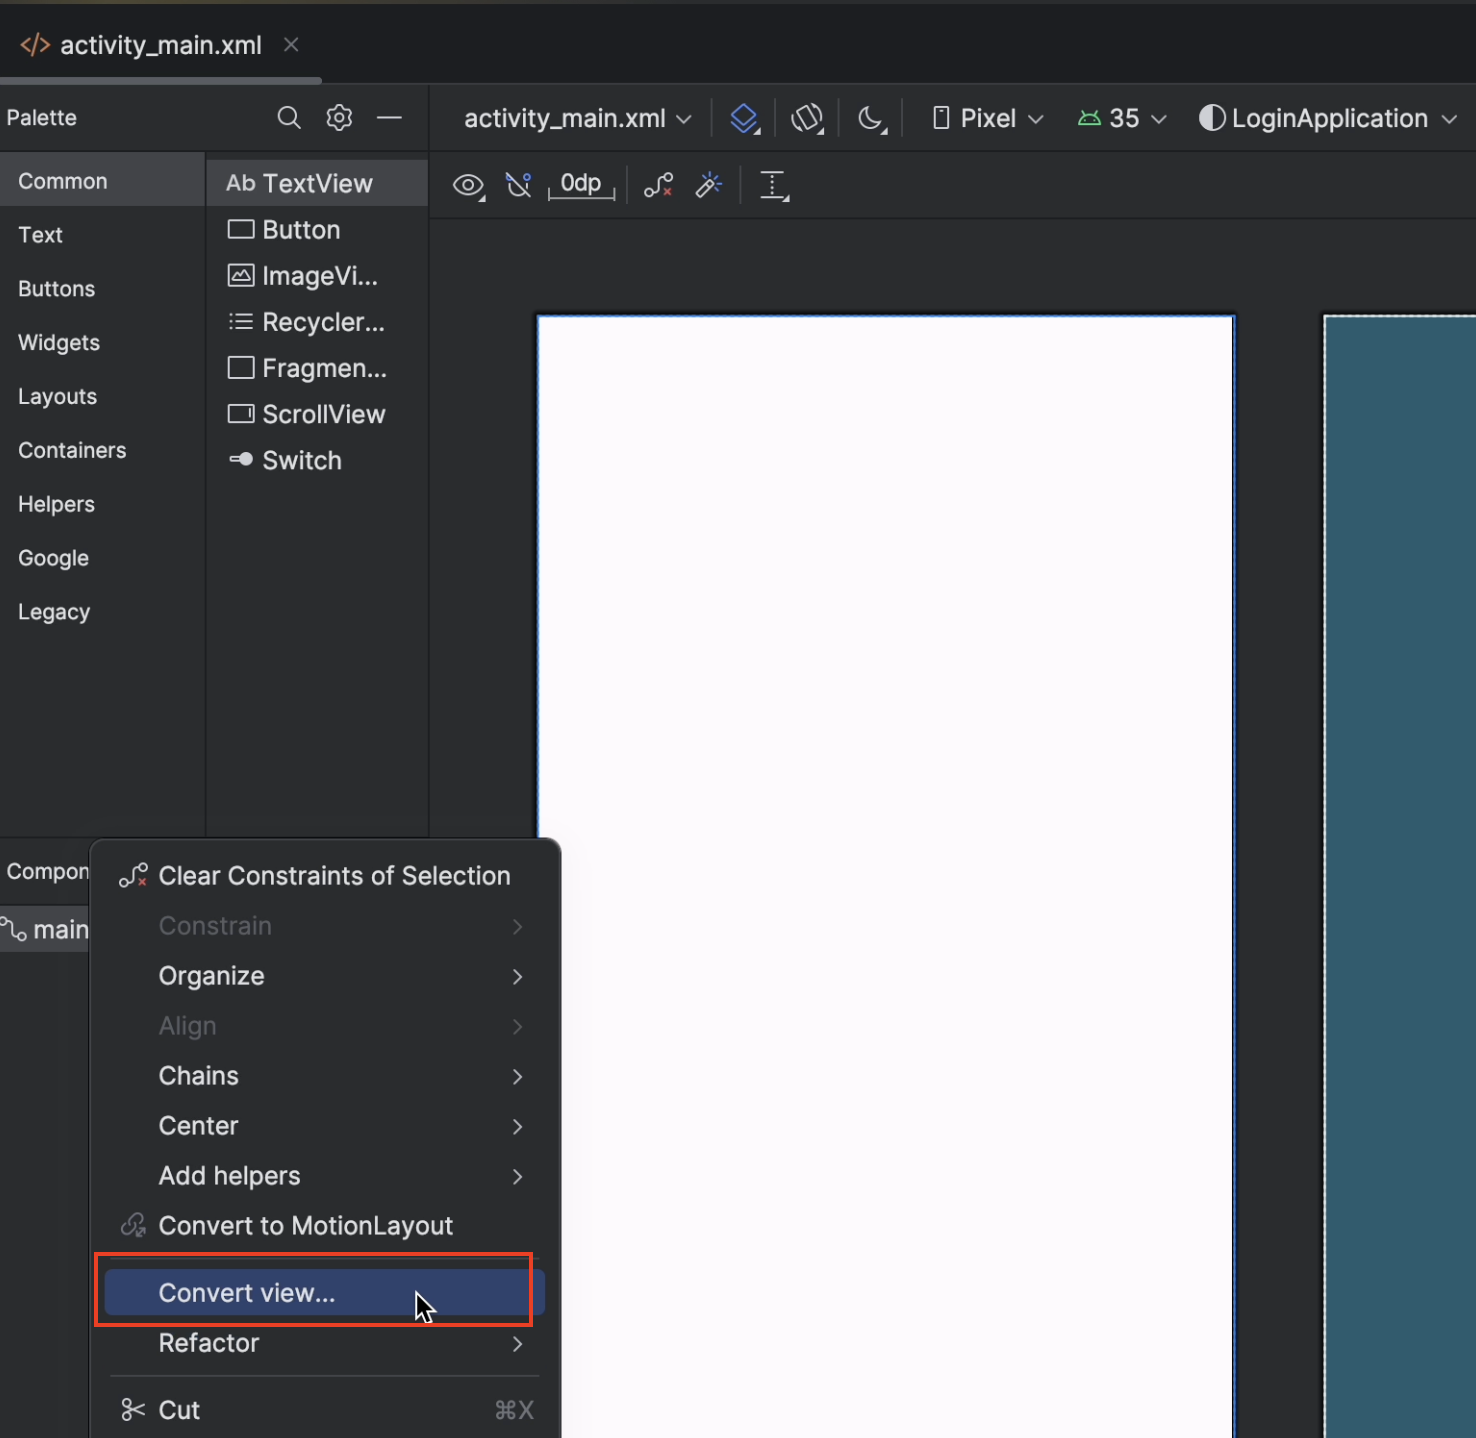
You are shown different kinds of layouts. Pick
LinearLayouton the screen.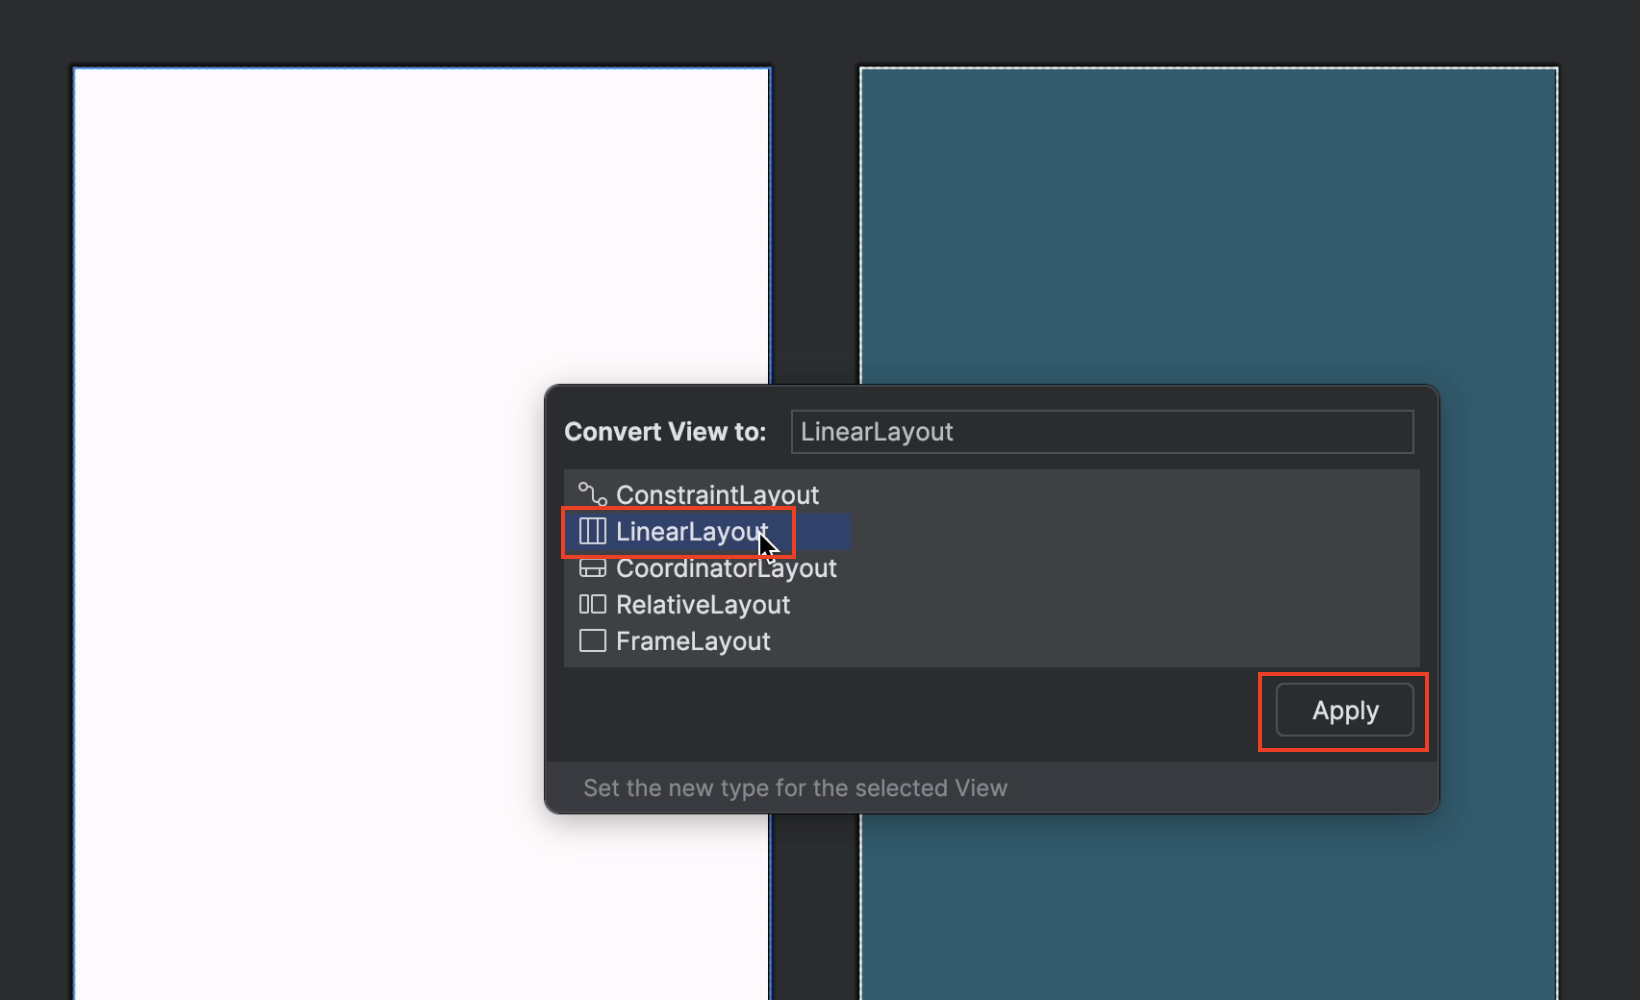
Uh oh! It might look like you broke something when you picked
LinearLayout. The problem tab shows something in red. The issue is that our layout does not have an explicit direction. A linear layout needs to have averticalor ahorizontaldirection stated explicitly. The error should tell you the same. You can right click and selectShow Quick-Fixesto see all the options to fix the issue.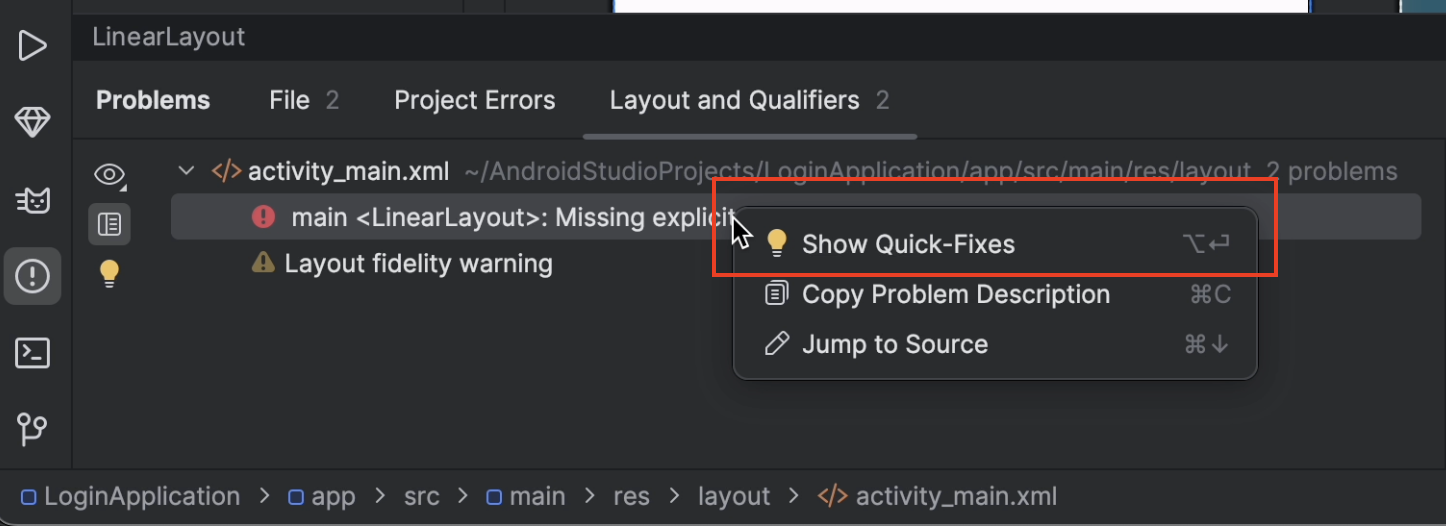
Fix the issue by picking
Set orientation="vertical"from the quick fix.
You should see the issue is fixed in the
Problemstab.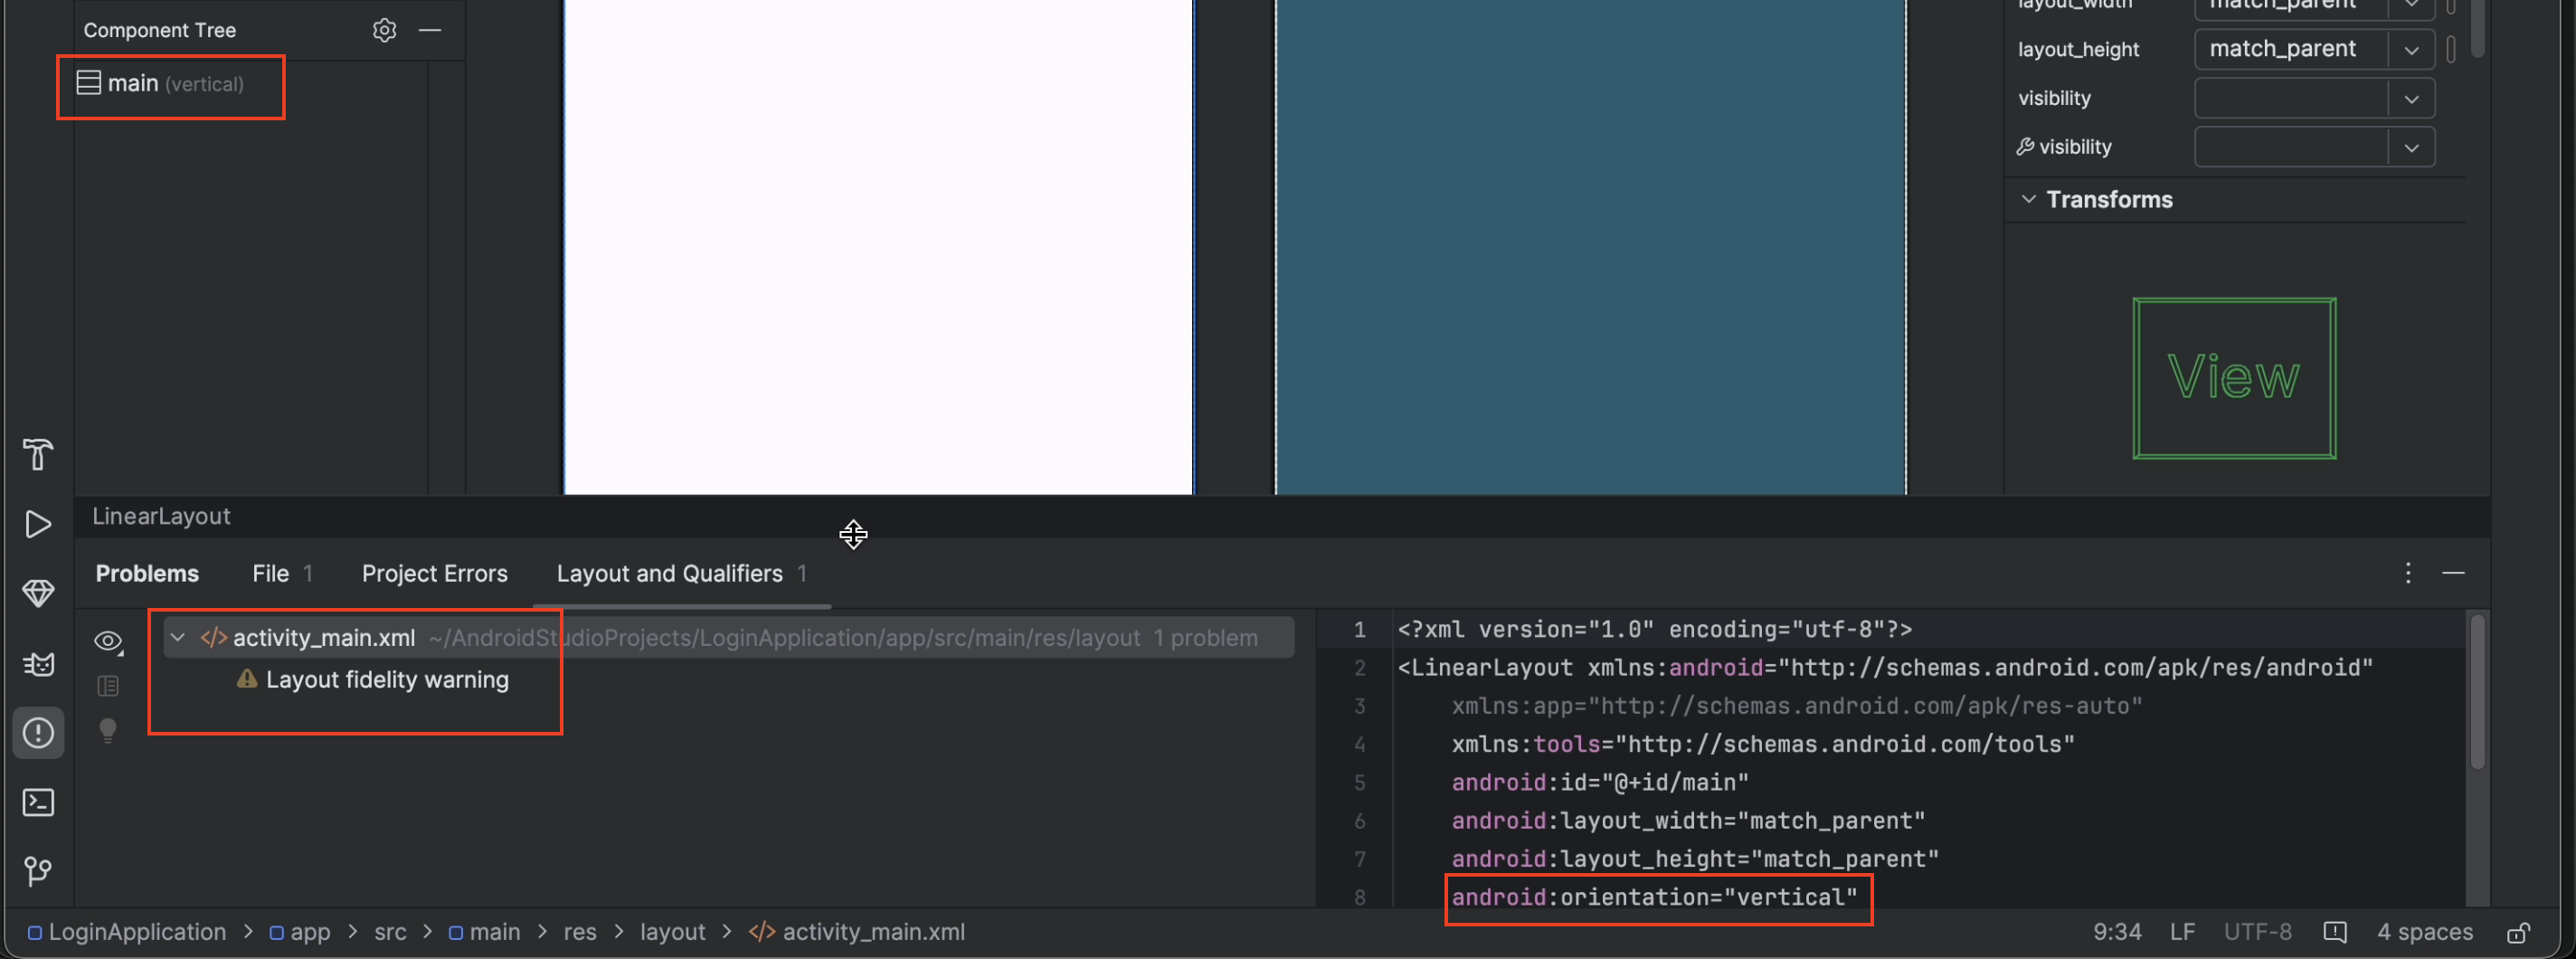
You can confirm the
orientationisverticalin the attributes of the widget. TheAttributesview has a list of everything you can set for this widget.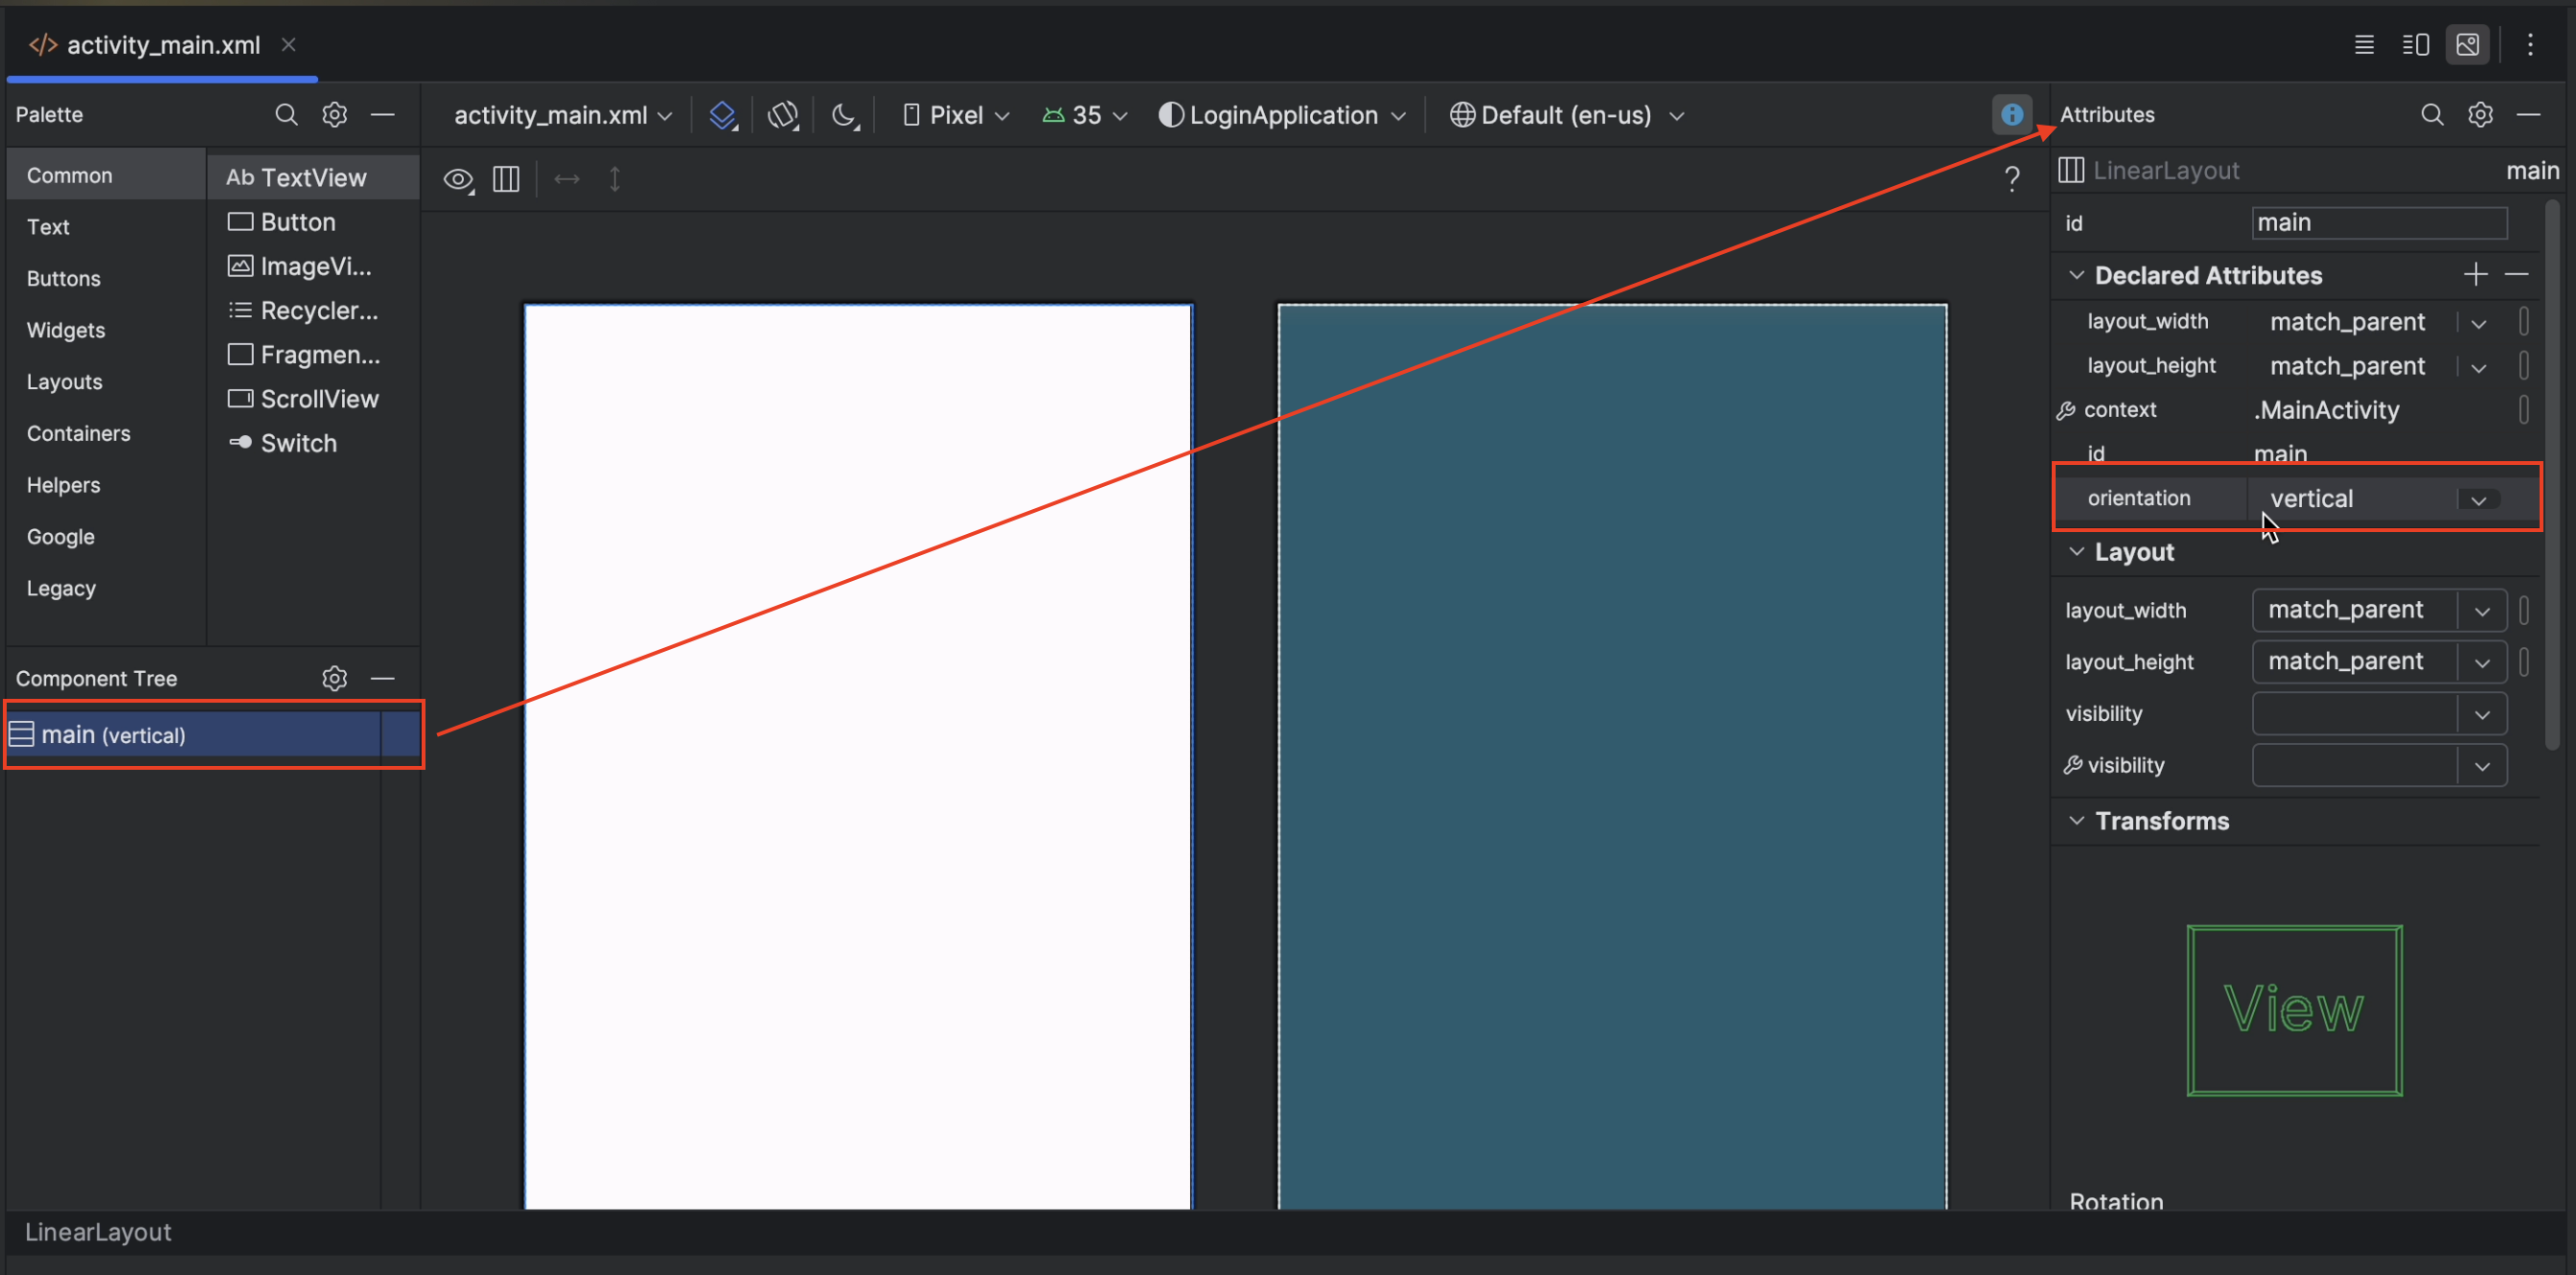
While we are on the attributes, another useful feature to know is that you can search attributes for a field by using the search bar in the
Attributesview.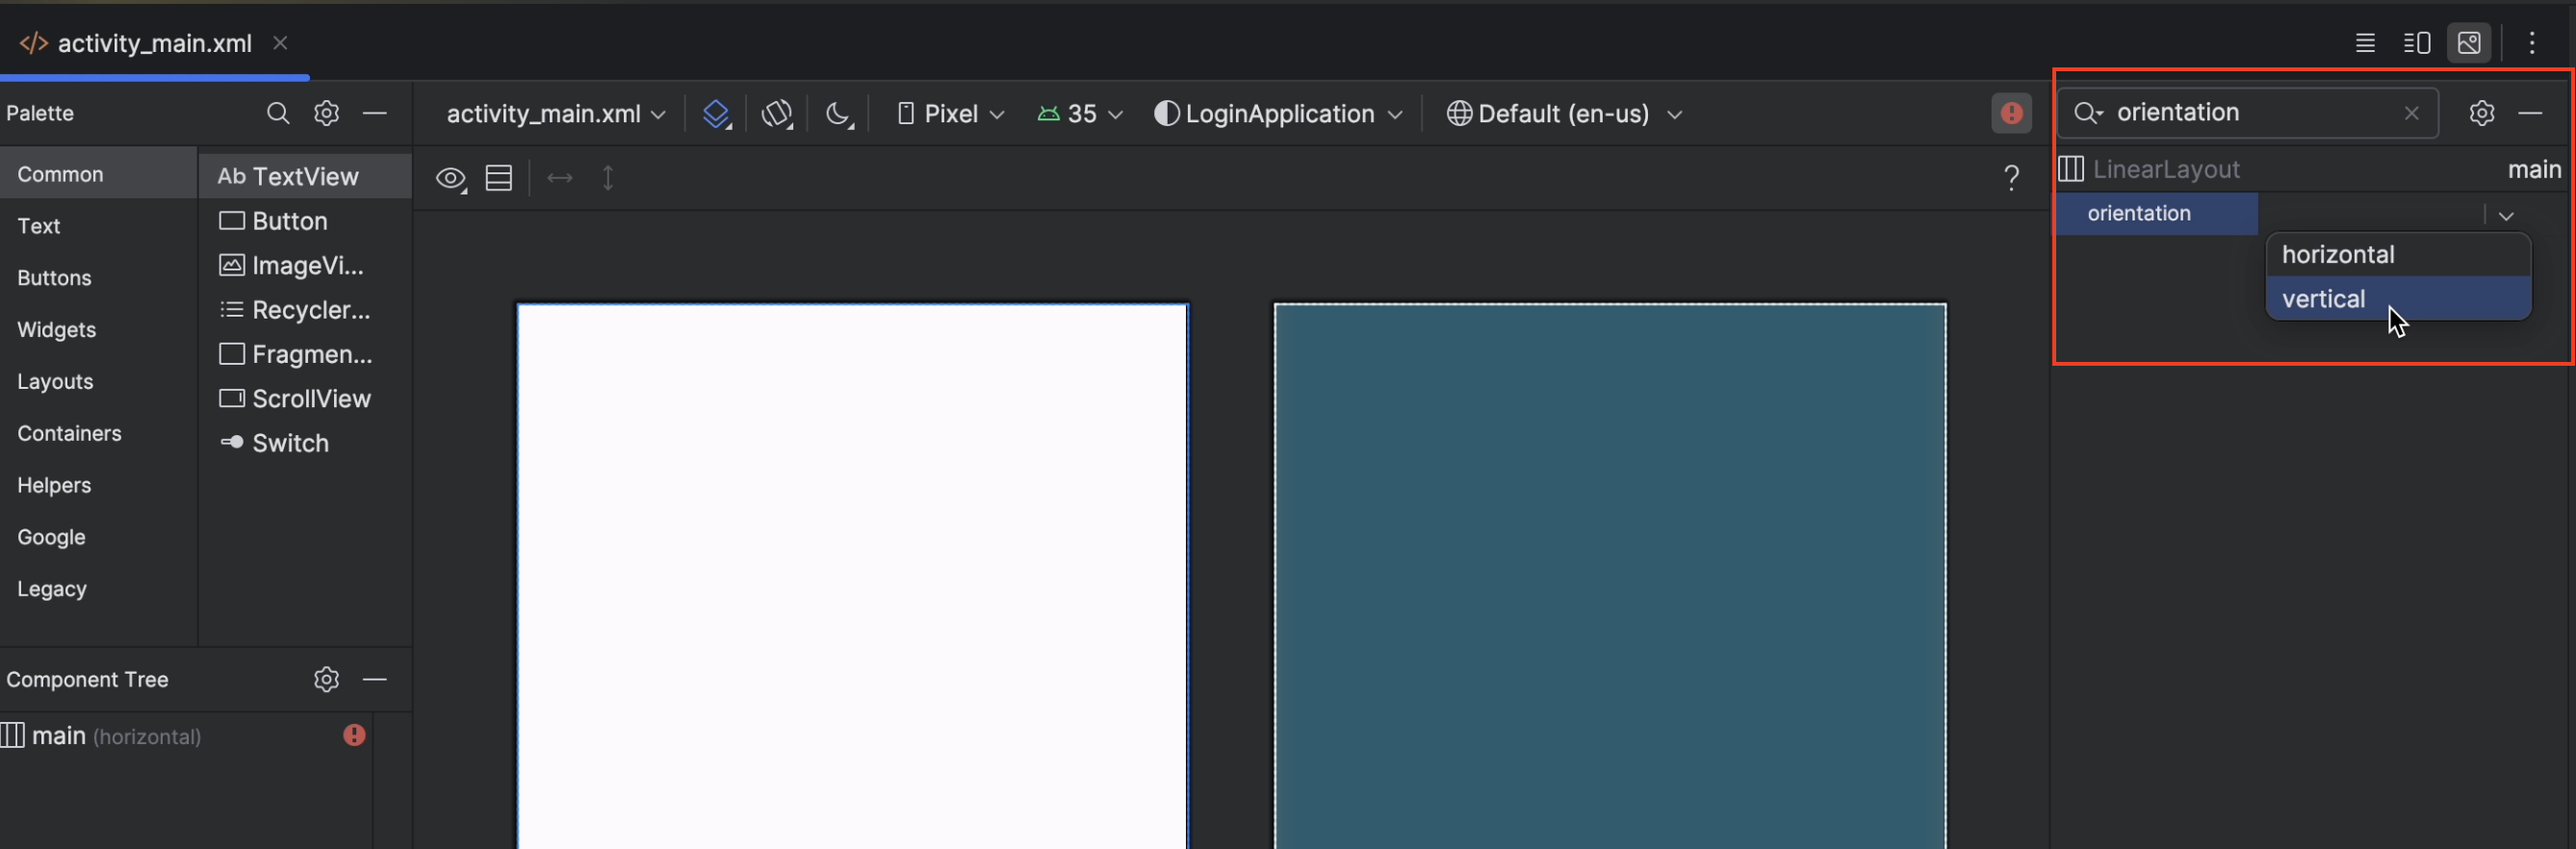
Step 3: Add login text view
Add a TextView:
Drag a
TextViewfrom thePaletteto theLinearLayout.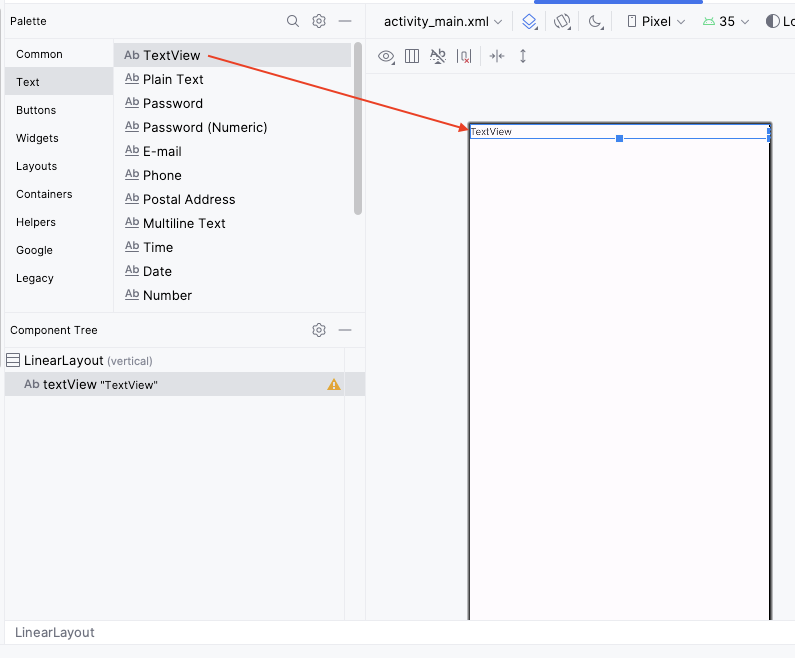
In the
Attributespanel, set theidtologin_title.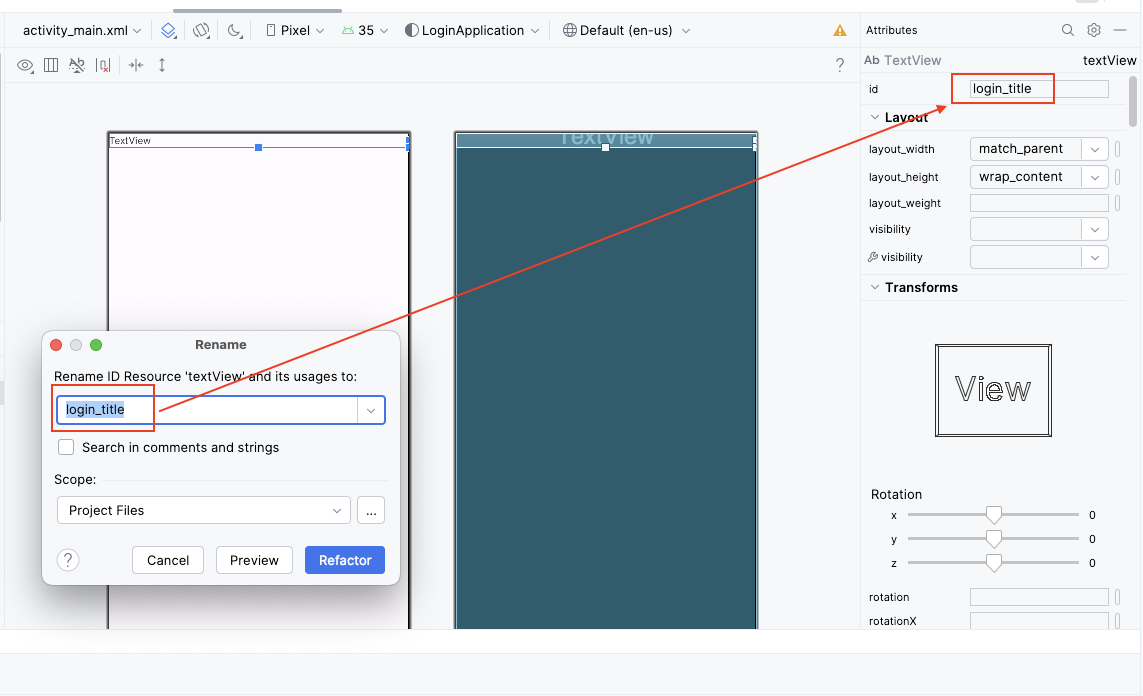
Set the
texttoLogin Application.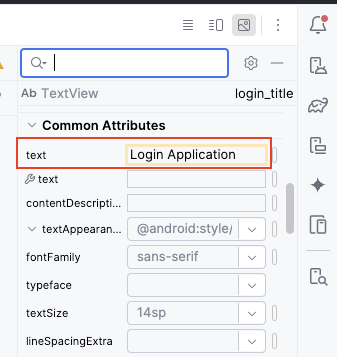
Set the
textSizeto24sp.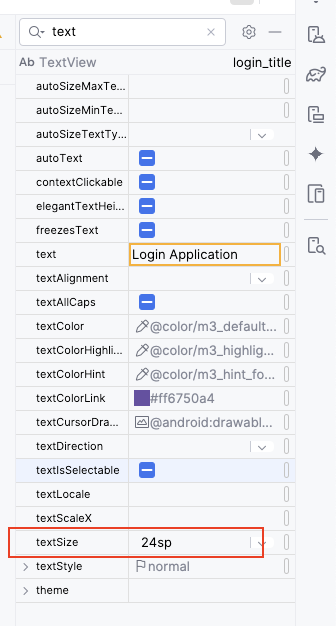
Set the
gravitytocenter.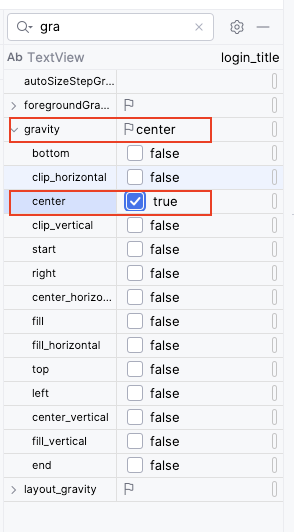
Set
layout_marginto16dp.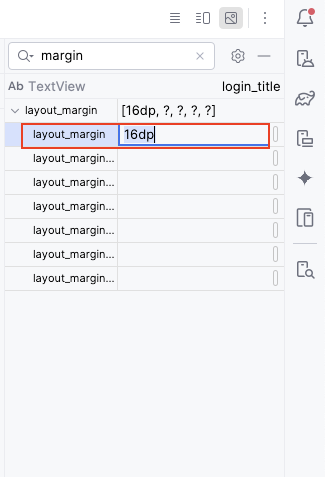
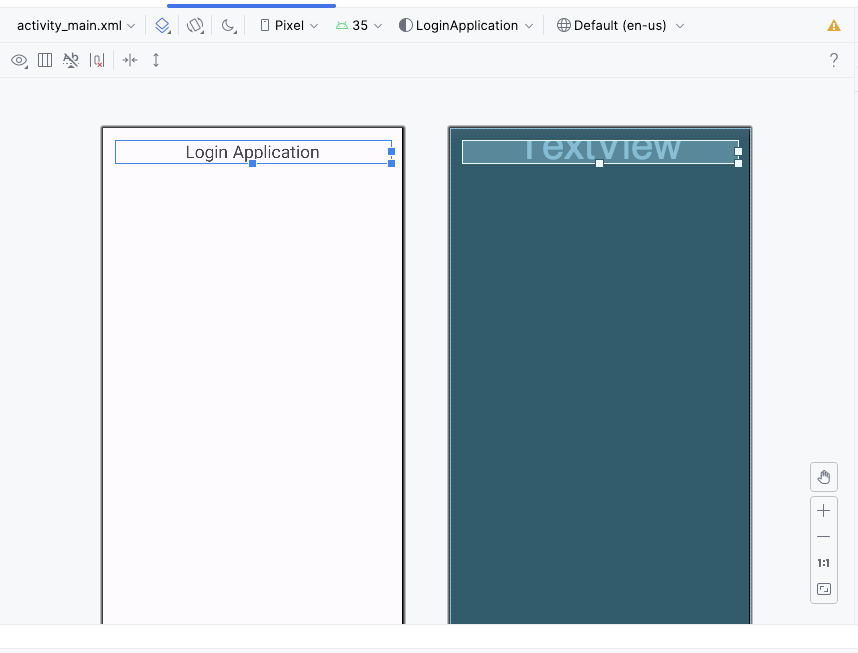
At the end of this step, you should have a TextView that
serves as the title text of the first screen of your application!
Step 4: Add the username widget
Drag an
E-mailfrom thePaletteto theLinearLayout, below theTextView.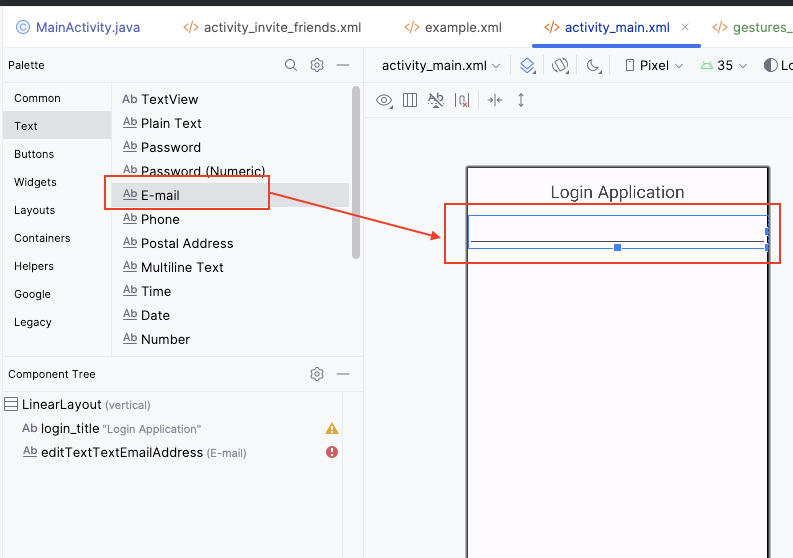
In the
Attributespanel, set theidtologin_username.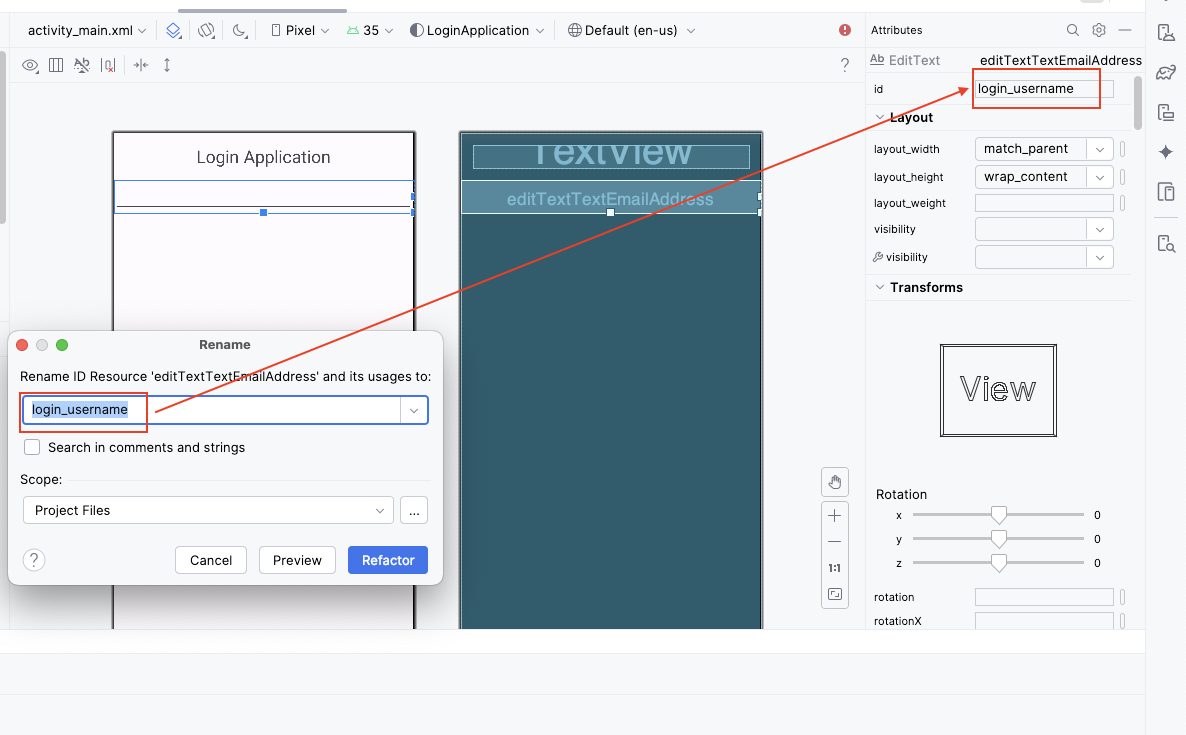
Set the
hinttoUsername.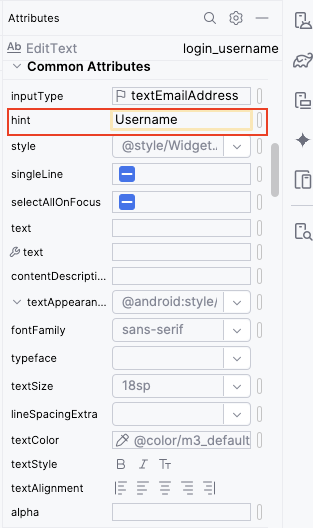
Confirm that the
inputTypeistextEmailAddress.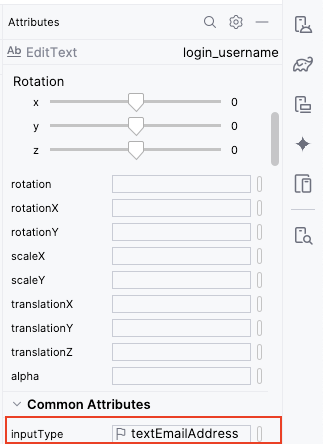
Set
layout_marginto16dp.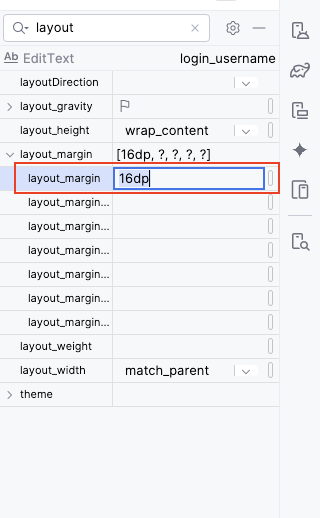
Set
min-heightto48dp.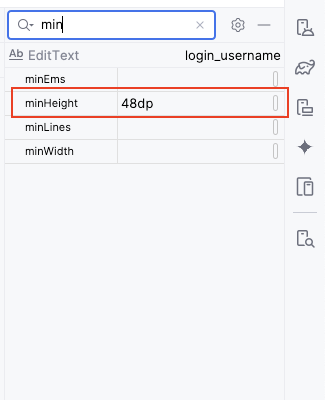
Step 5: Add the password widget
Drag another
Passwordfrom thePaletteto theLinearLayout, below theUsername EditText.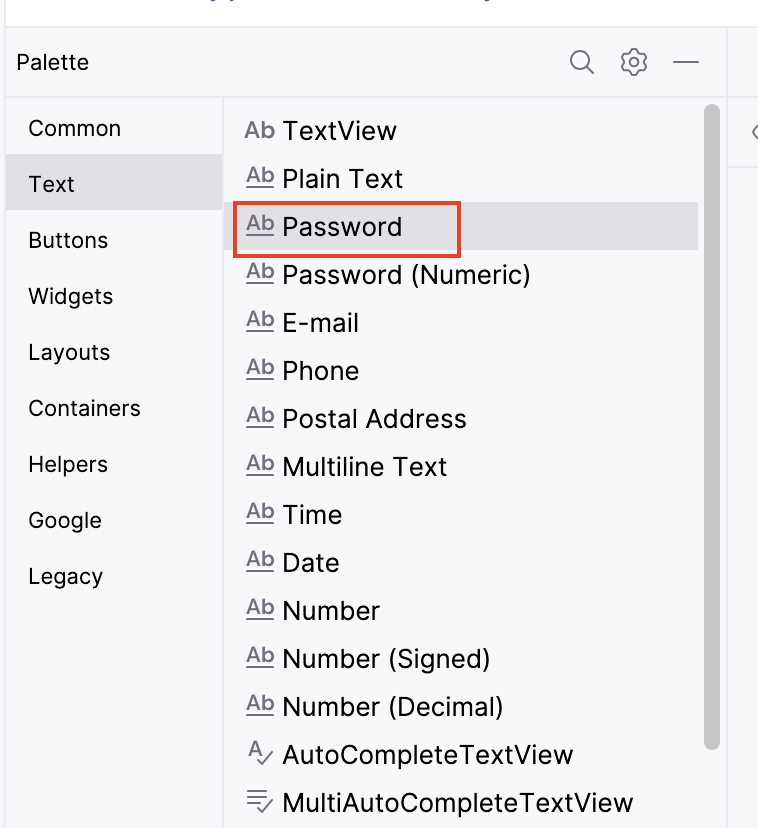
In the
Attributespanel, set theidtologin_password.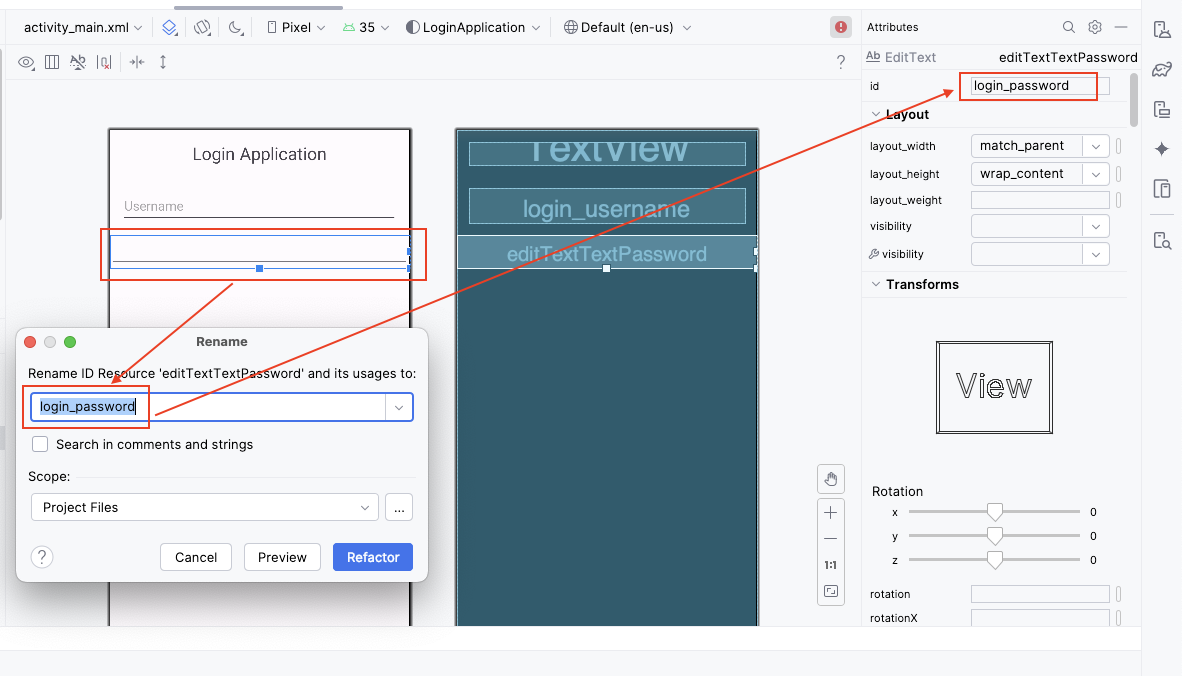
Set the
hinttoPassword.
Confirm the
inputTypeis set totextPassword.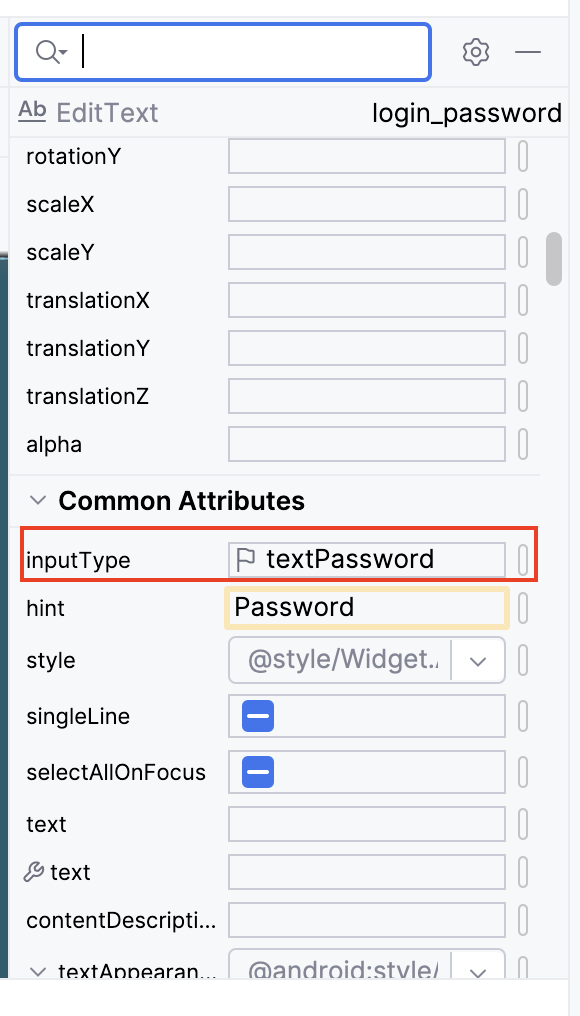
Set
layout_marginto16dp.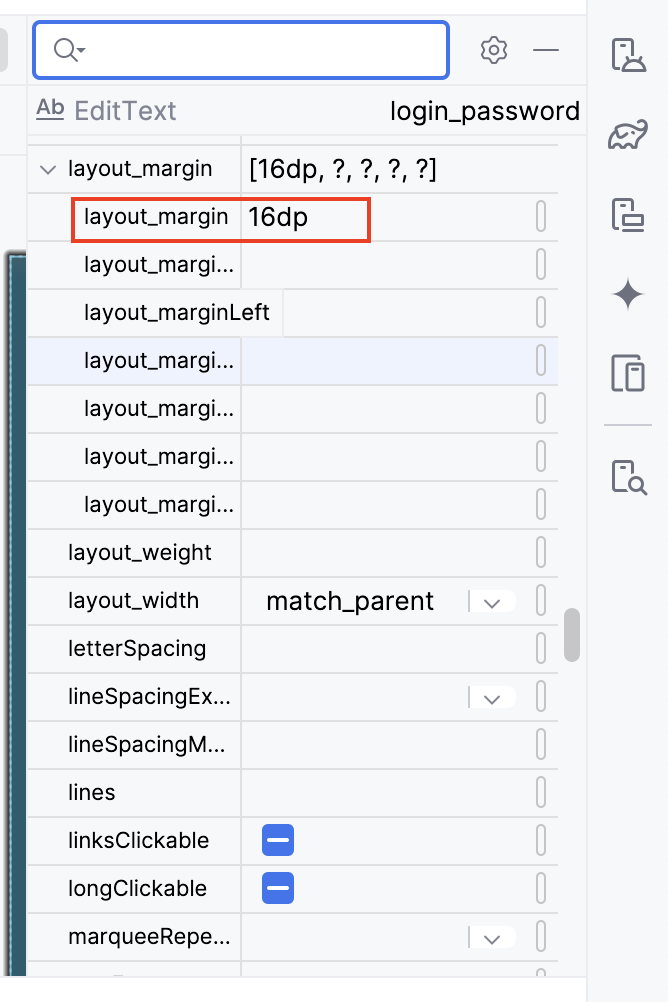
Set
min-heightto48dp.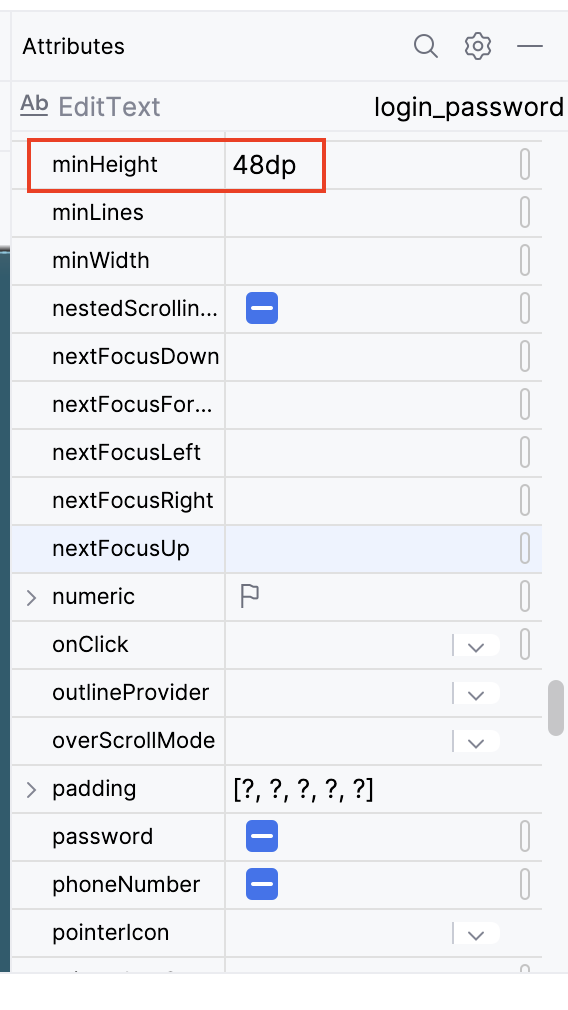
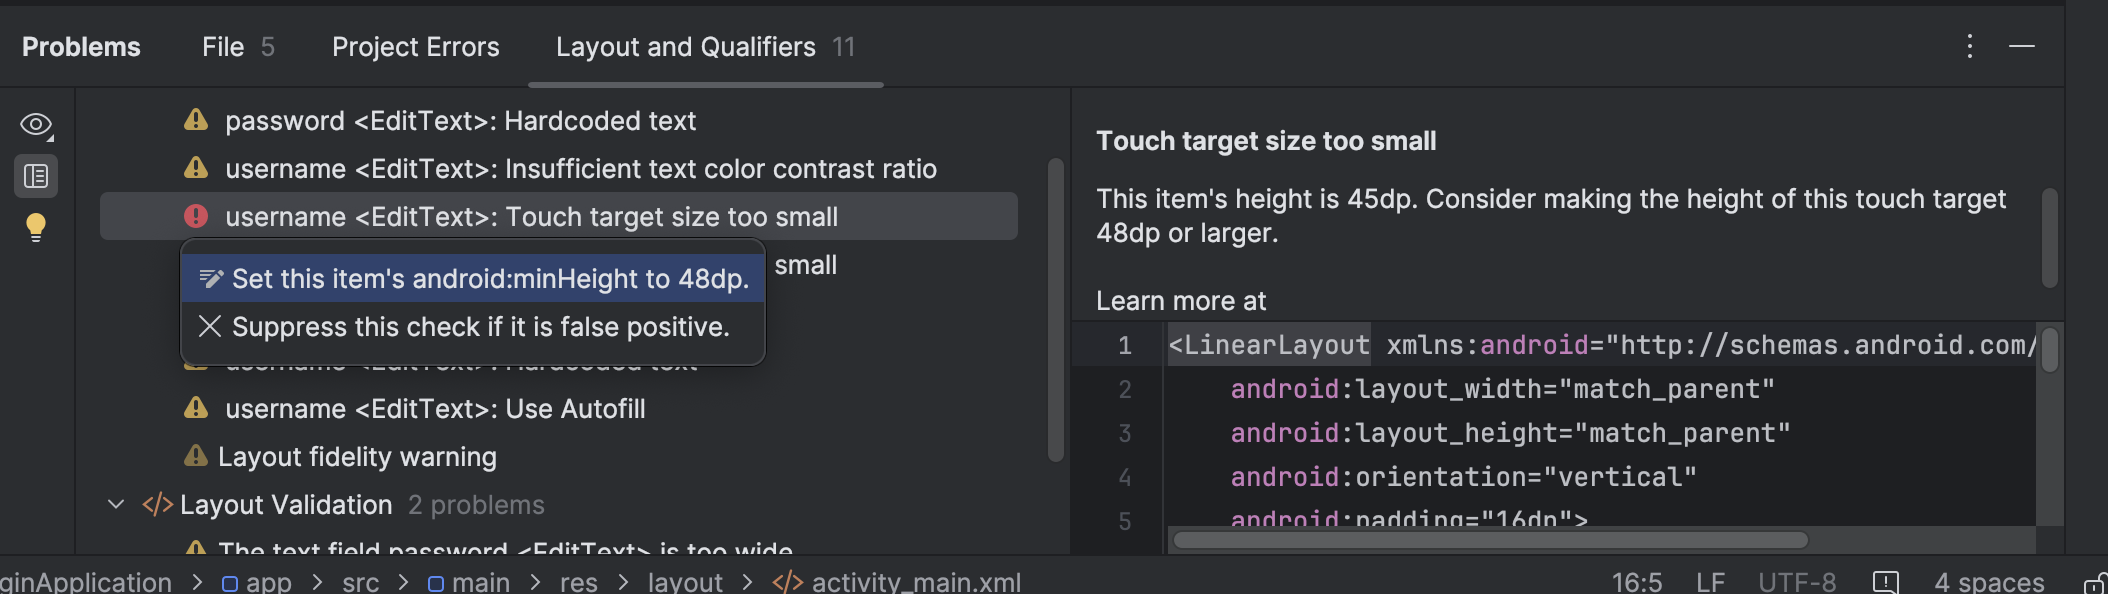
Step 6: Fix issues [optional]
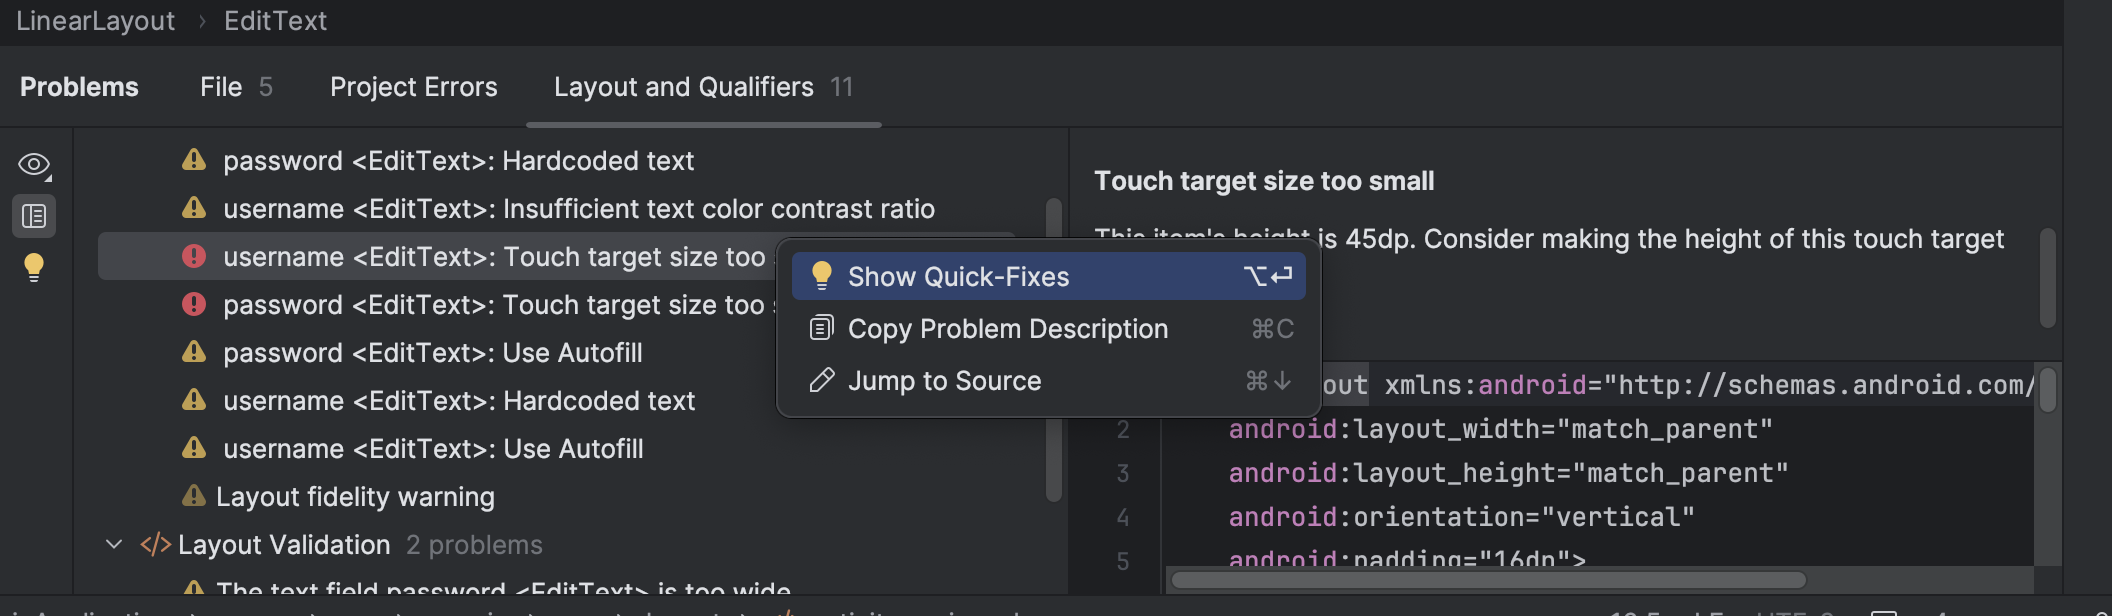
You might notice some problems (in red) in the Problem
view. If there are no issues, move to the next step.
You can right click on the issue and look for a quick fix:
In this case, clicking on the first solution will set the minHeight
to 48dp and remove the error.
Repeat the above steps for the password widget.
Step 7: Add the login button
Drag a
Buttonfrom thePaletteto theLinearLayout, below the Password EditText.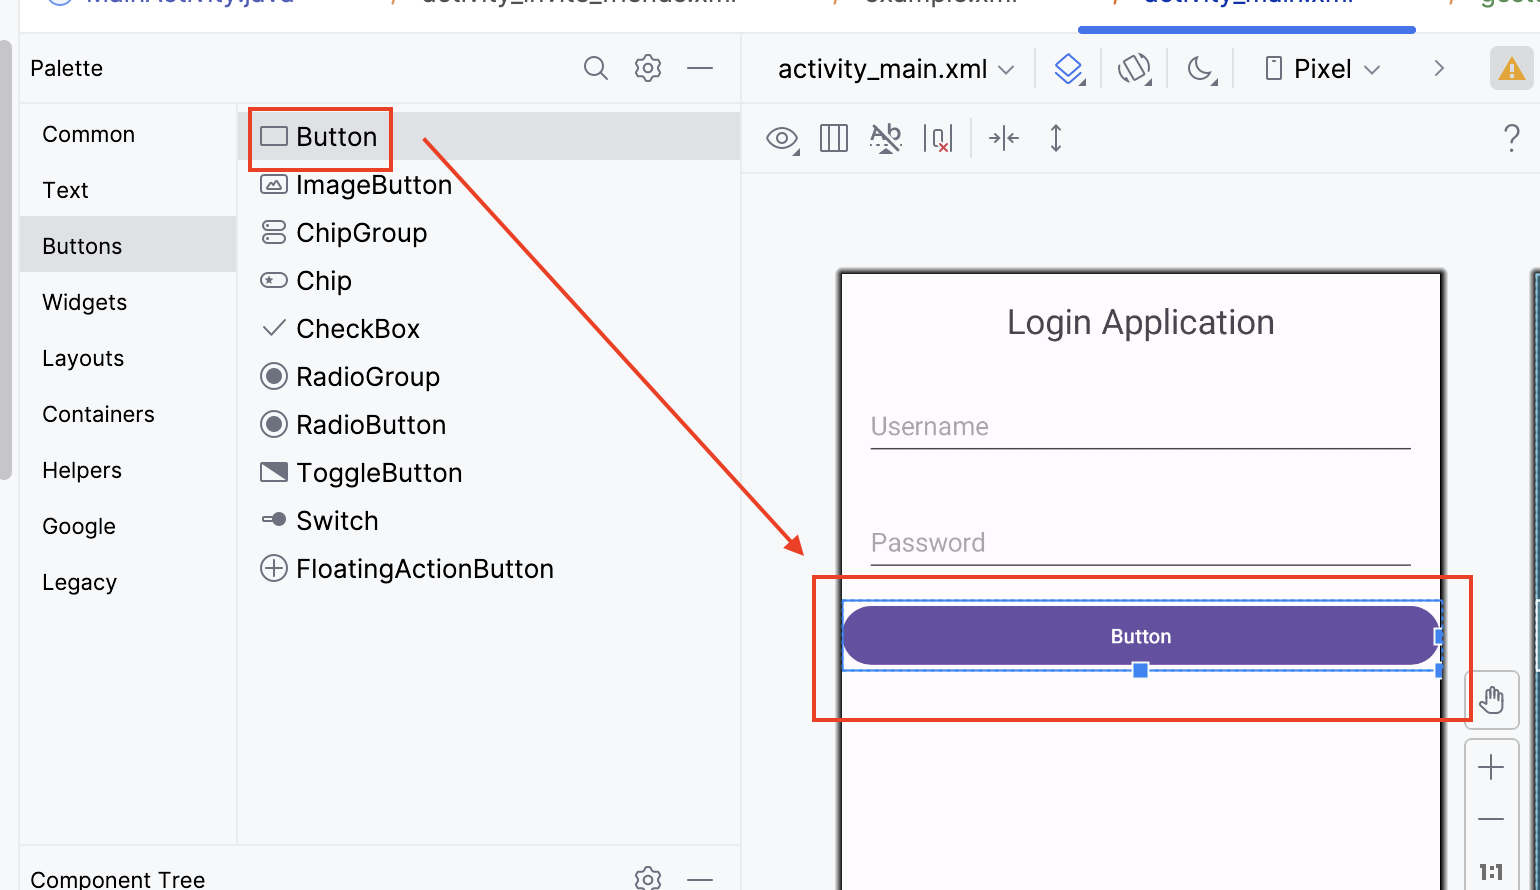
In the
Attributespanel, set theidtologin_button.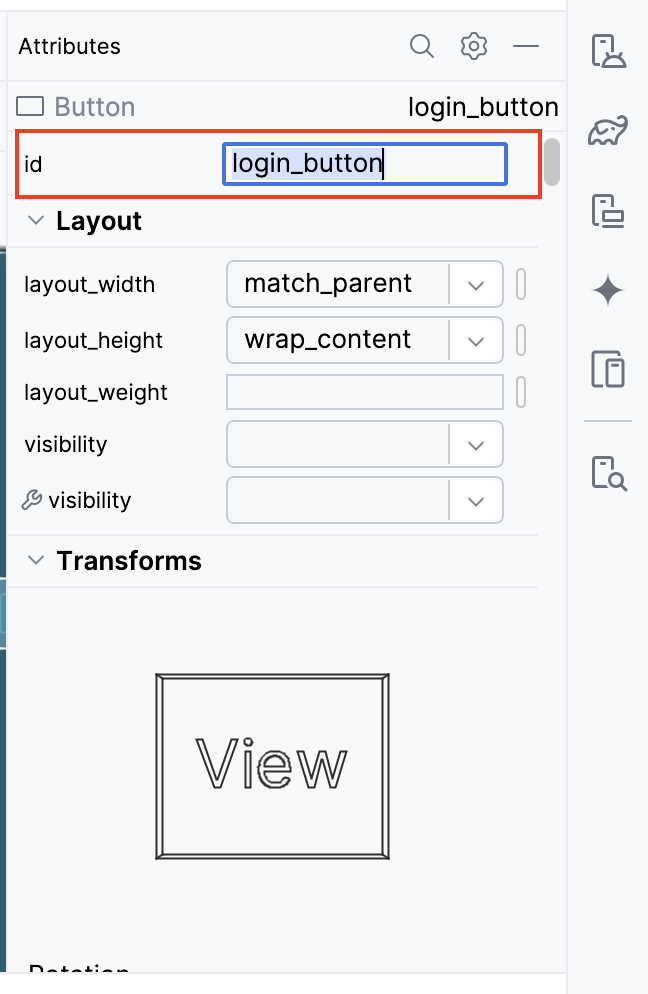
Set the
texttoLogin.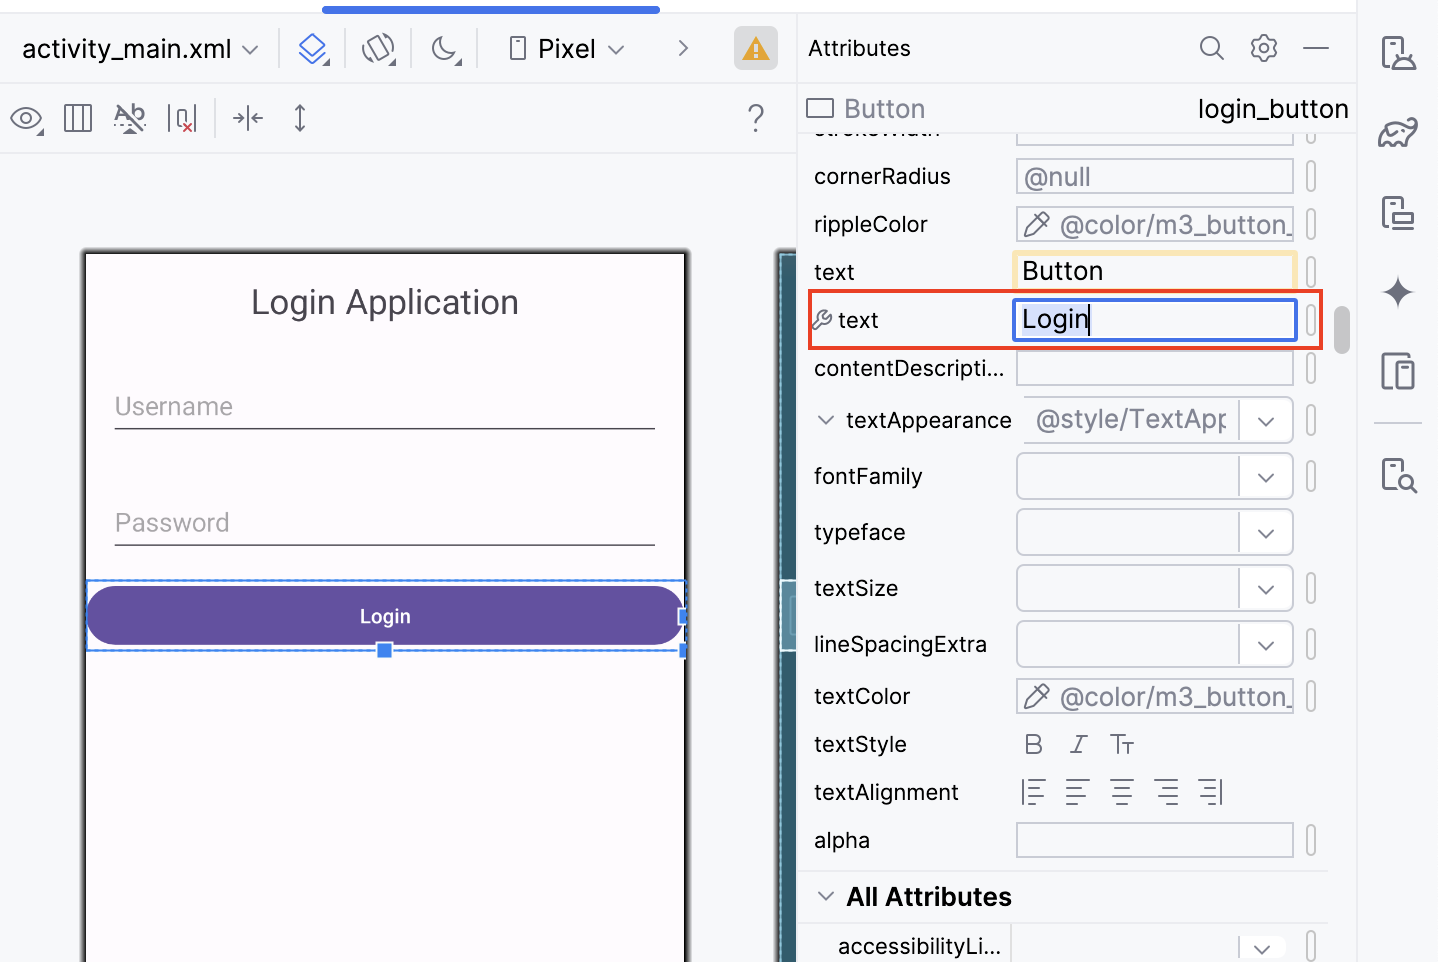
Set
layout_marginto16dp.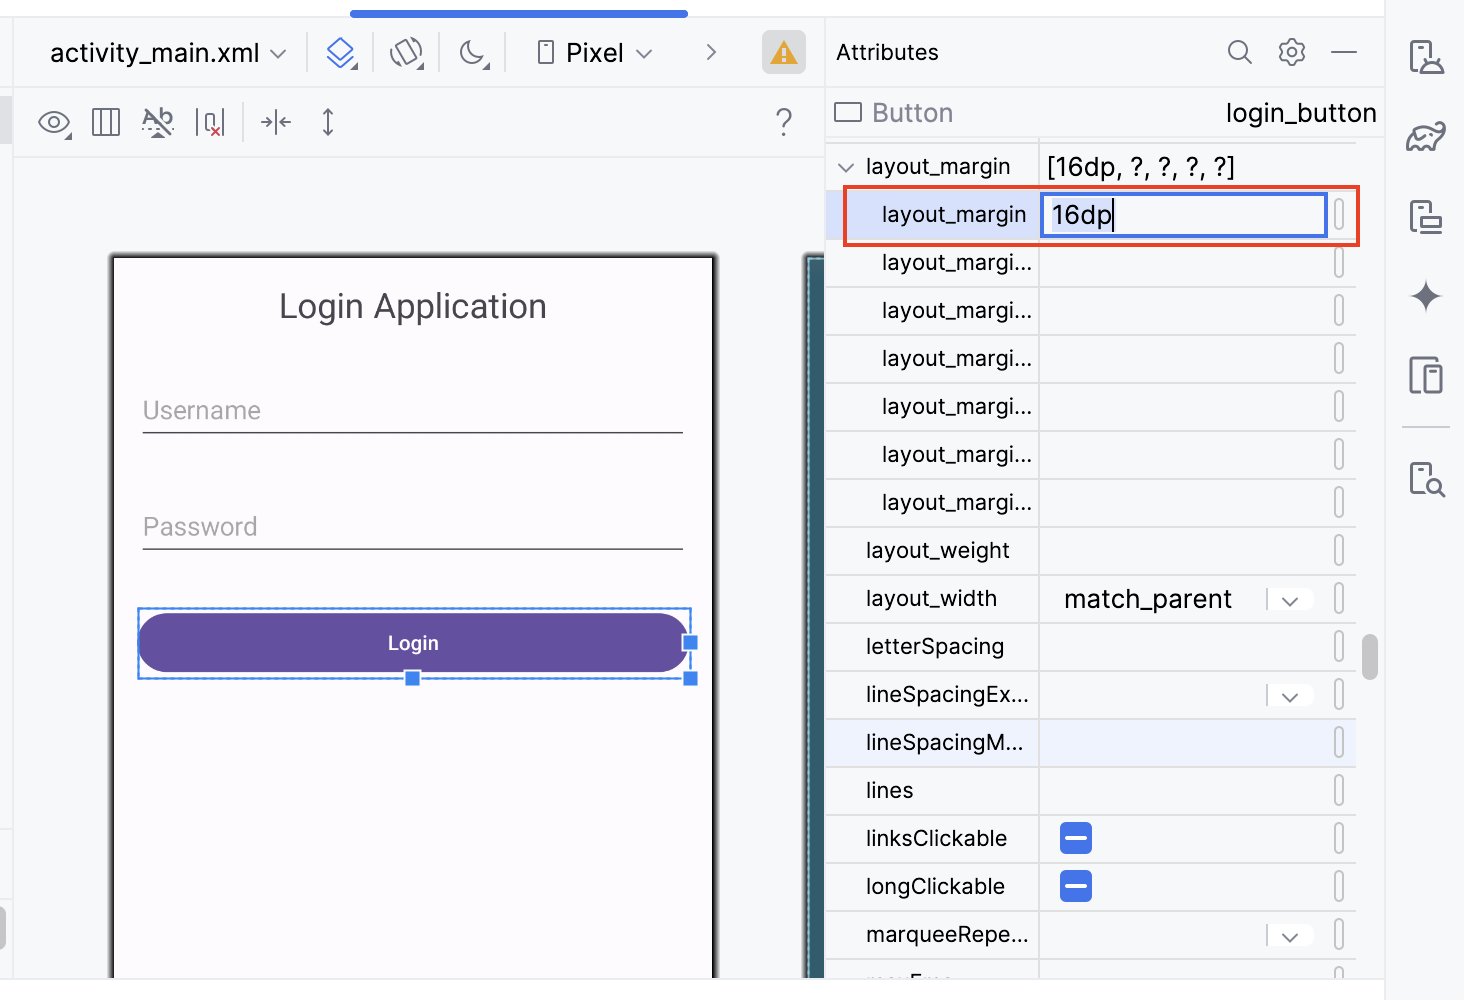
Set
min-heightto48dp.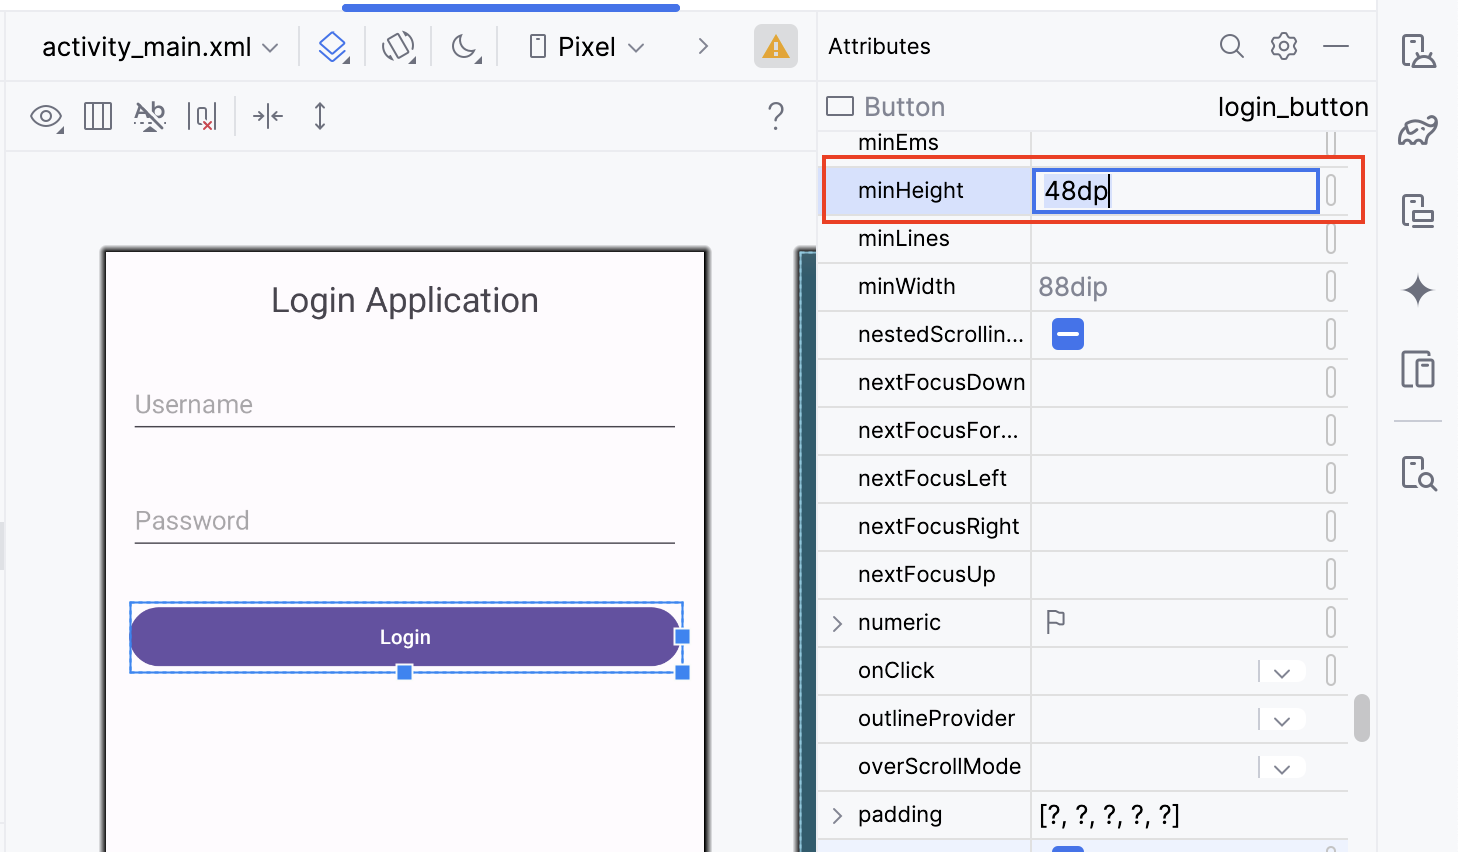
Step 8: Add "Register for a new account" link
Drag a
TextViewfrom thePaletteto theLinearLayout, below theLoginbutton.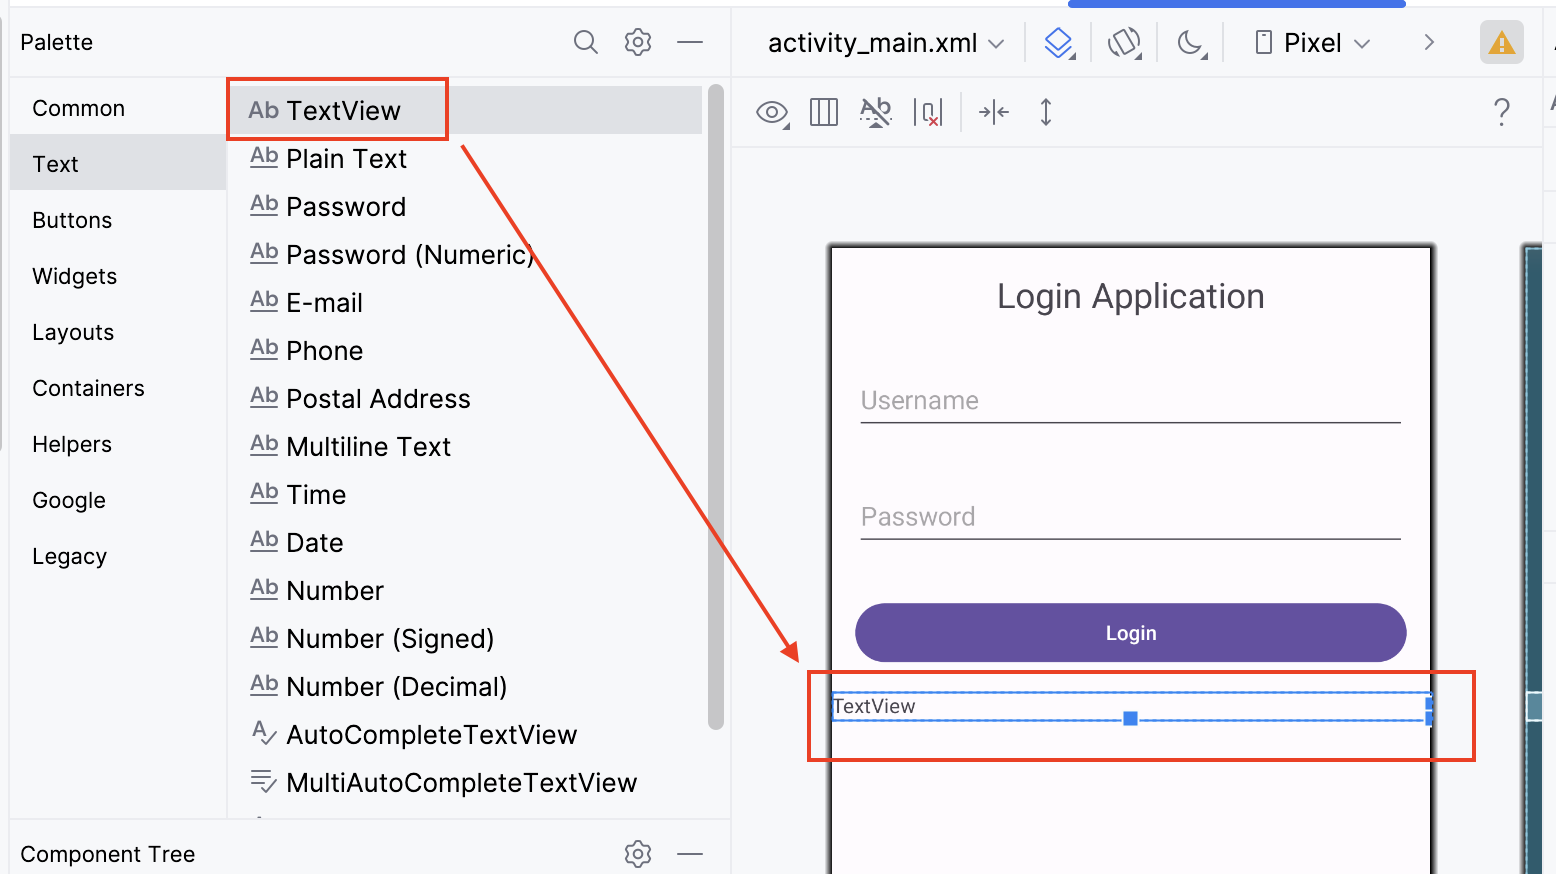
In the
Attributespanel, set theidtologin_register_link.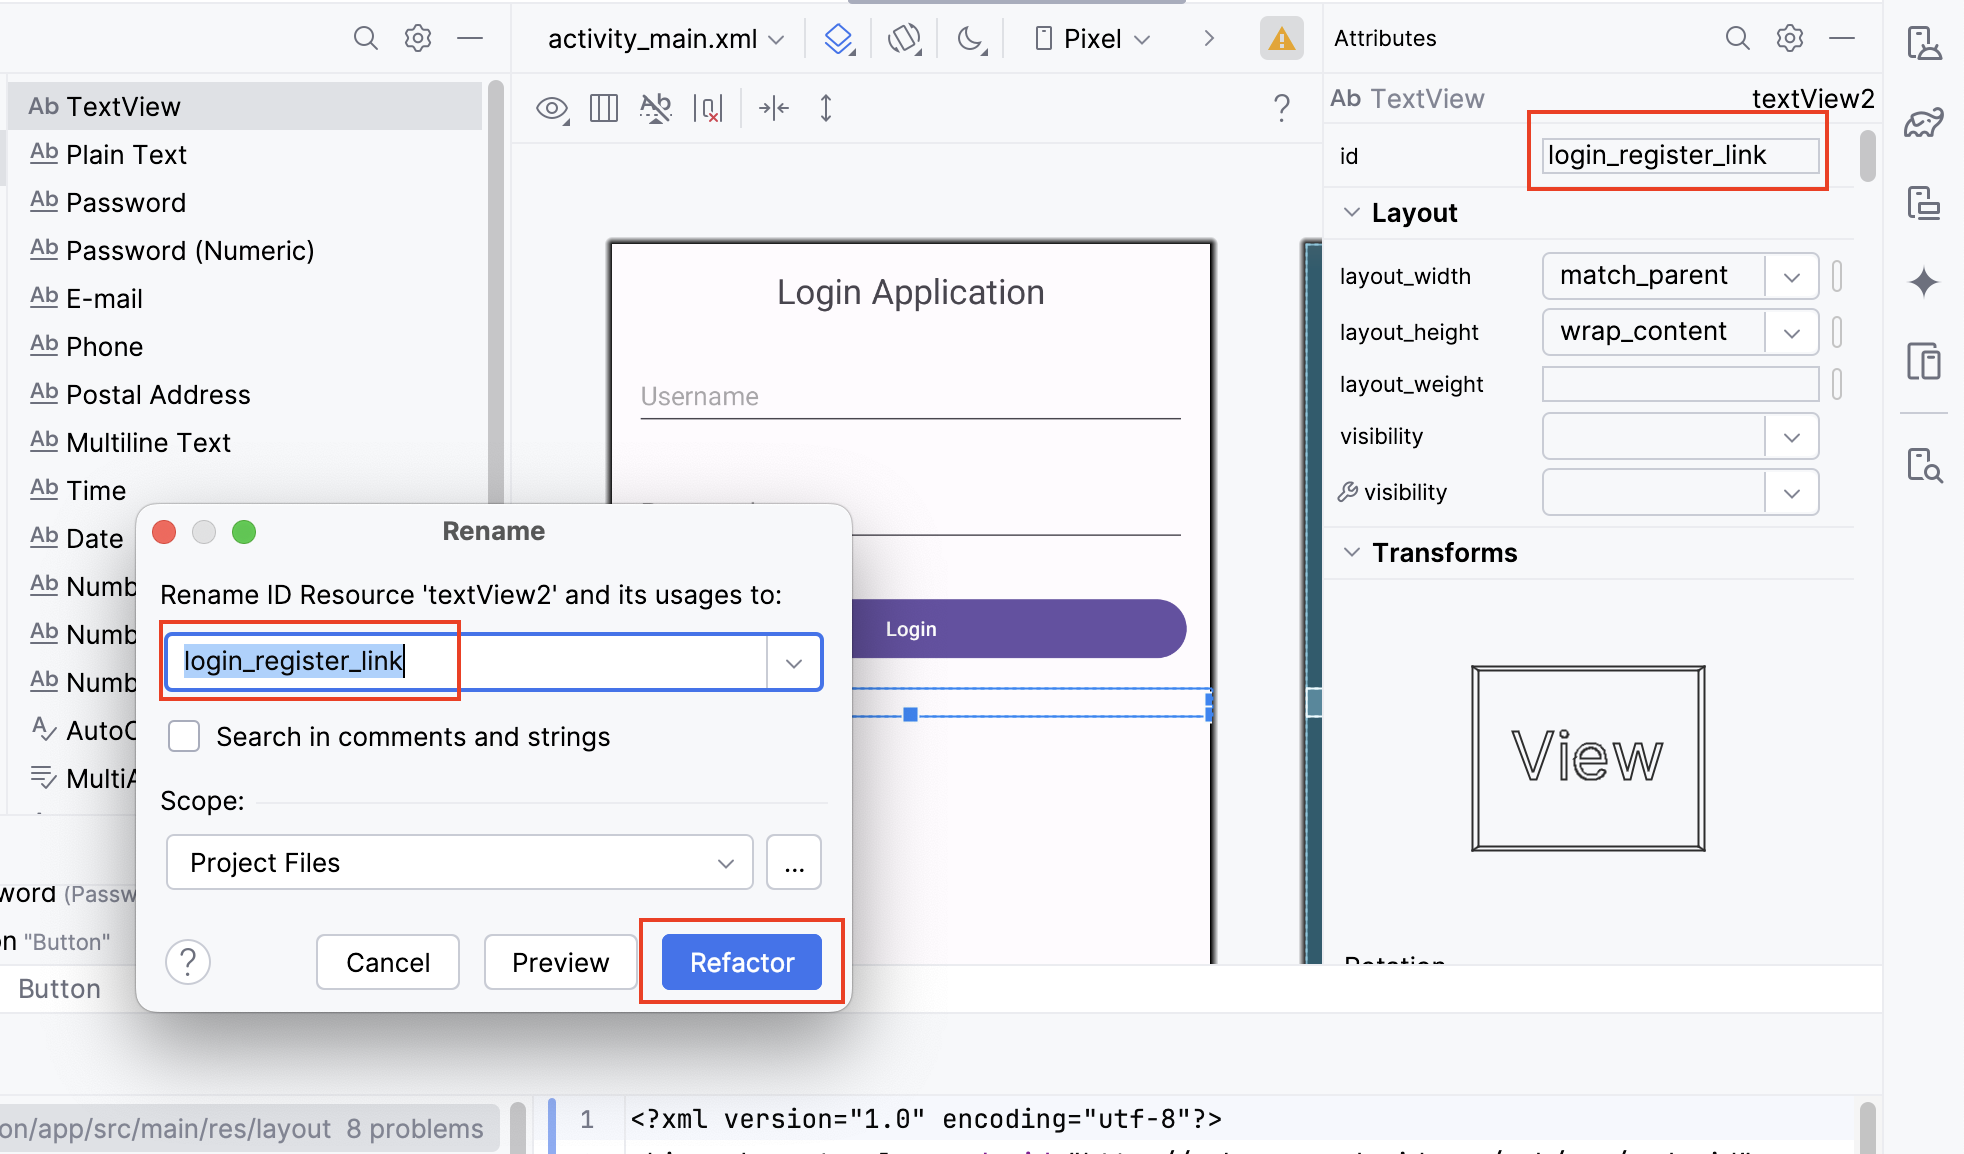
Set the
texttoRegister for a new account.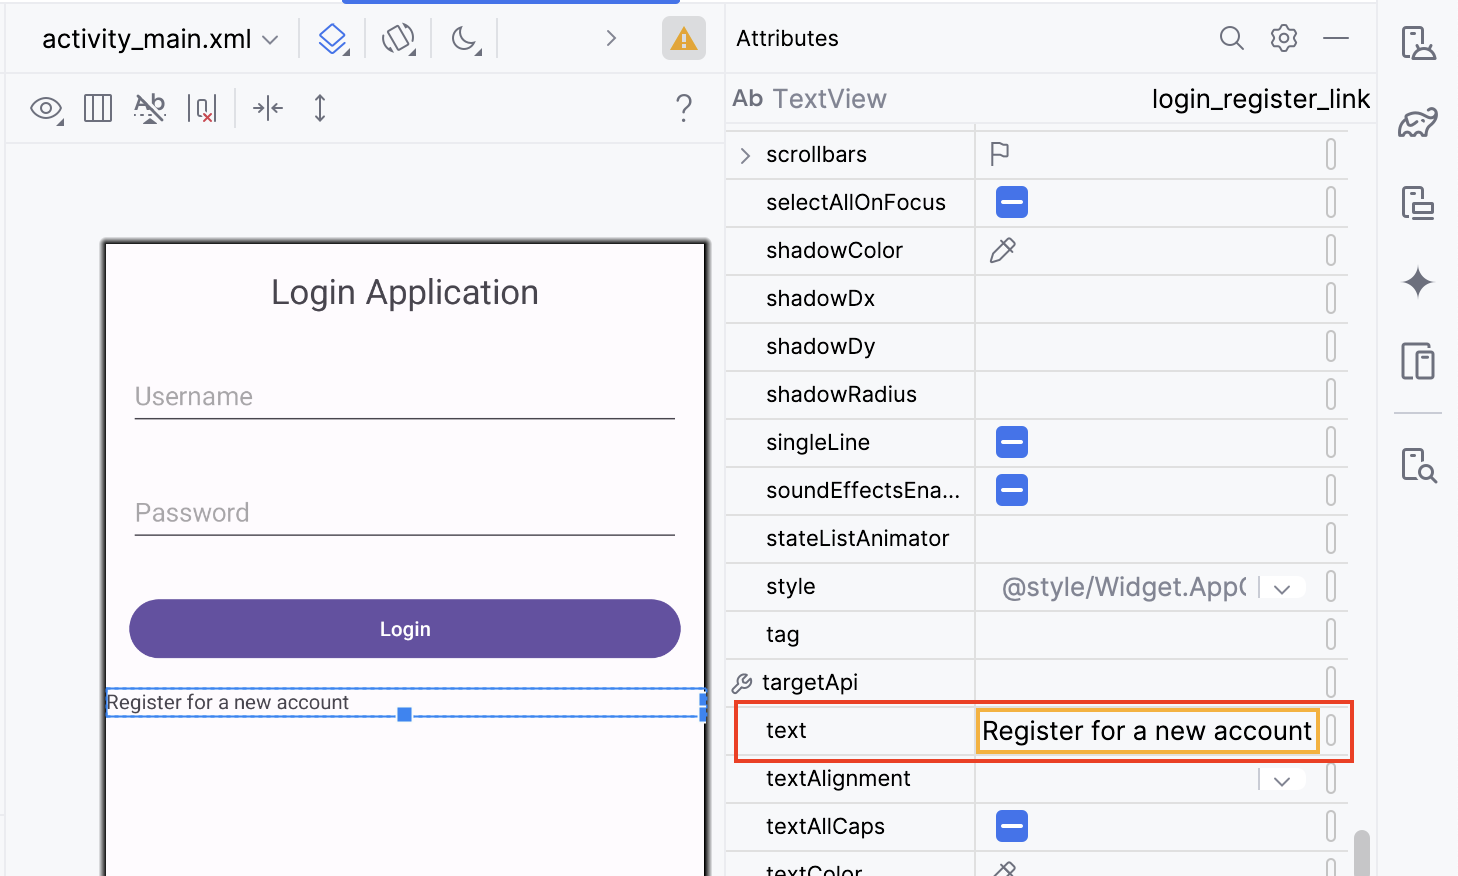
Set the
textColorto a color resource or a hex value to make it look like a link (e.g.,#0000FFfor blue).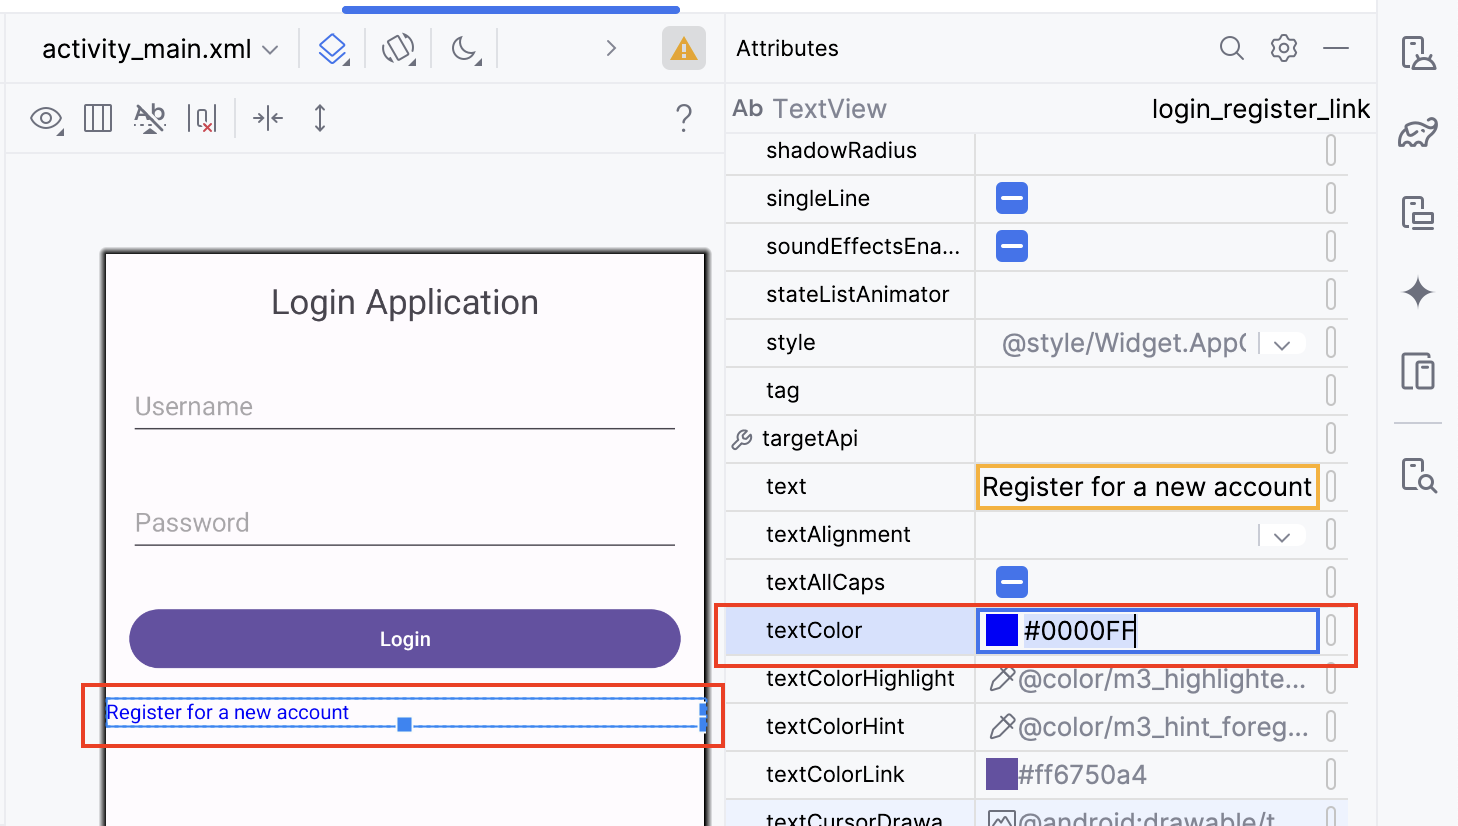
Set the
textSizeto16sp.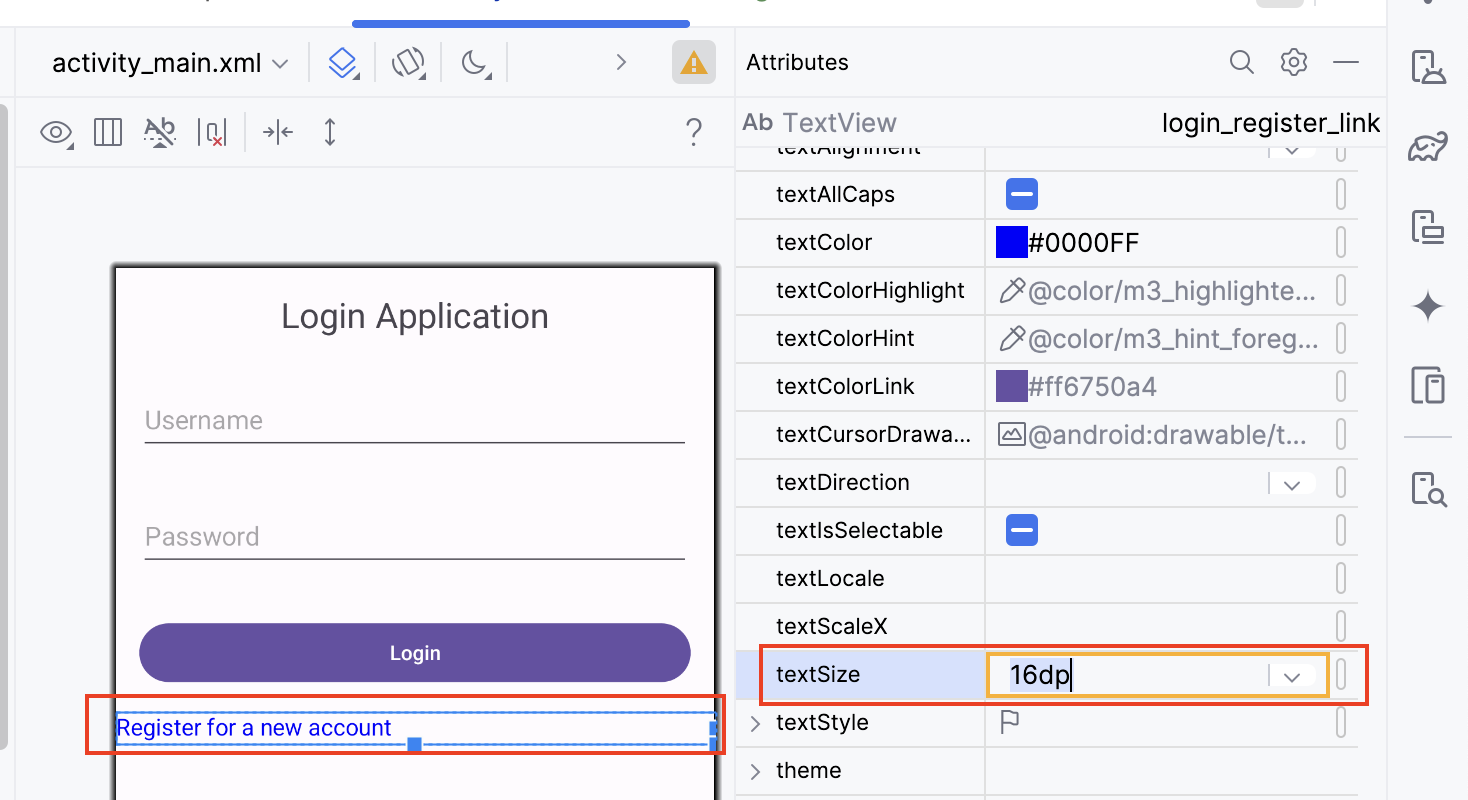
Set
layout_marginLeftto16dpandlayout_marginTopto5dp. Setlayout_widthtowrap_content.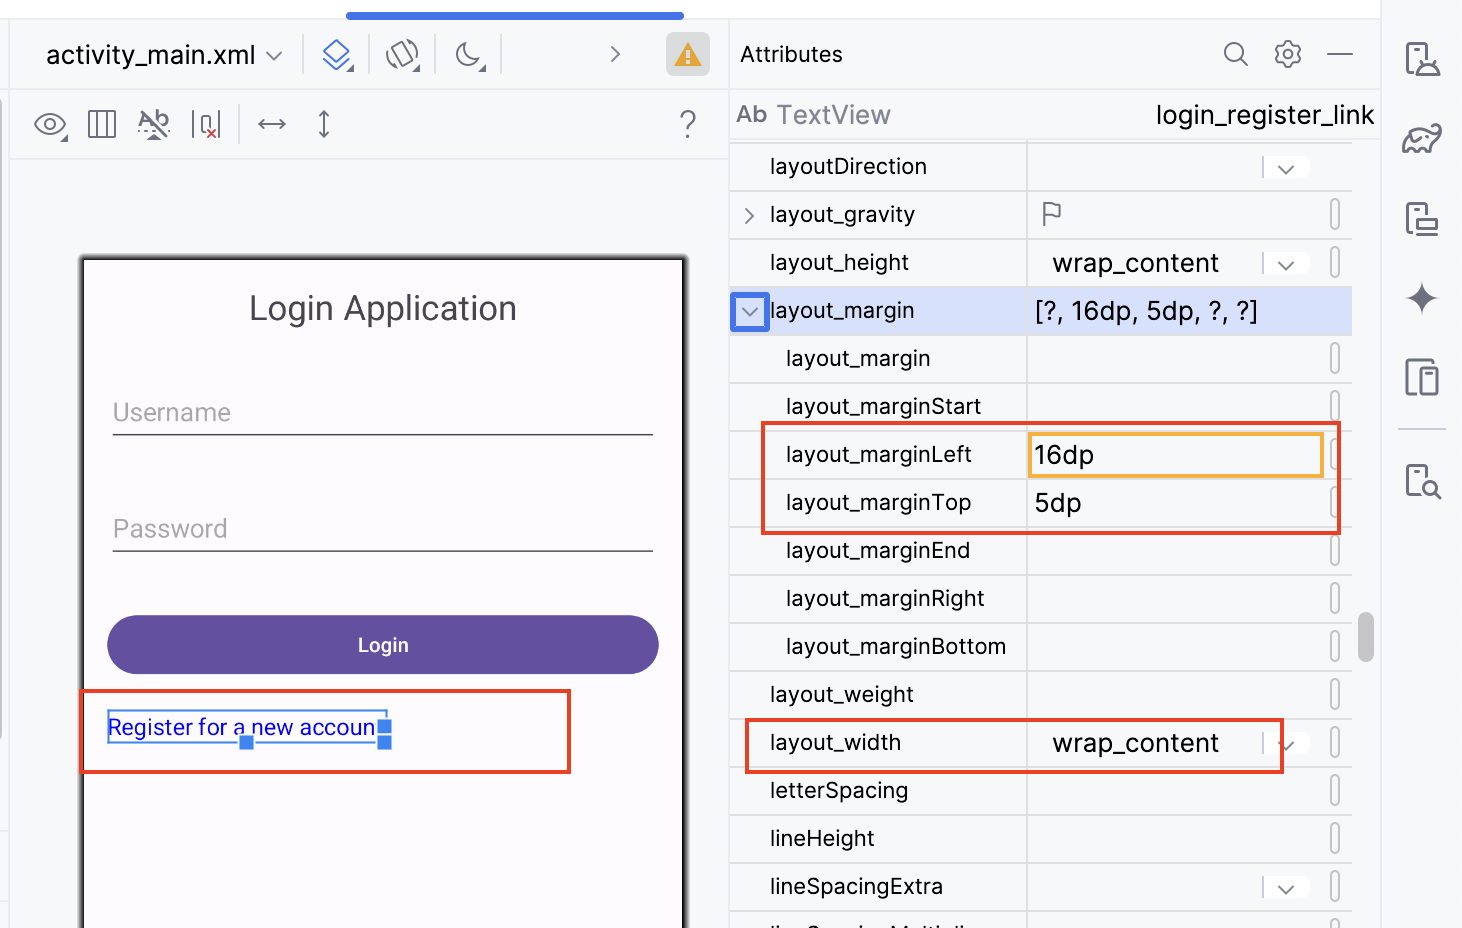
Step 9: Run the application
Ensure your AVD is set up from the previous lab.
Click the
Runbutton in Android Studio.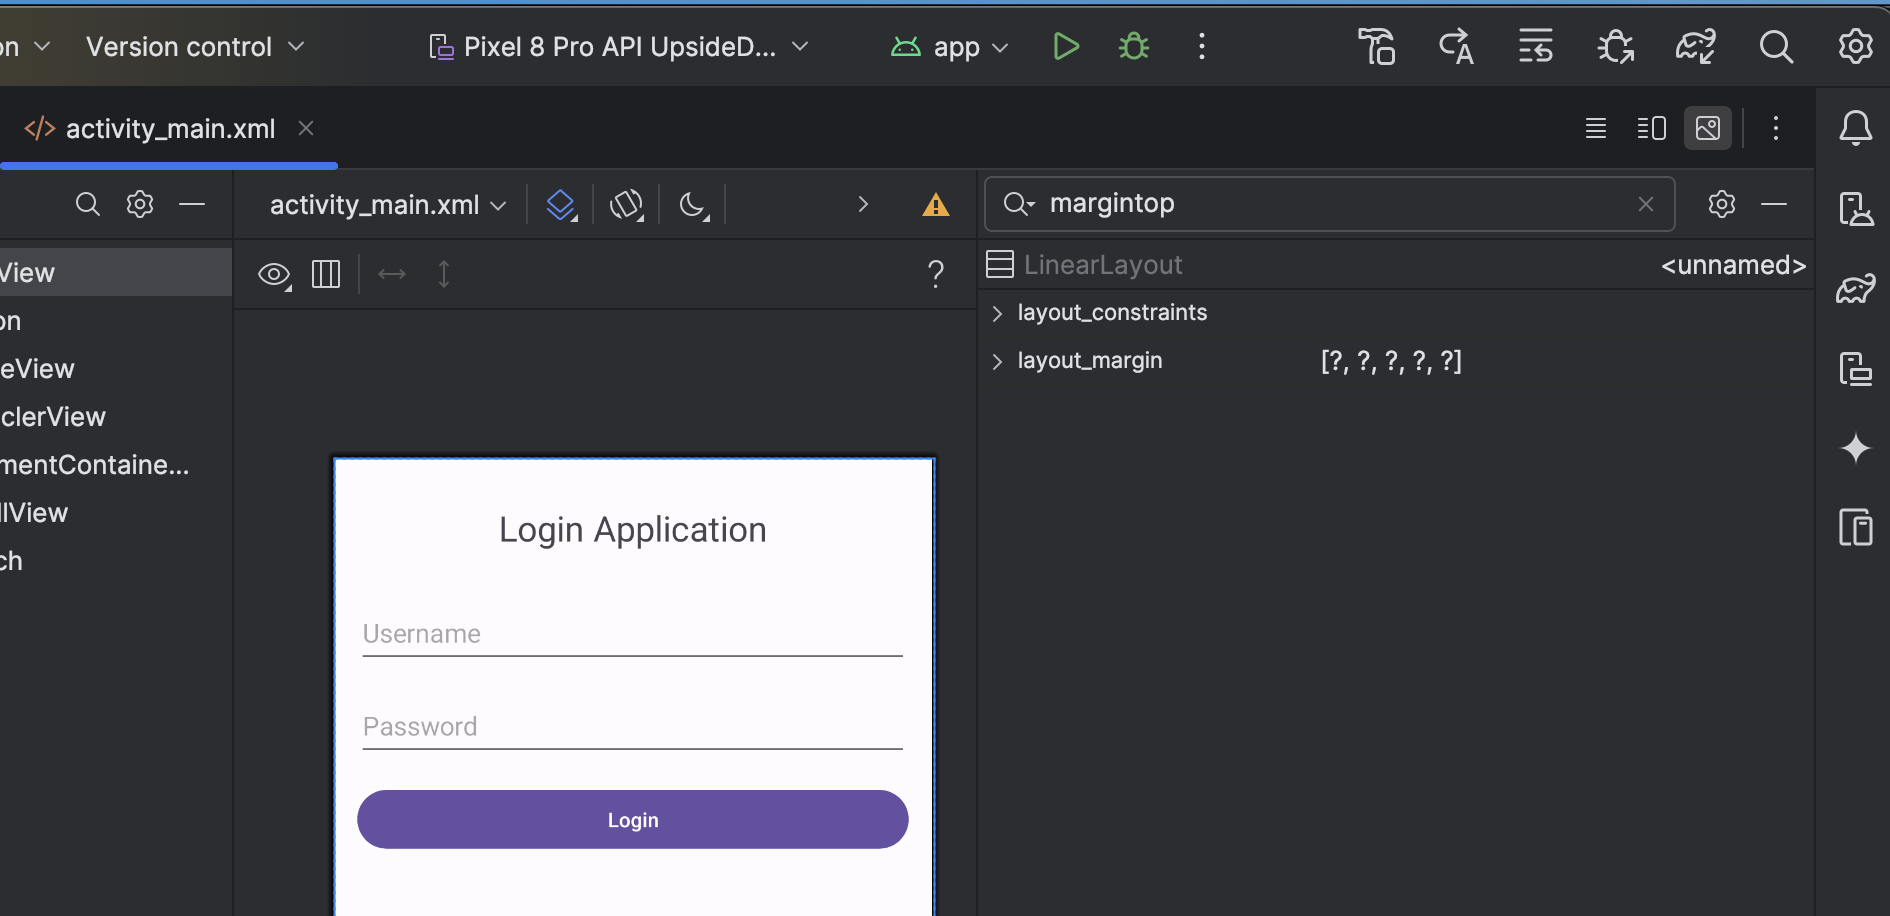
Select your AVD and wait for the application to launch.
Verify that the login screen appears as designed.
You have now successfully created the UI for a login screen using
LinearLayout. This foundational skill will be crucial as
you continue to develop more complex UIs in your Android
applications.
Author
UL