
Leveraging Gemini AI in Android Studio
Estimated time: 30 minutes
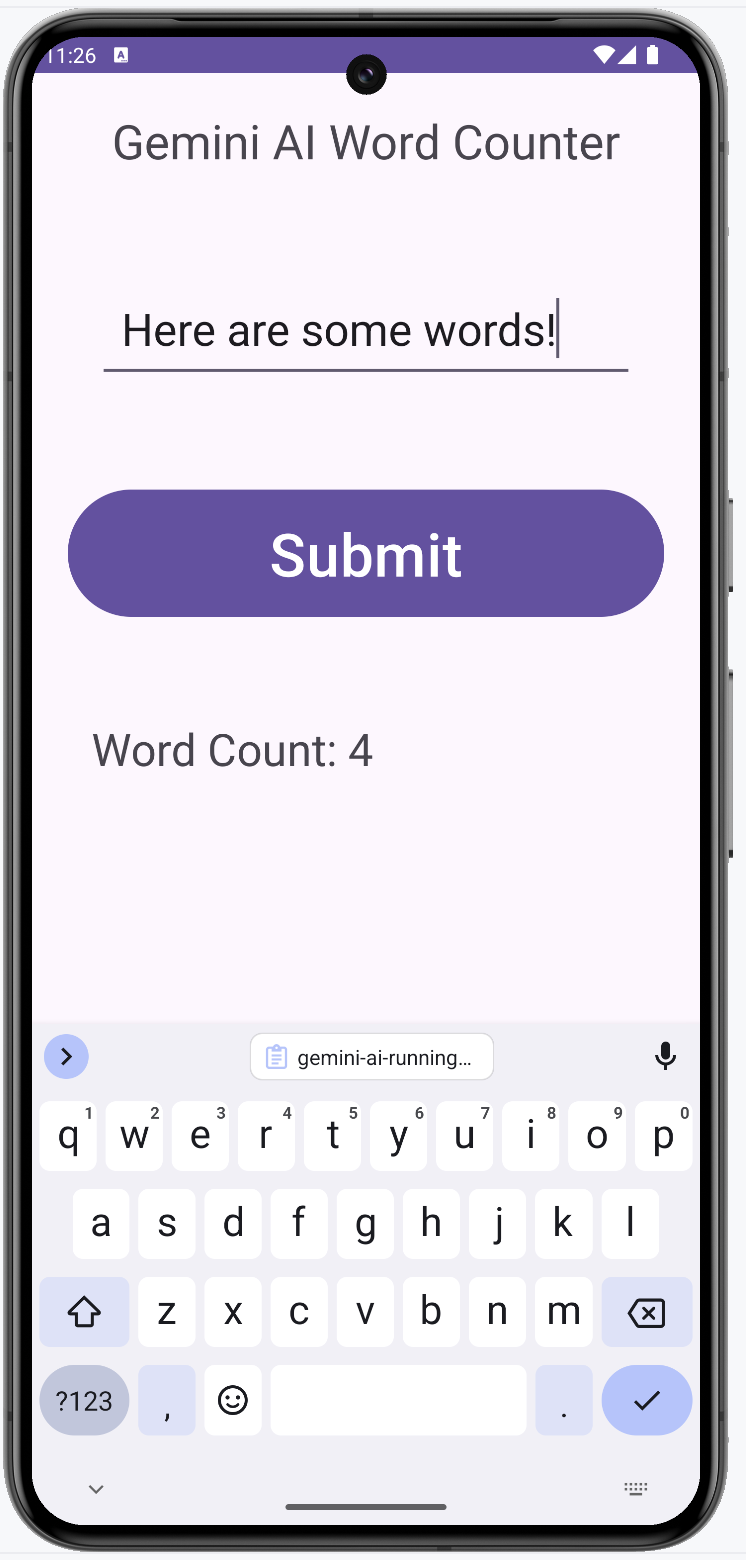
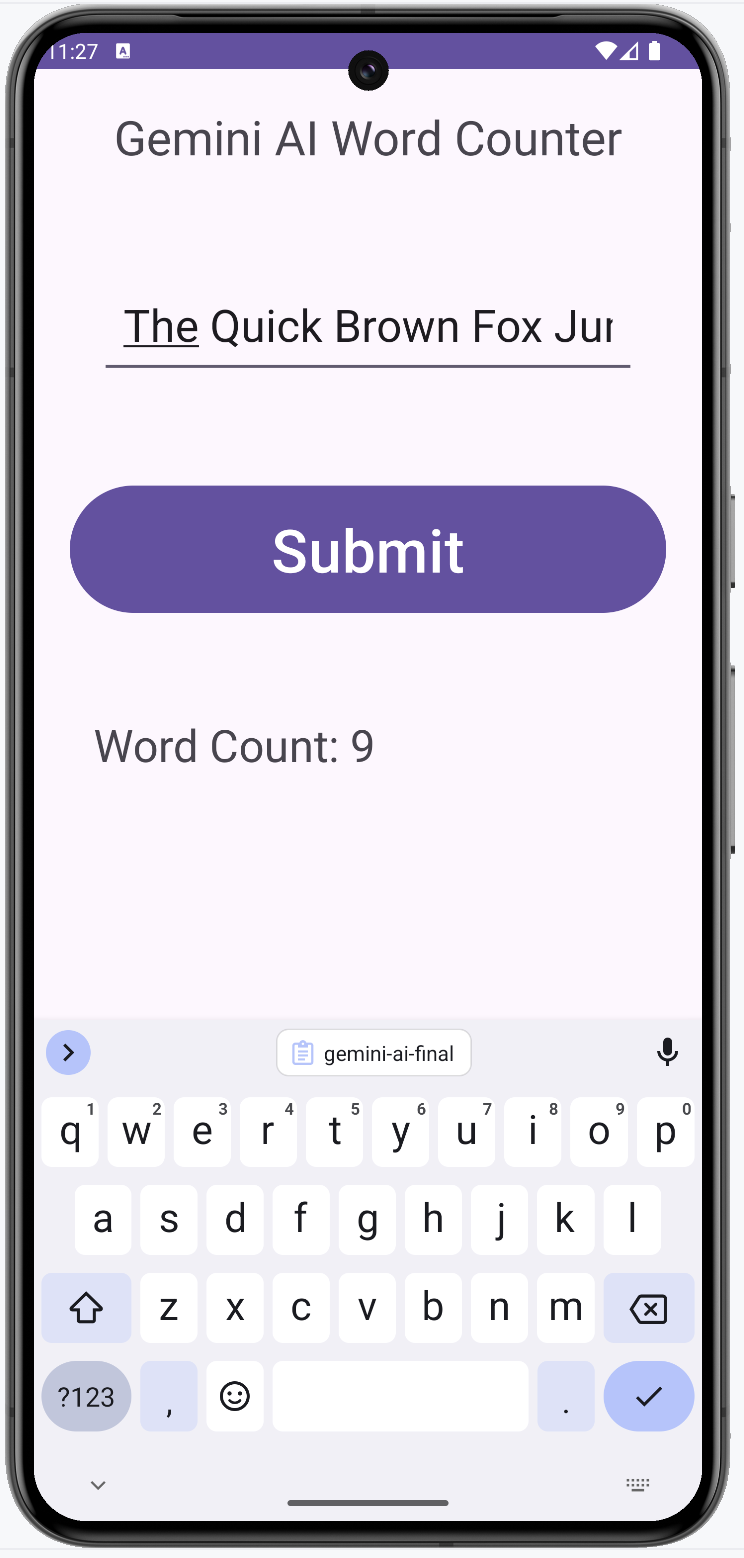
Welcome to the lab on leveraging Gemini AI in Android Studio. In this lab, you will create a simple app with a linear layout and basic widgets, guided by Gemini AI. The app will take user input and output the number of words in that input. The goal is for you not to write any code, but ask Gemini to generate the logic for you. The final result would look something like this.
Objectives
After completing this lab, you will be able to:
- Create an app with a linear layout using Android Studio
- Integrate basic widgets such as TextView, EditText, Button, and ImageView
- Install and enable Gemini plugin for Android Studio
- Utilize Gemini AI to generate application code
Running the lab
This is an instructional lab that does not require a Skills Network lab environment. You will follow this lab on your local machine using Android Studio.
Key terms
- LinearLayout: A view group that aligns all children in a single direction, either vertically or horizontally. You will be building the main screen using a Linear layout in this lab.
- TextView: Displays text to the user.
- EditText: Allows the user to enter text.
- Button: A clickable button that performs an action.
- ScrollView: A layout that allows for scrolling of the view hierarchy.
- Gemini AI: An AI service that helps in generating application code and providing suggestions.
Instructions
Step 1: Create a new project
- Open Android Studio and start a new project.
- Select "Phone and Tablet" and "Empty Views Activity" as the project type.
- Name your project
Geminiand choose Java as the language. - Confirm the package name is
com.example.gemini. This is important later on in the project. - Select "Finish" to create the project.
Step 2: Add LinearLayout
Open the
activity_main.xmlfile in theres/layoutdirectory. This is the main view of the project that opens when the app is launched. Switch to the "Design" view by clicking on "Design" on top of the window.Select and delete the existing text box that says "hello world" in the middle of the screen.
Convert the
mainconstraint layout to a linear layout.Android Studio might complain about missing orientation. Use the quick fix to set the orientation to
vertical.
Step 3: Add TextView
- Drag a
TextViewfrom the Palette into theLinearLayout. - In the Attributes panel, set the
idtoapp_title. - Set the
textto "Gemini AI Word Counter." - Set the
textSizeto32sp. - Set the
gravitytocenter. - Set
marginto24dp. - Set the
layout_gravitytocenter_horizontal.
Step 4: Add input for user to enter text
- Drag an
EditTextfrom the Palette into theLinearLayout. - In the Attributes panel, set the
idtouser_input.Delete thetextand set thehintto "Enter some text." - Confirm that the
inputTypeistext. - Set
layout_marginto44dp. - Set
paddingto16dp. - Set
textSizeto30sp. - Set
minHeightto60dp.
Step 5: Add button widget
- Add a
Buttonbelow theEditText: - Drag a
Buttonfrom the Palette into theLinearLayout. - In the Attributes panel, set the
idtoaction_button. - Set the
textto "Submit." - Set
layout_marginto24dp. - Set
paddingto16dp. - Set
textSizeto40sp. - Set
minHeightto60dp.
Step 6: Add output widget
- Drag a
TextViewfrom the Palette into theLinearLayout. - In the Attributes panel, set the
idtoresult_text. - Set the
textto "Results will be displayed here". - Set
textSizeto30sp. - Set
layout_marginto24dp. - Set
paddingto16dp.
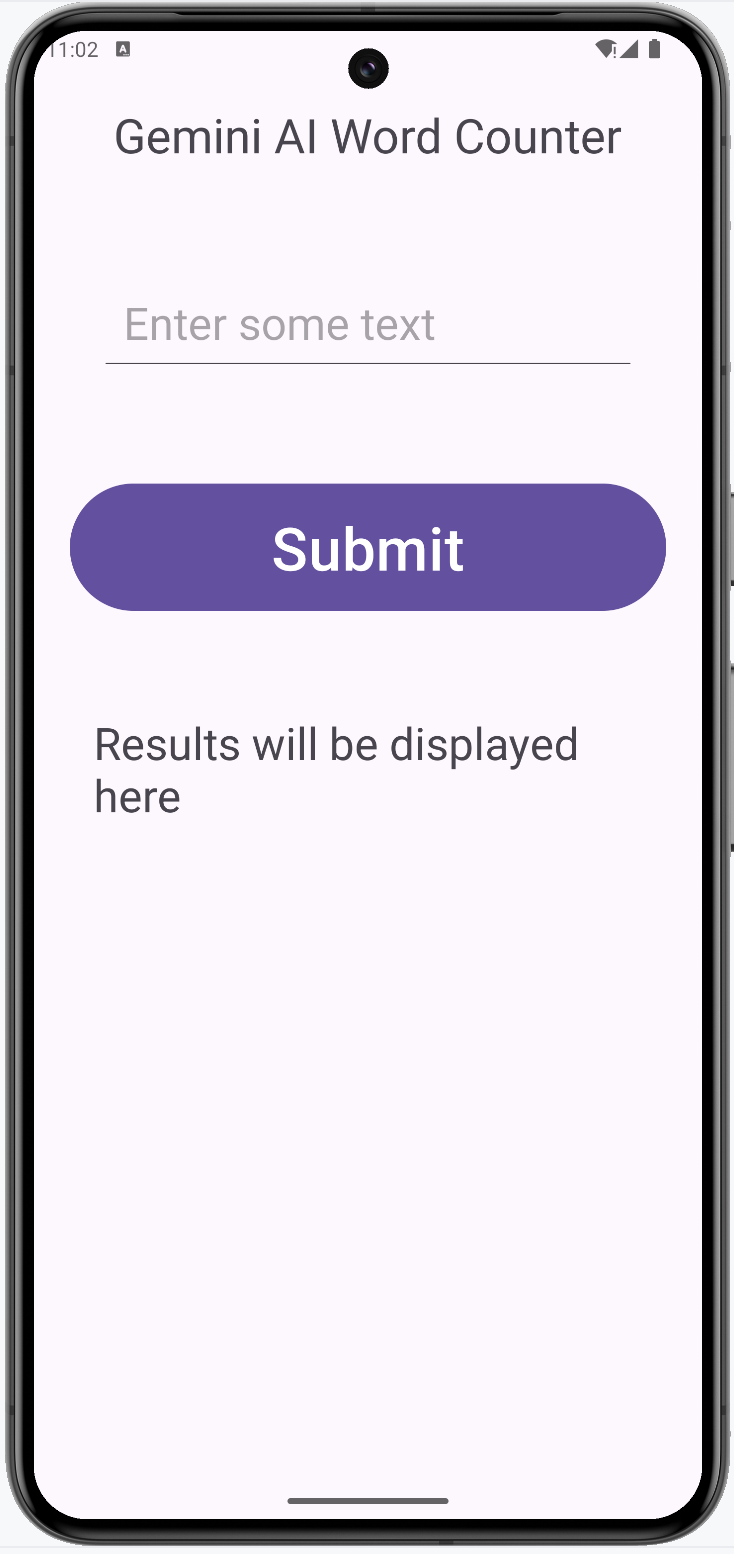
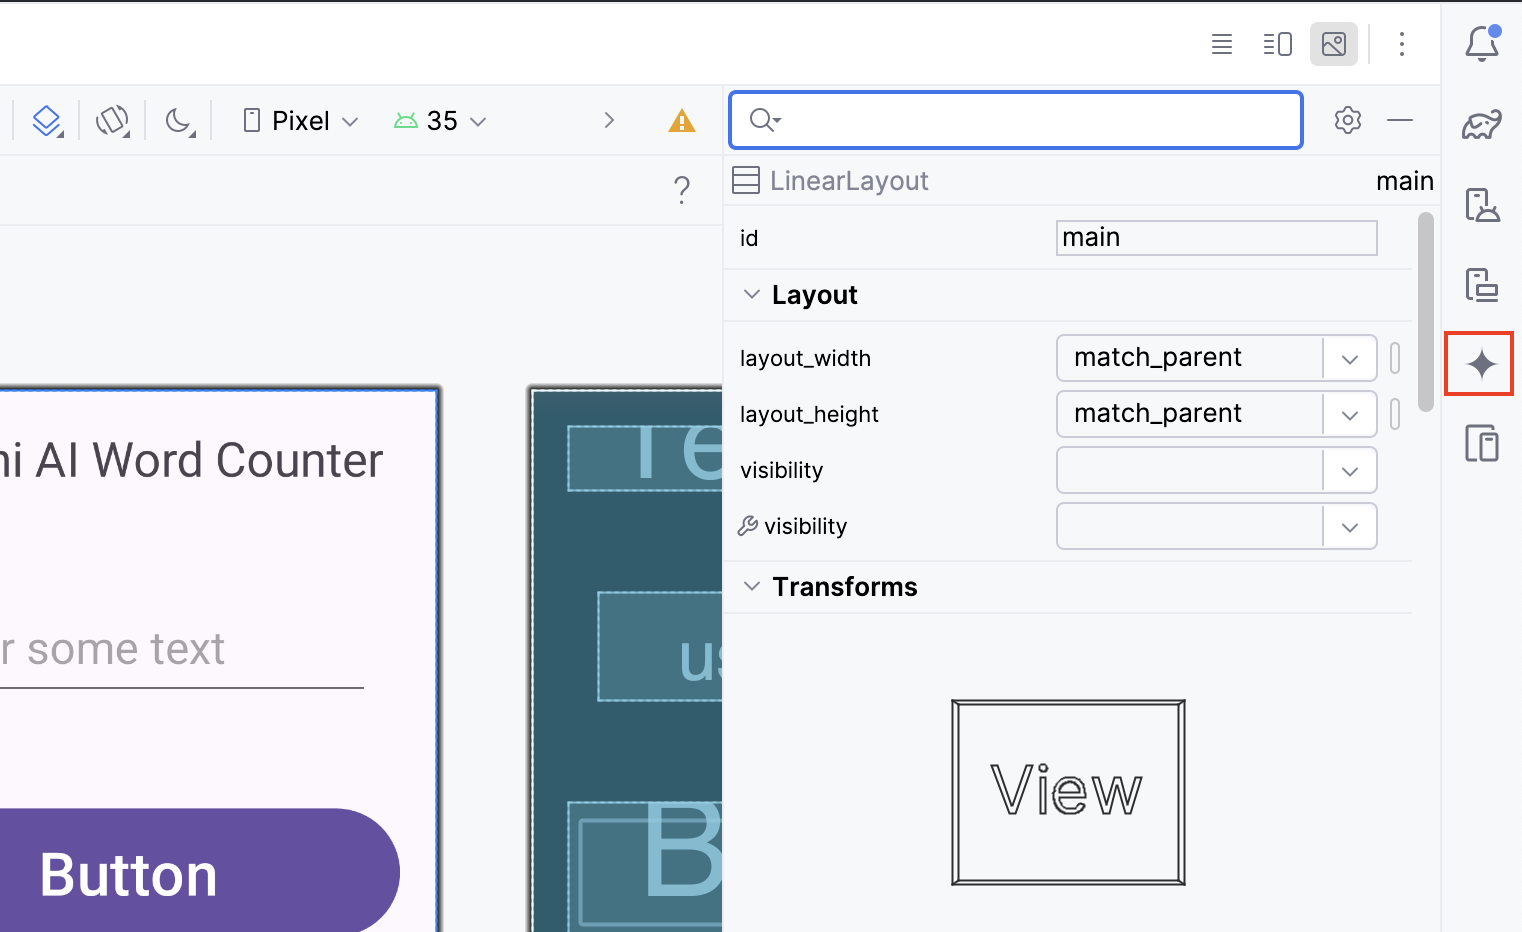
The design should look like the following at this time.
Step 7: Install and enable Gemini AI
In Android Studio, navigate to
File > Settings > Pluginsand search for "Gemini AI."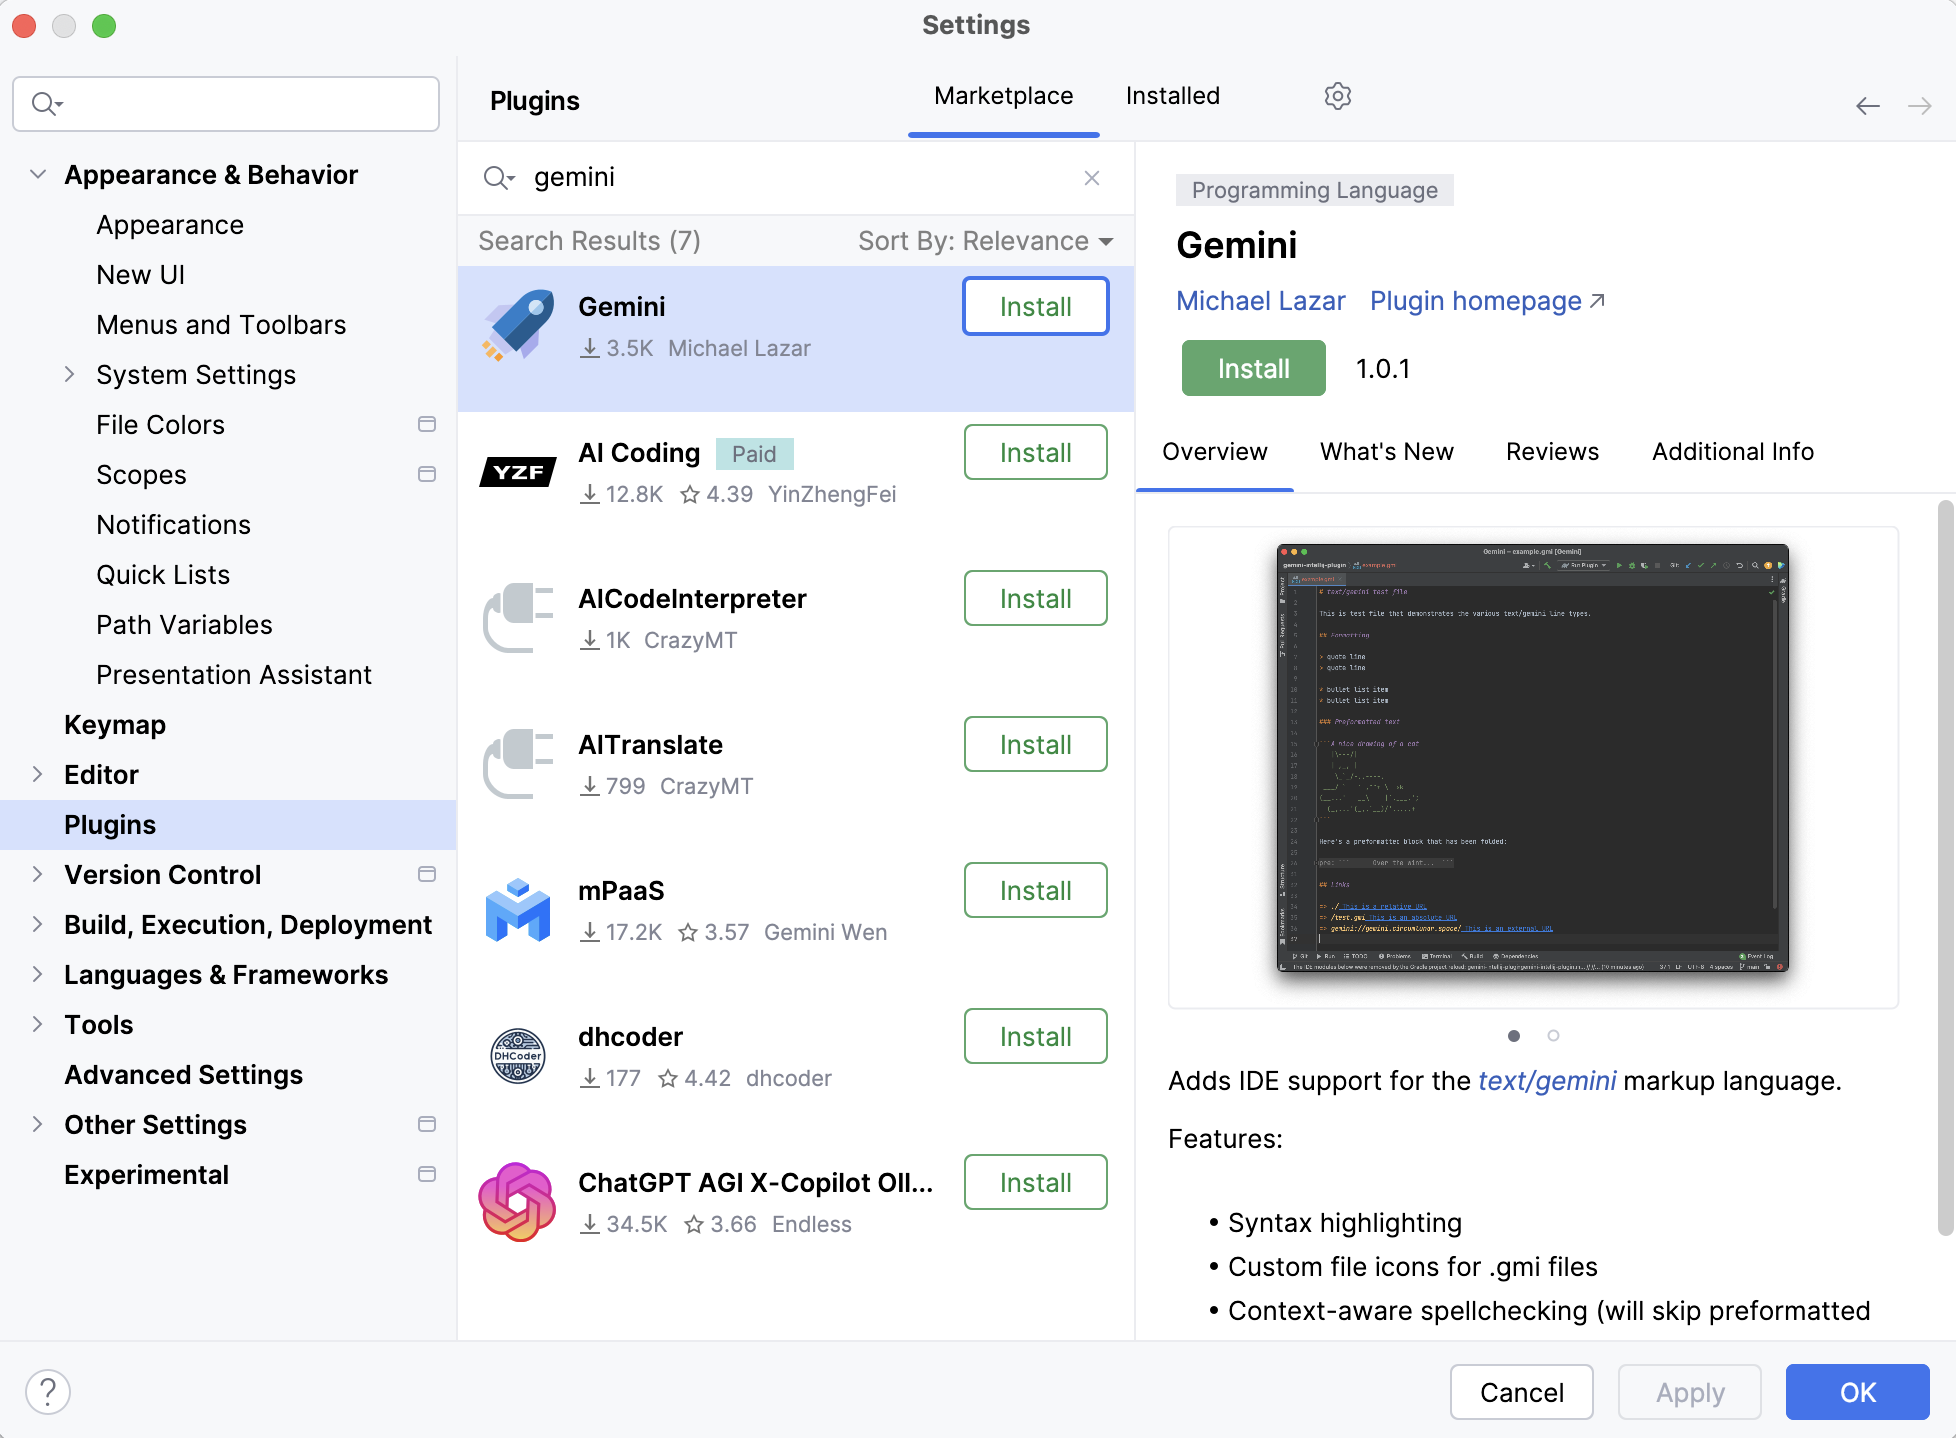
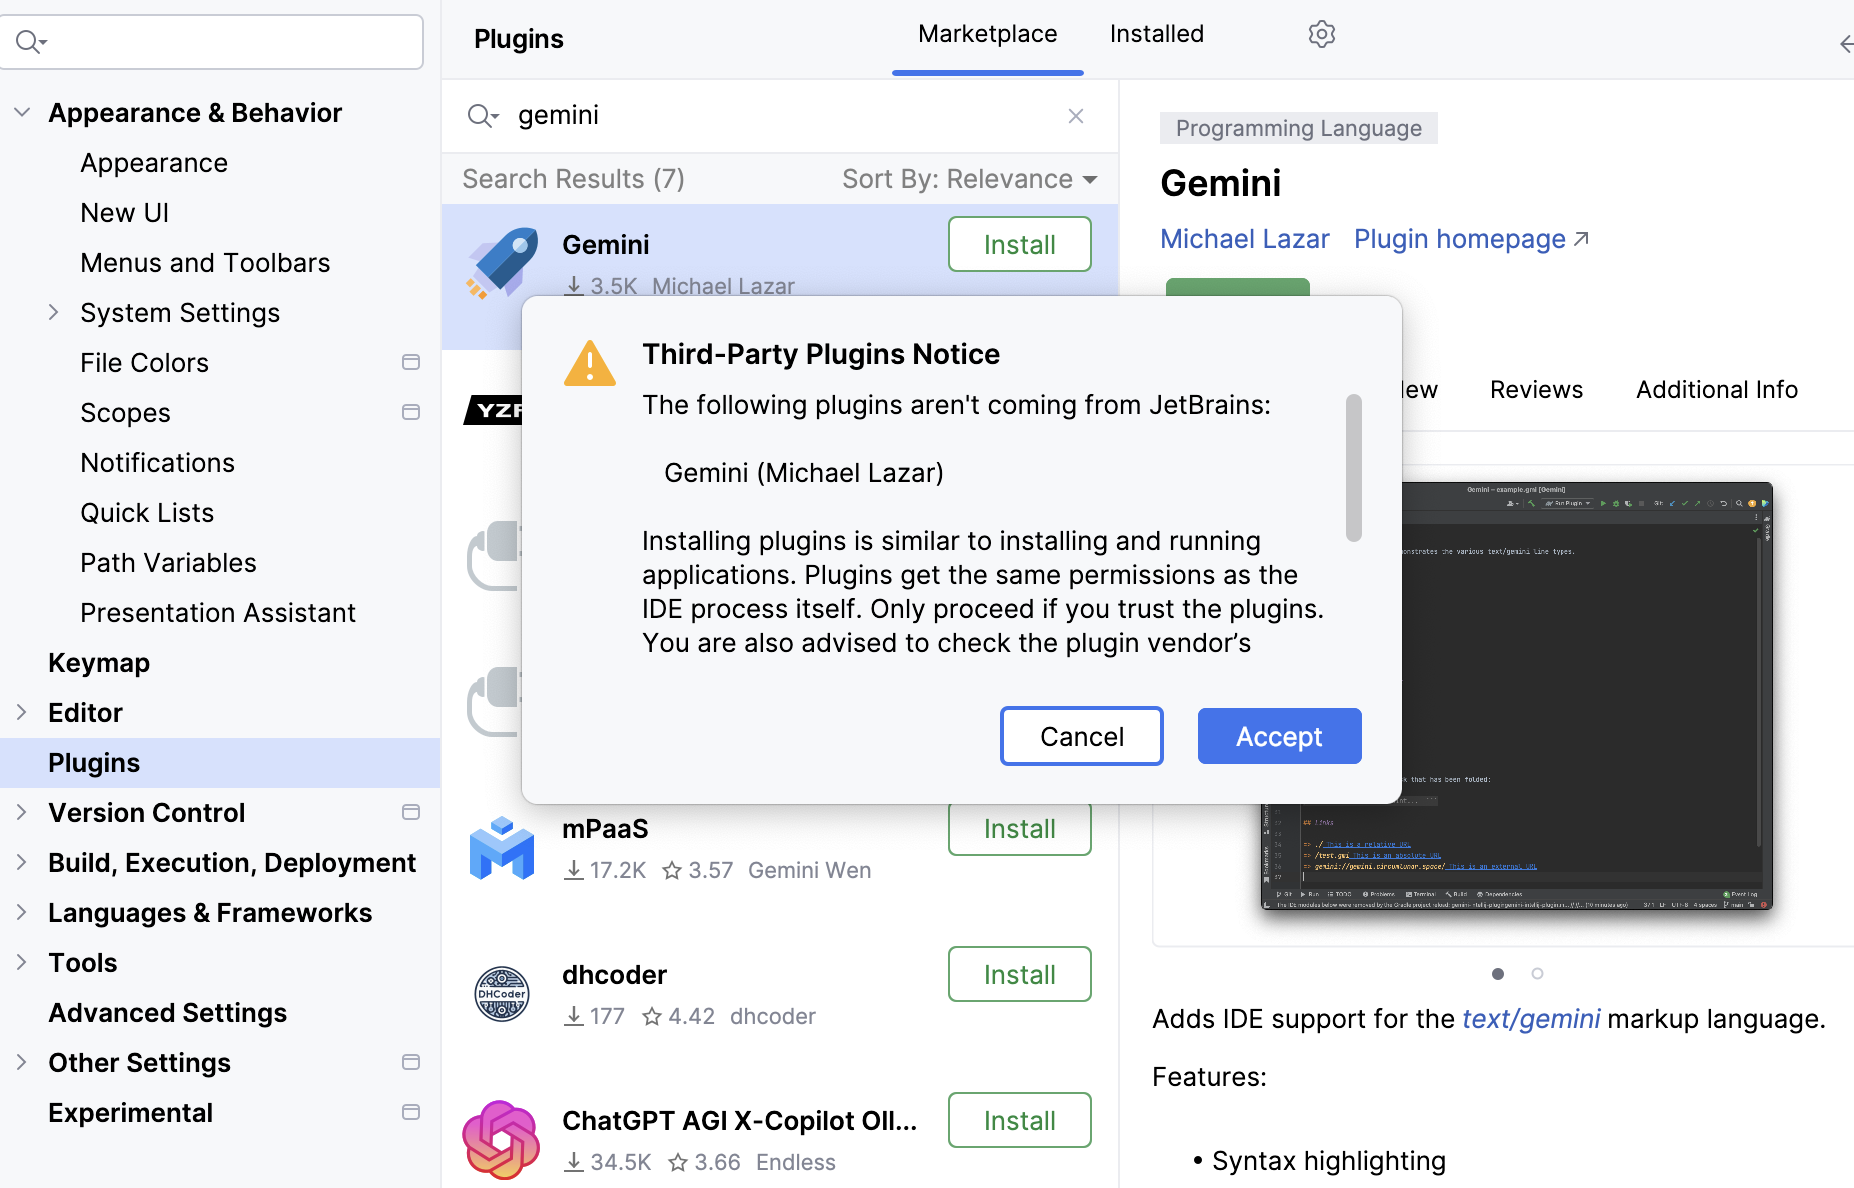
Accept the license and Install the Gemini AI plugin. This might restart Android Studio.
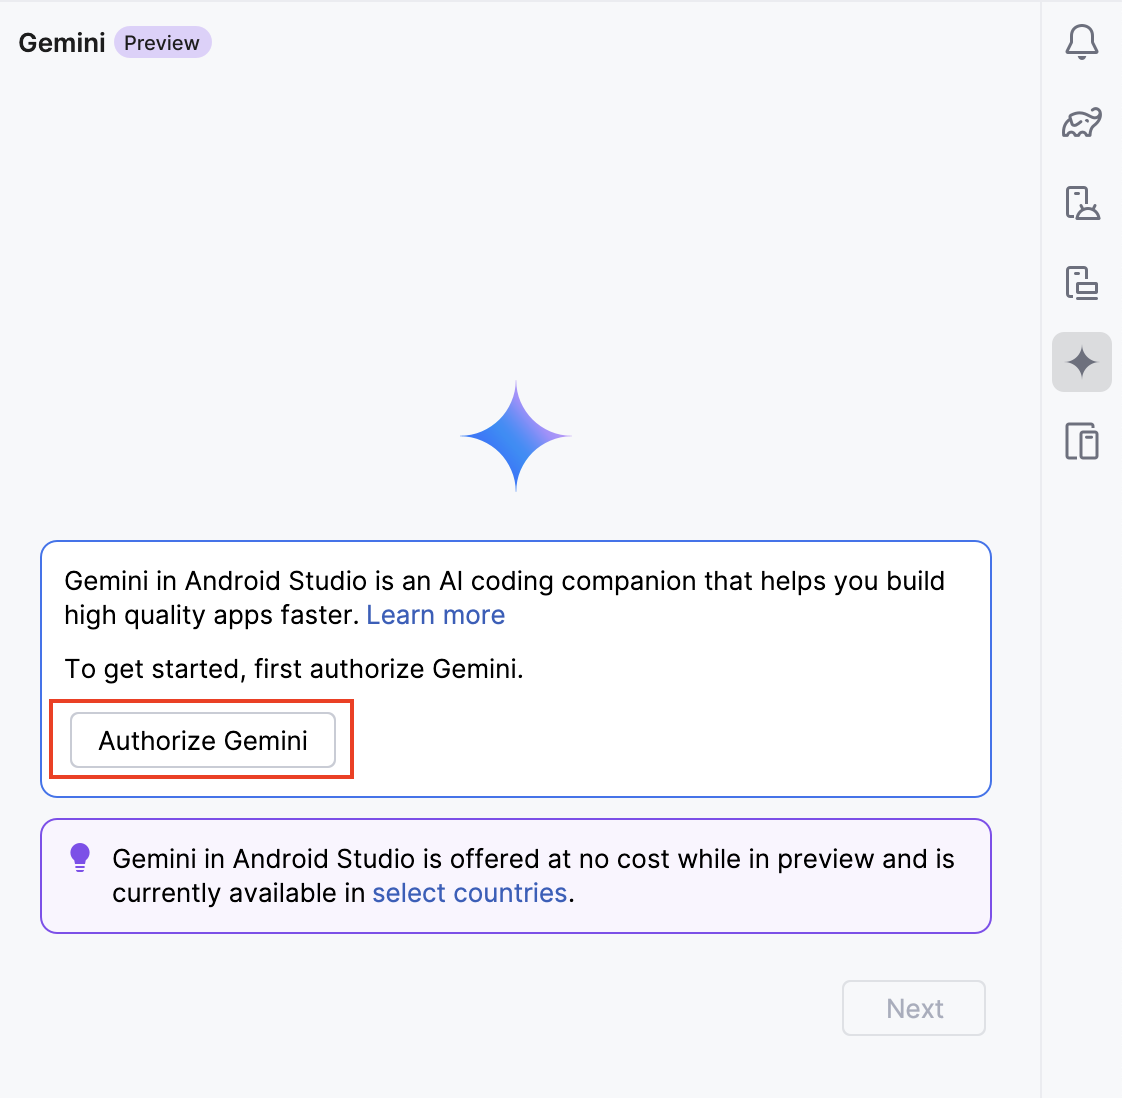
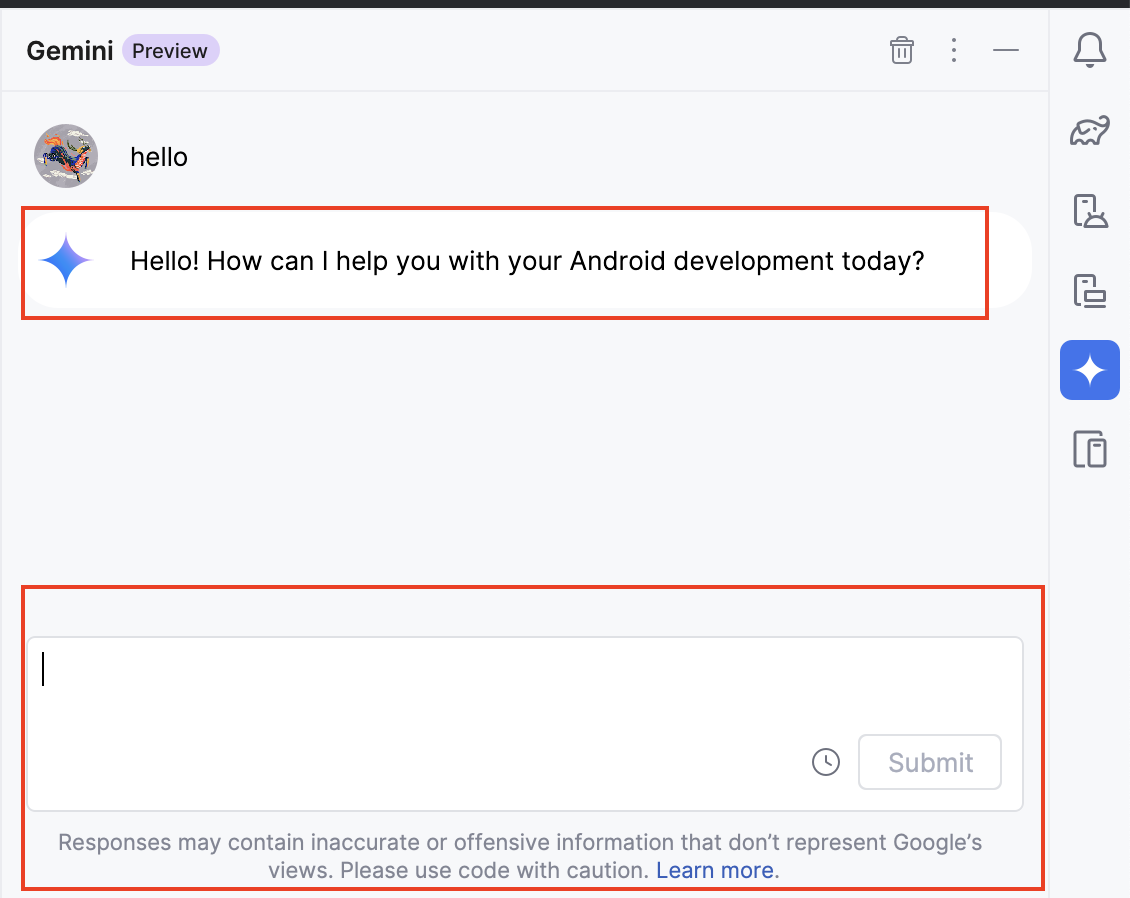
Access the Gemini AI by clicking on the star-like button on the right-hand panel in Android Studio.
You will notice a dialog to authorize Gemini.
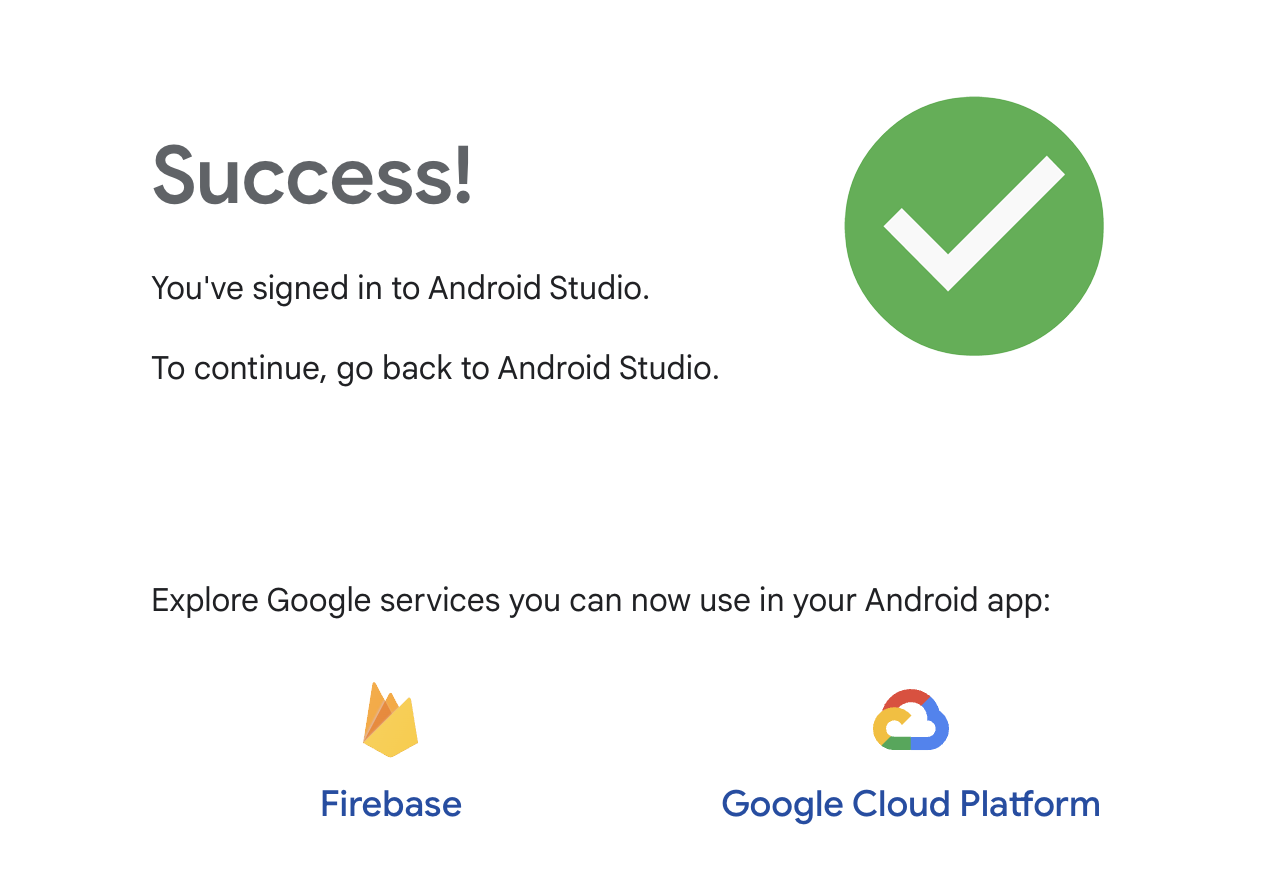
At the end of the process, you will see a successful message. Go ahead and follow the wizard to sign into your Google account and authorize Gemini AI.
You can close this and go back to Android Studio. You will see a screen informing you that Gemini was authorized.
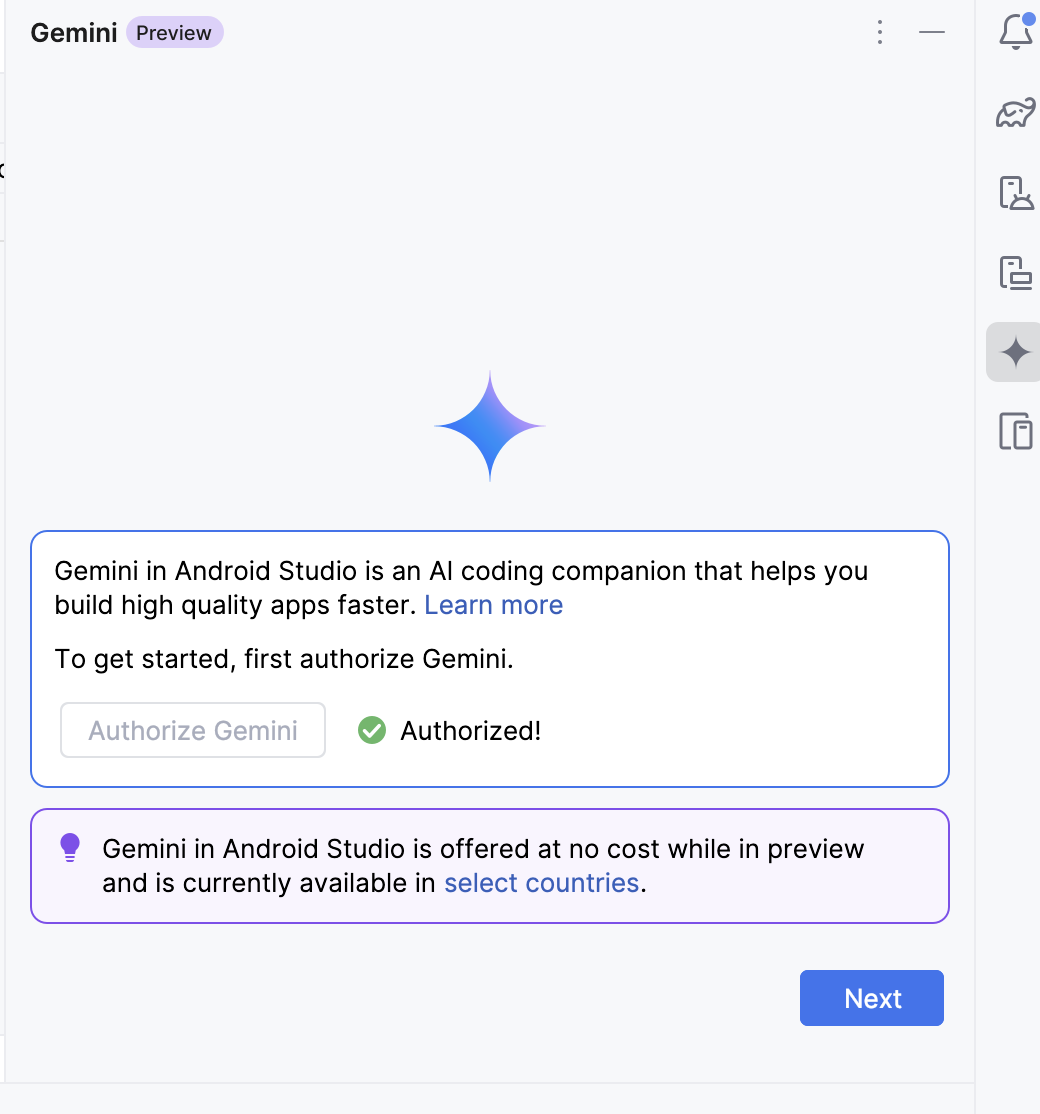
You should now see the AI panel populated with a dialog box with a question prompt.
Step 8: Use Gemini AI to hook up the button click
Great! We are now ready to ask Gemini for help. The goal is to add code that will take the user input and display the count of words in the output view when the action button is clicked. Let's ask Gemini how to do this by asking
I want to count the number of words in the user input (user_input) when the action_button is clicked. The results should be displayed in "result_text" widget. Use Java to write this code for me and tell me where to add it in the package com.example.gemini in this project. Thank you!. You can rephrase it as you like. Notice that some key pieces of information were provided, such as usingJavaand the packagecom.example.gemini. Make sure the package name matches the package yourMainActivity.javafile is in. Remember AI response is not deterministic and you might see a different answer with a different prompt.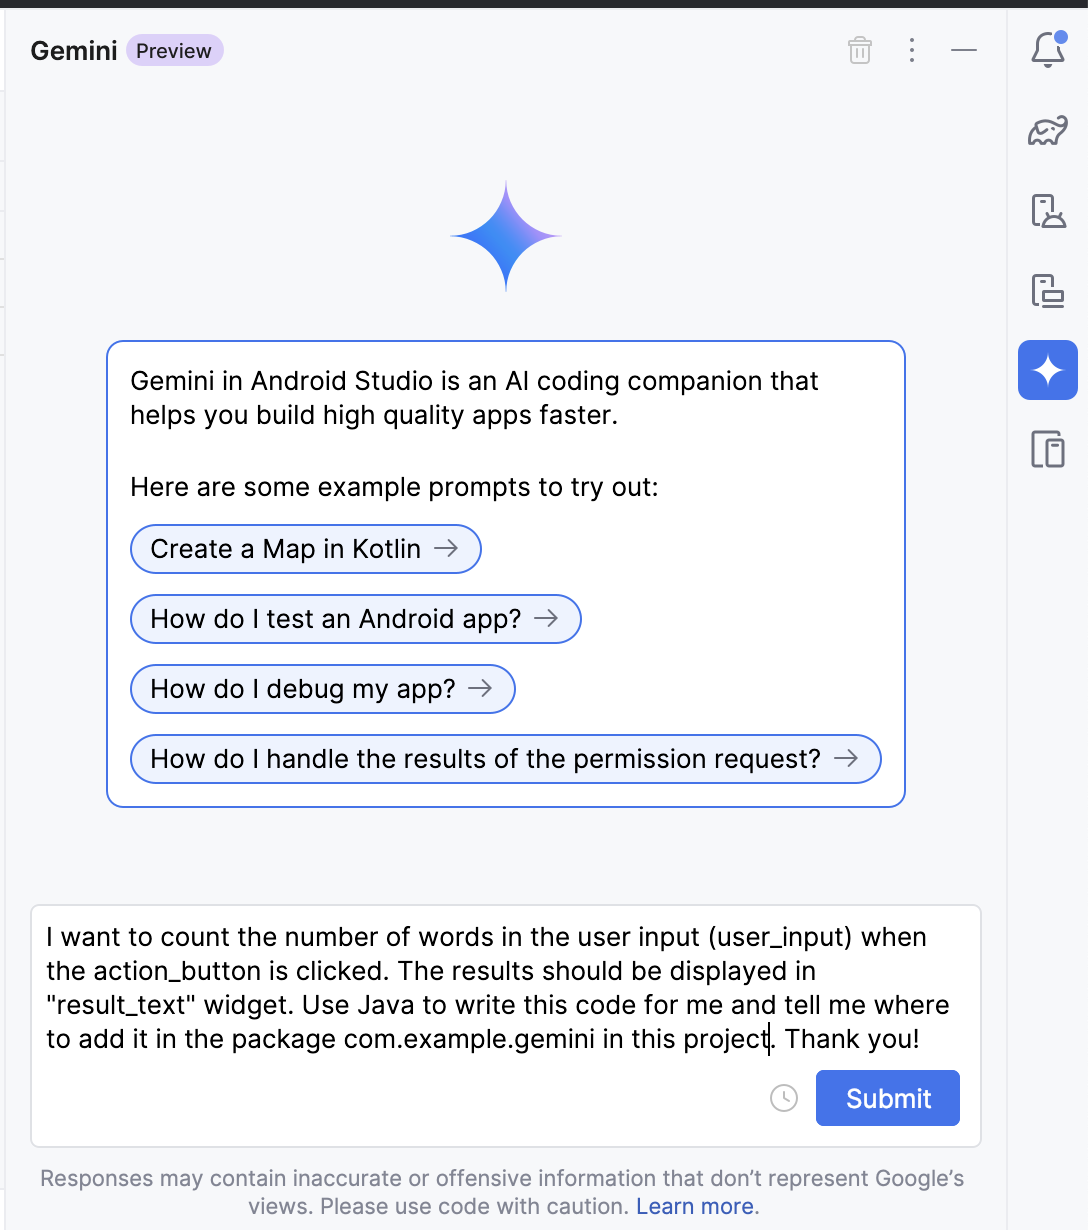
Gemini should produce code for the
MainActivity.javafile! How cool is this!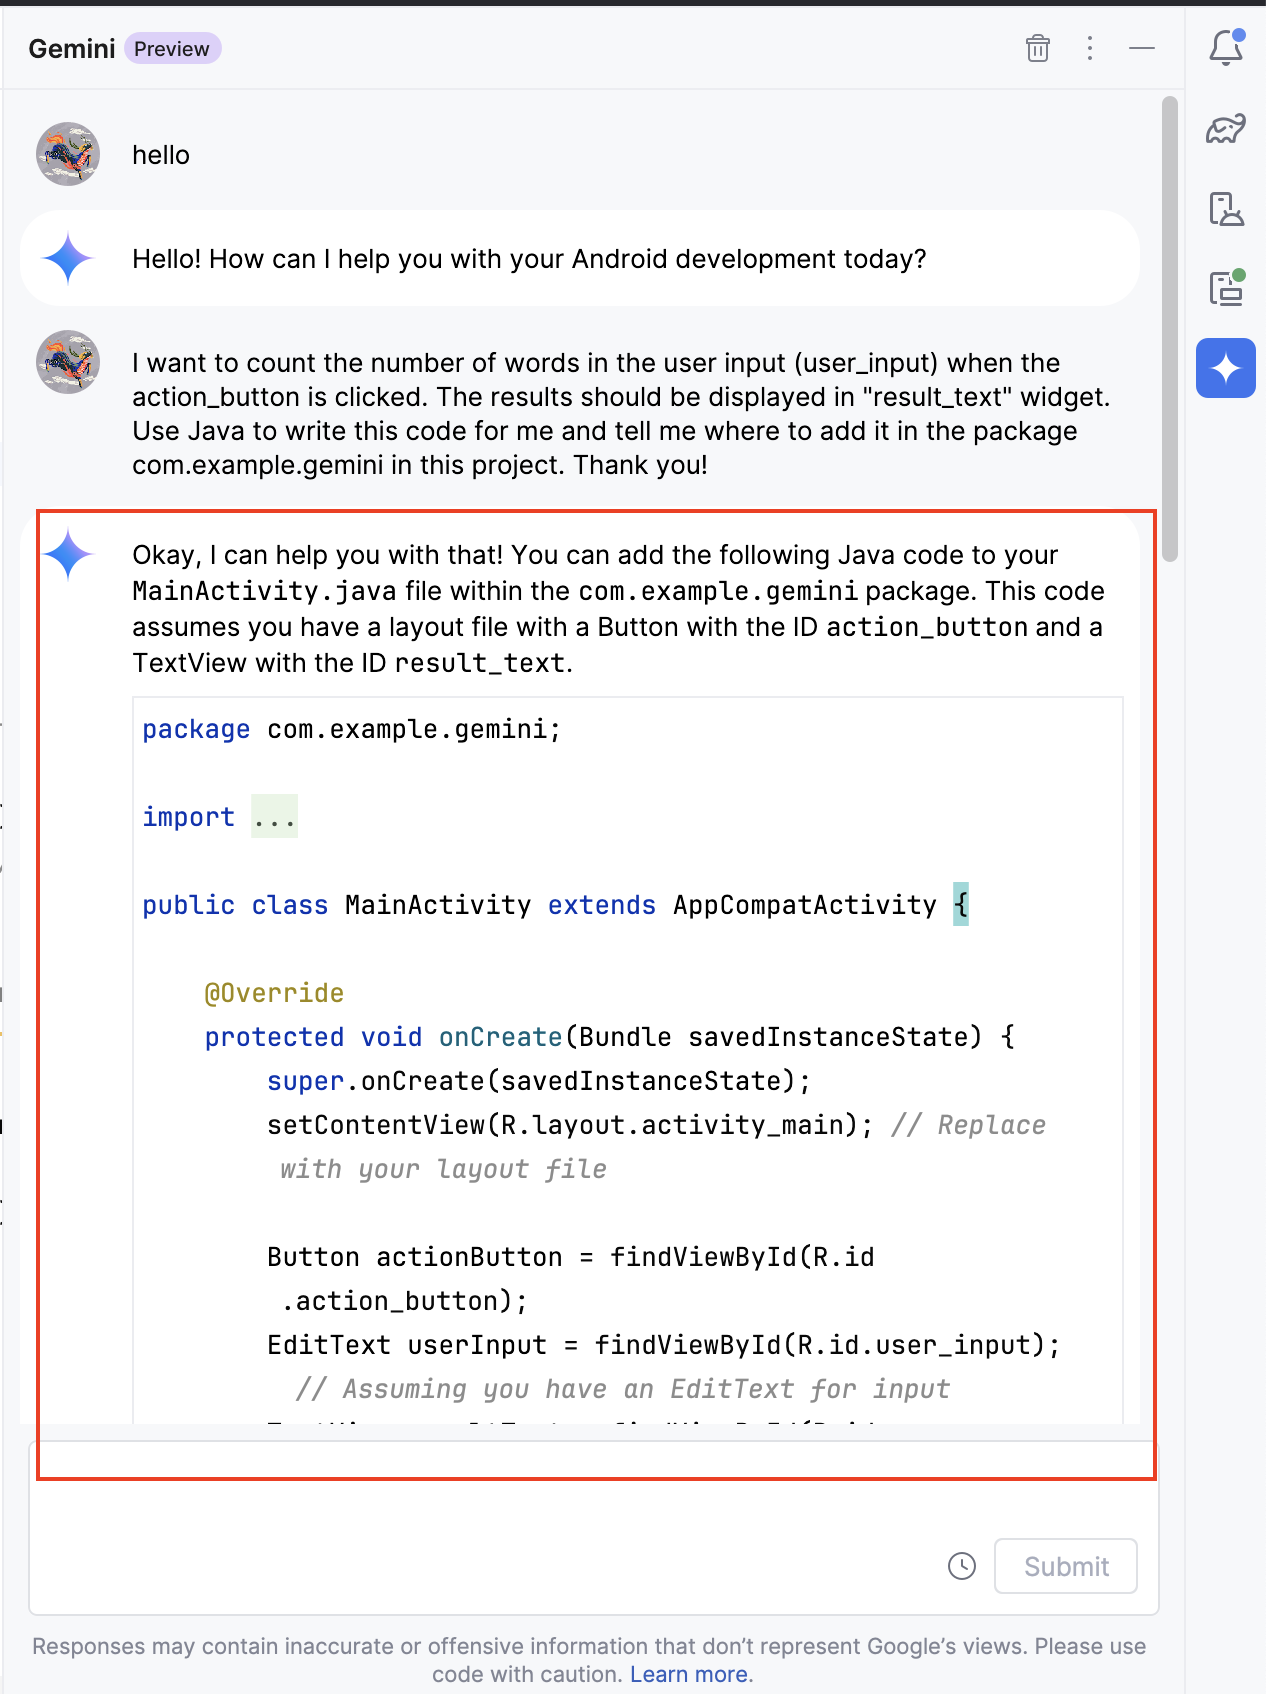
Not only that, it also explains the code below and gives you references to read more.
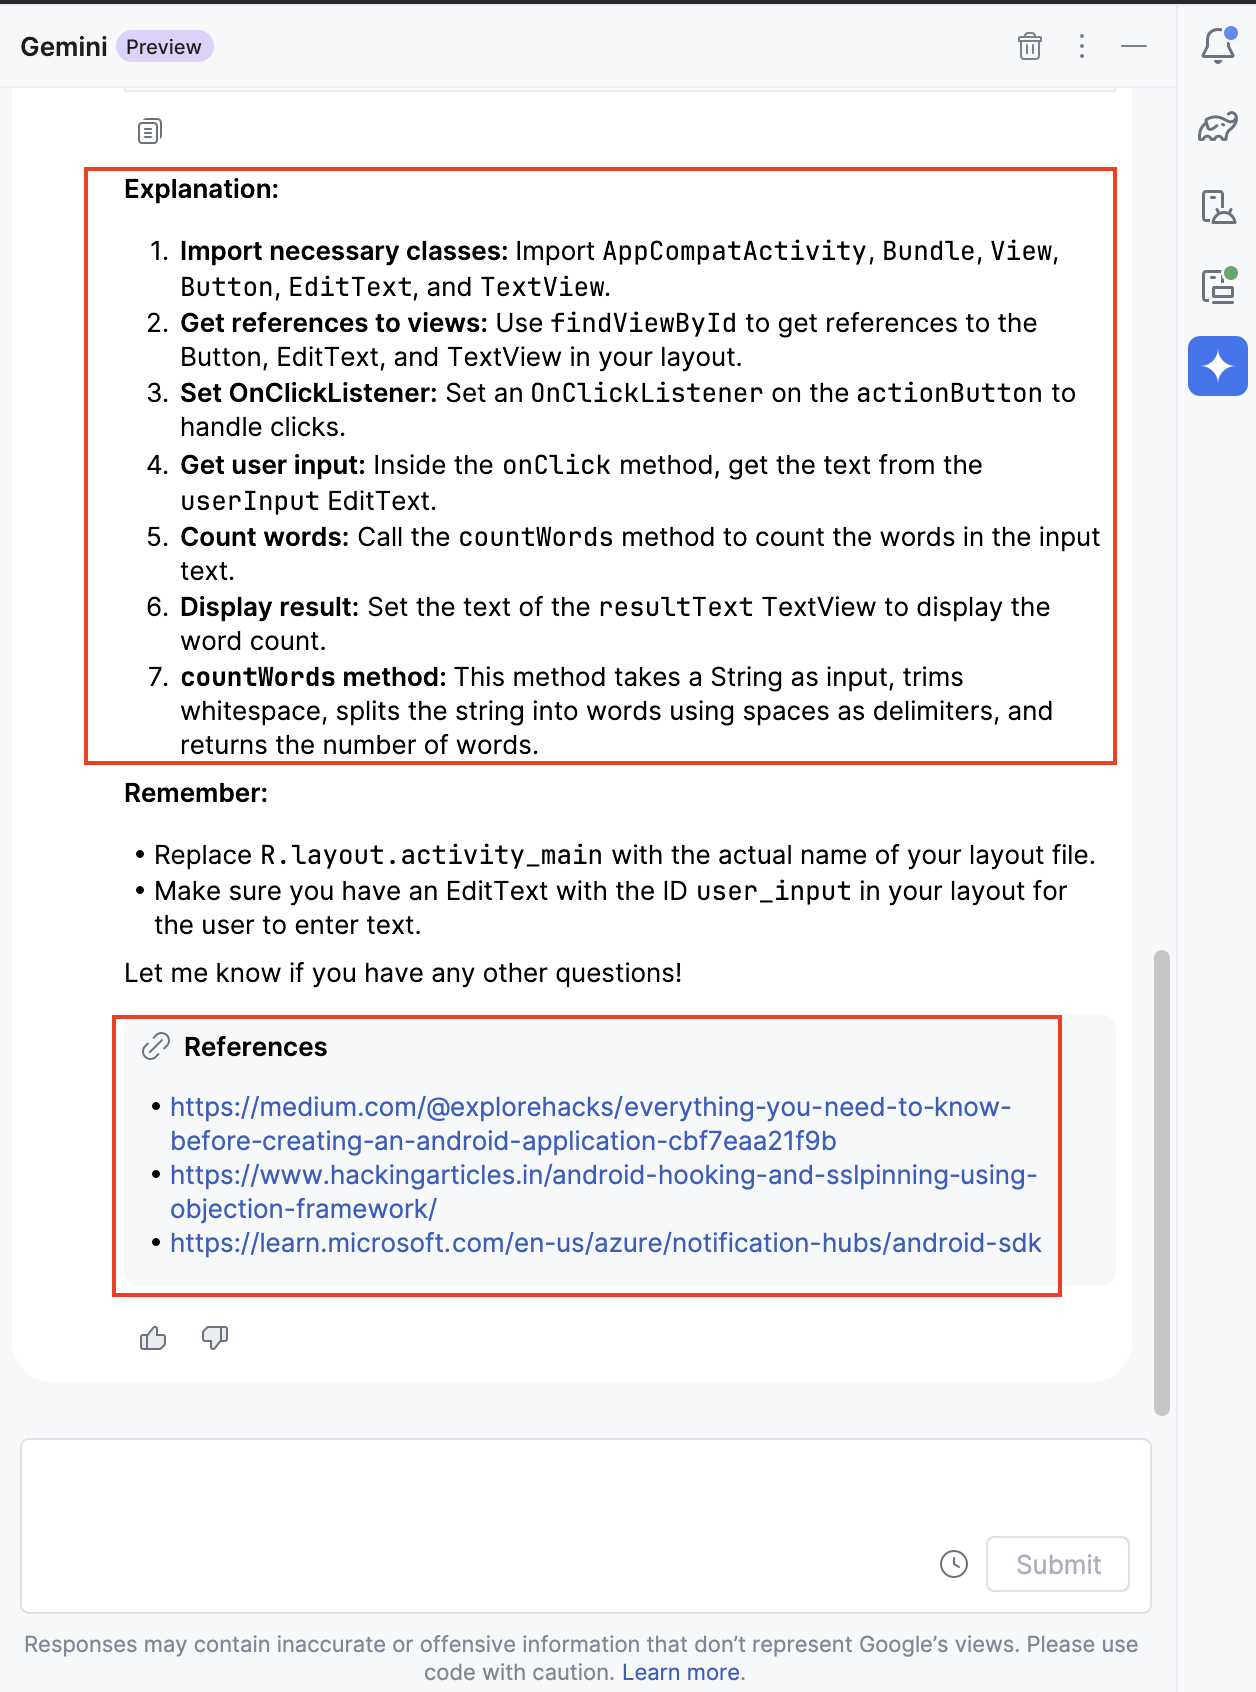
You can now copy and paste this code into
MainActivity.javafile.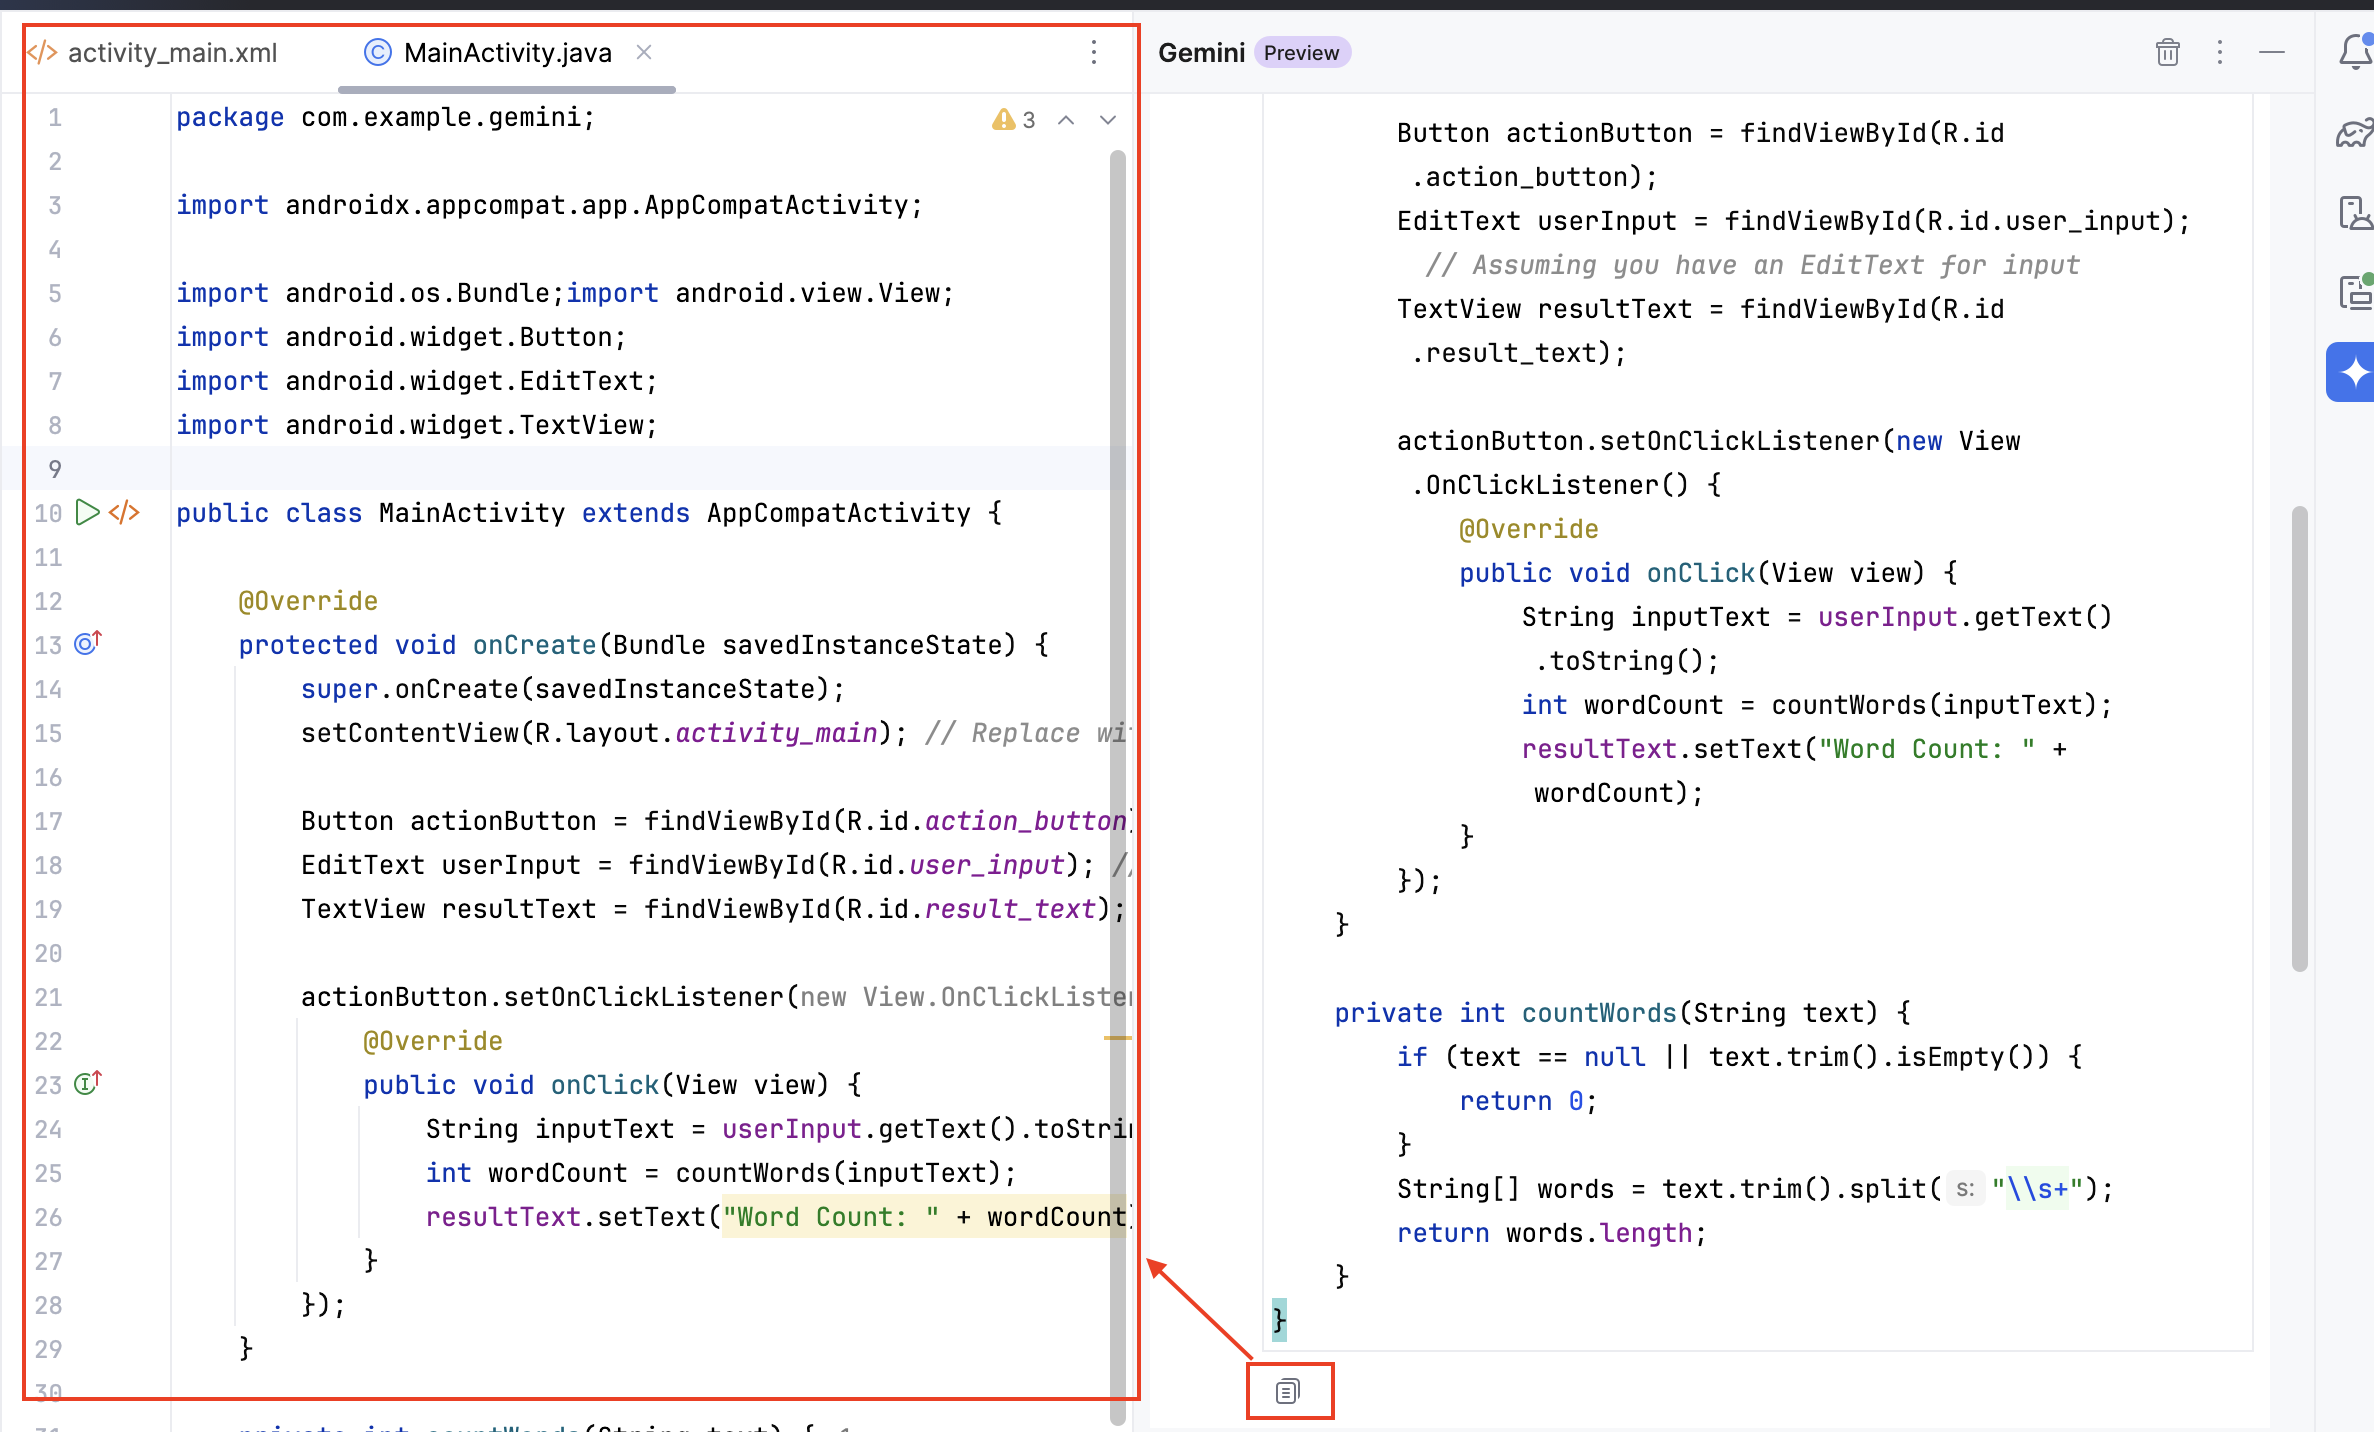
That's it! We can run the application in the emulator now.
Step 9: AI is not always right!
When first generating this code, an issue cropped up where Gemini
produced what was obviously an incorrect java code. The onclick listener
on the button was generated as publicvoid onClick instead
of public void onClick. This resulted in an error in the
java file.
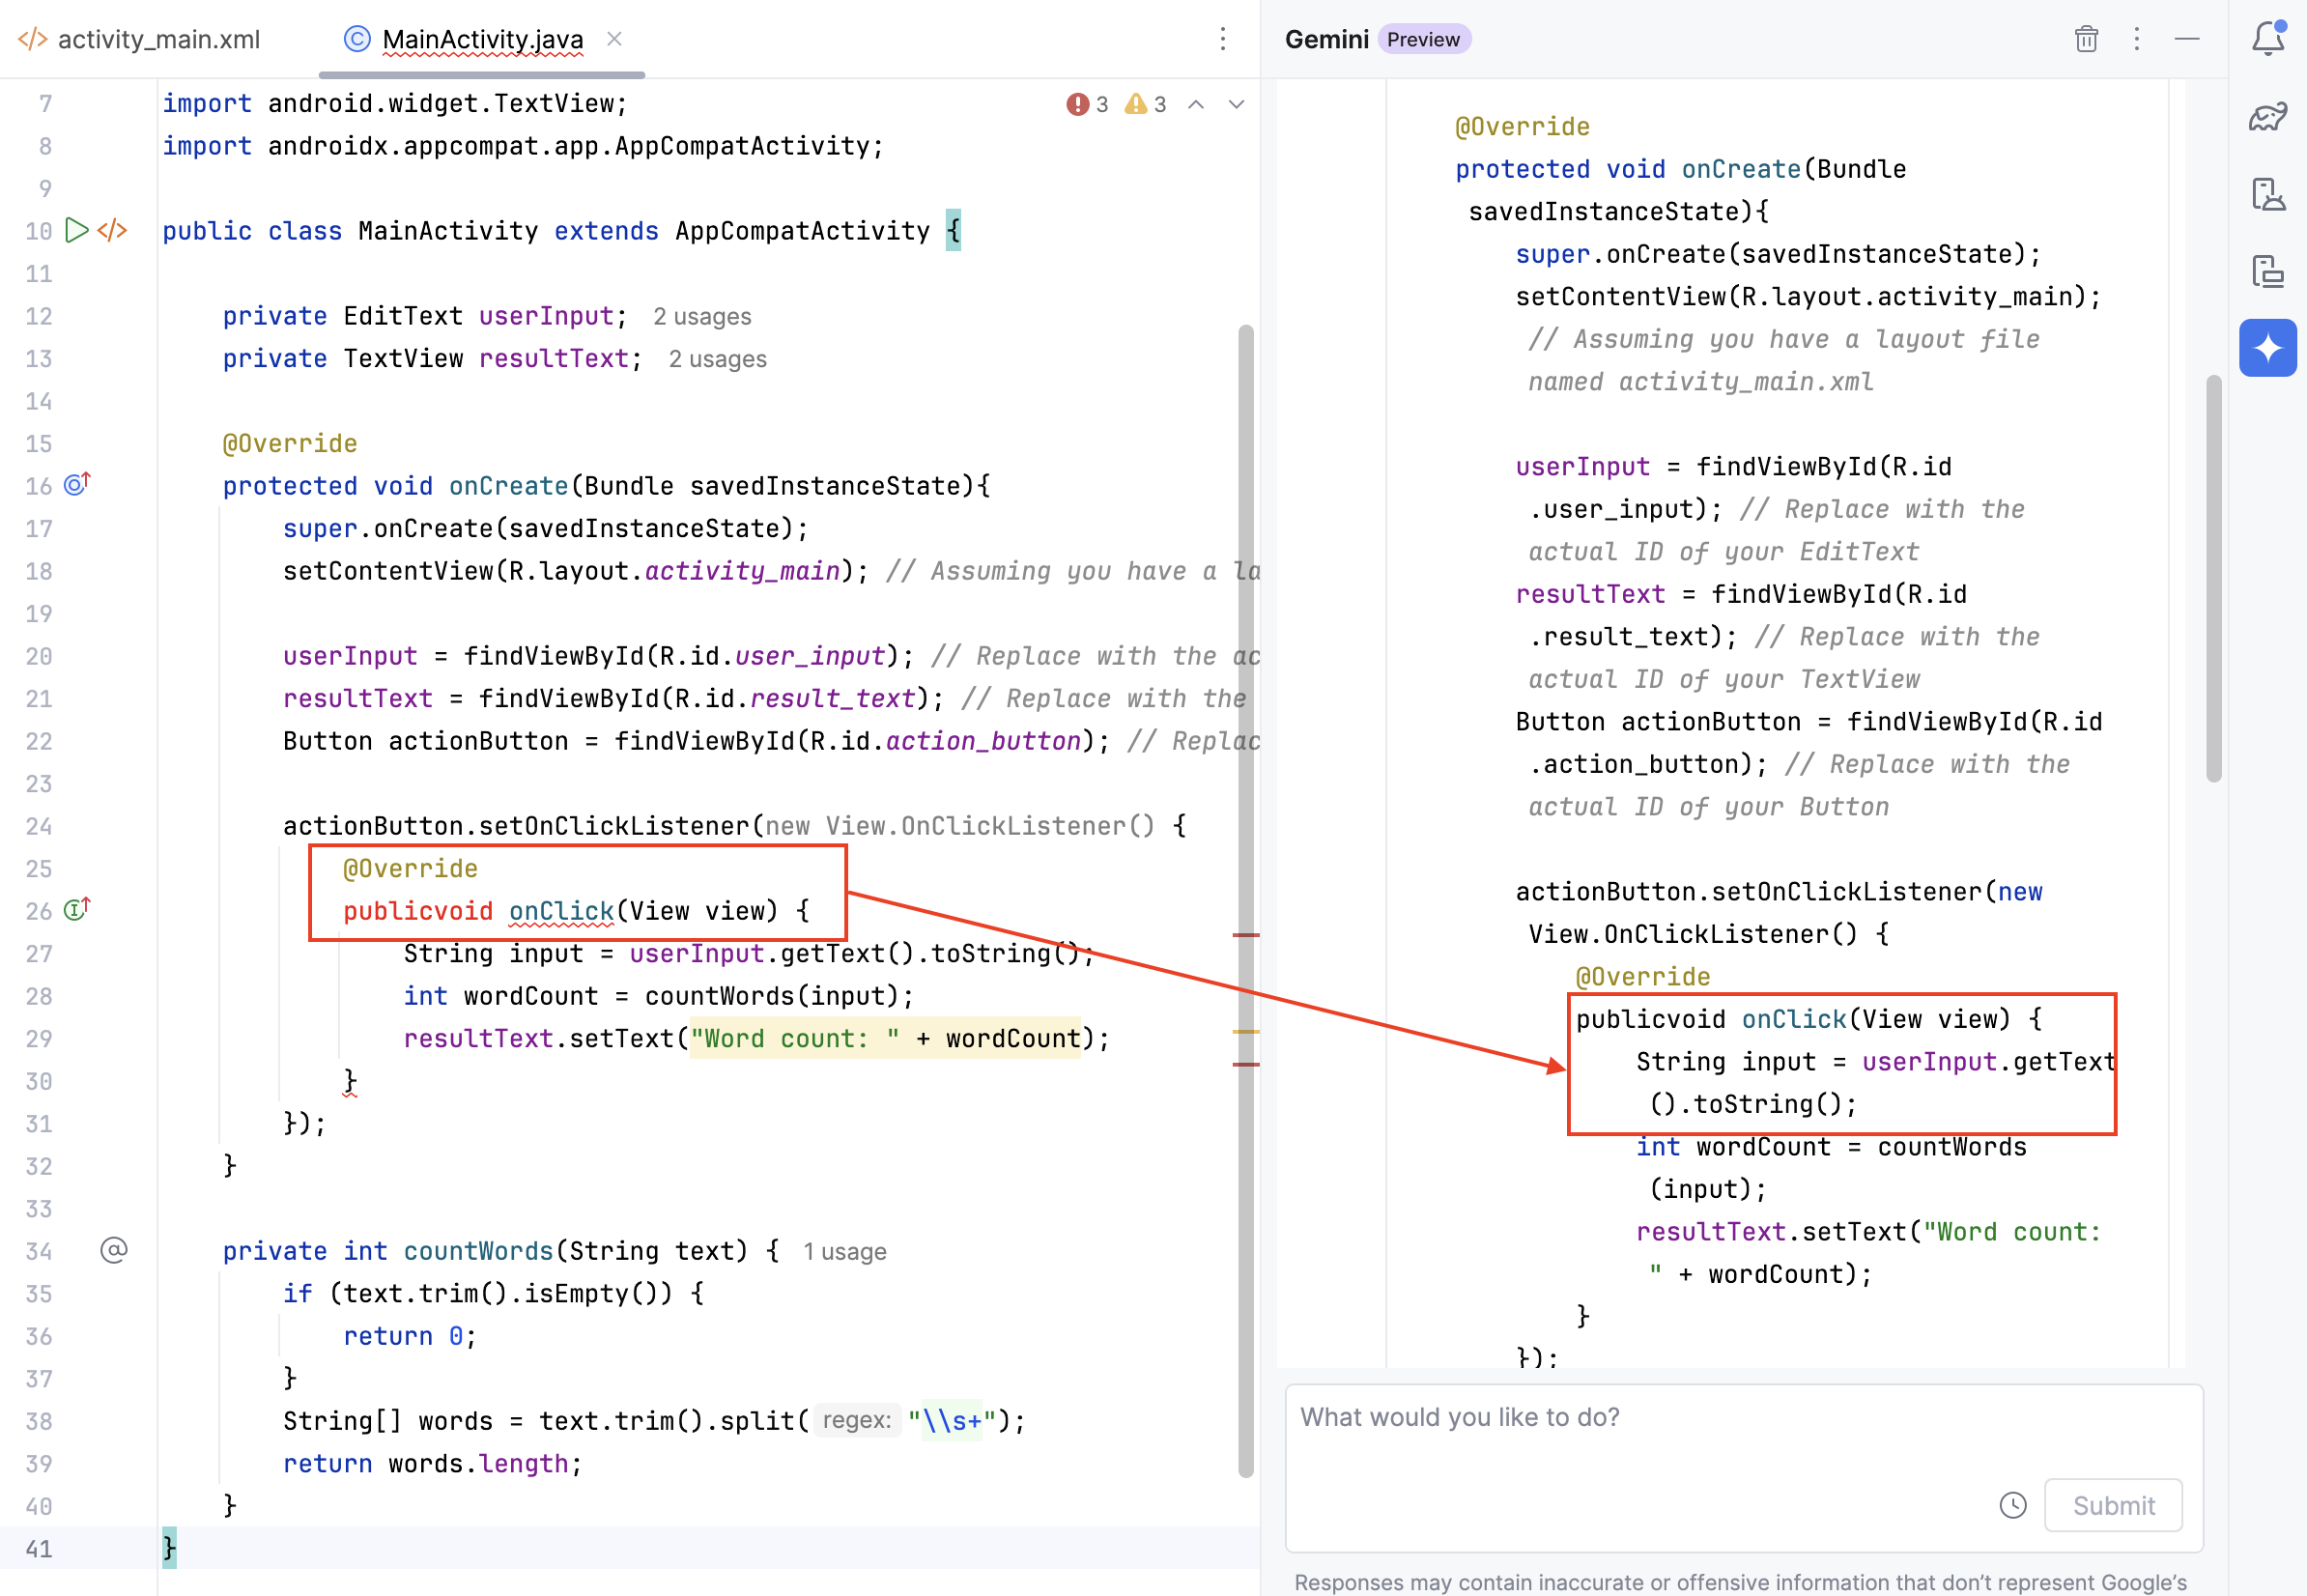
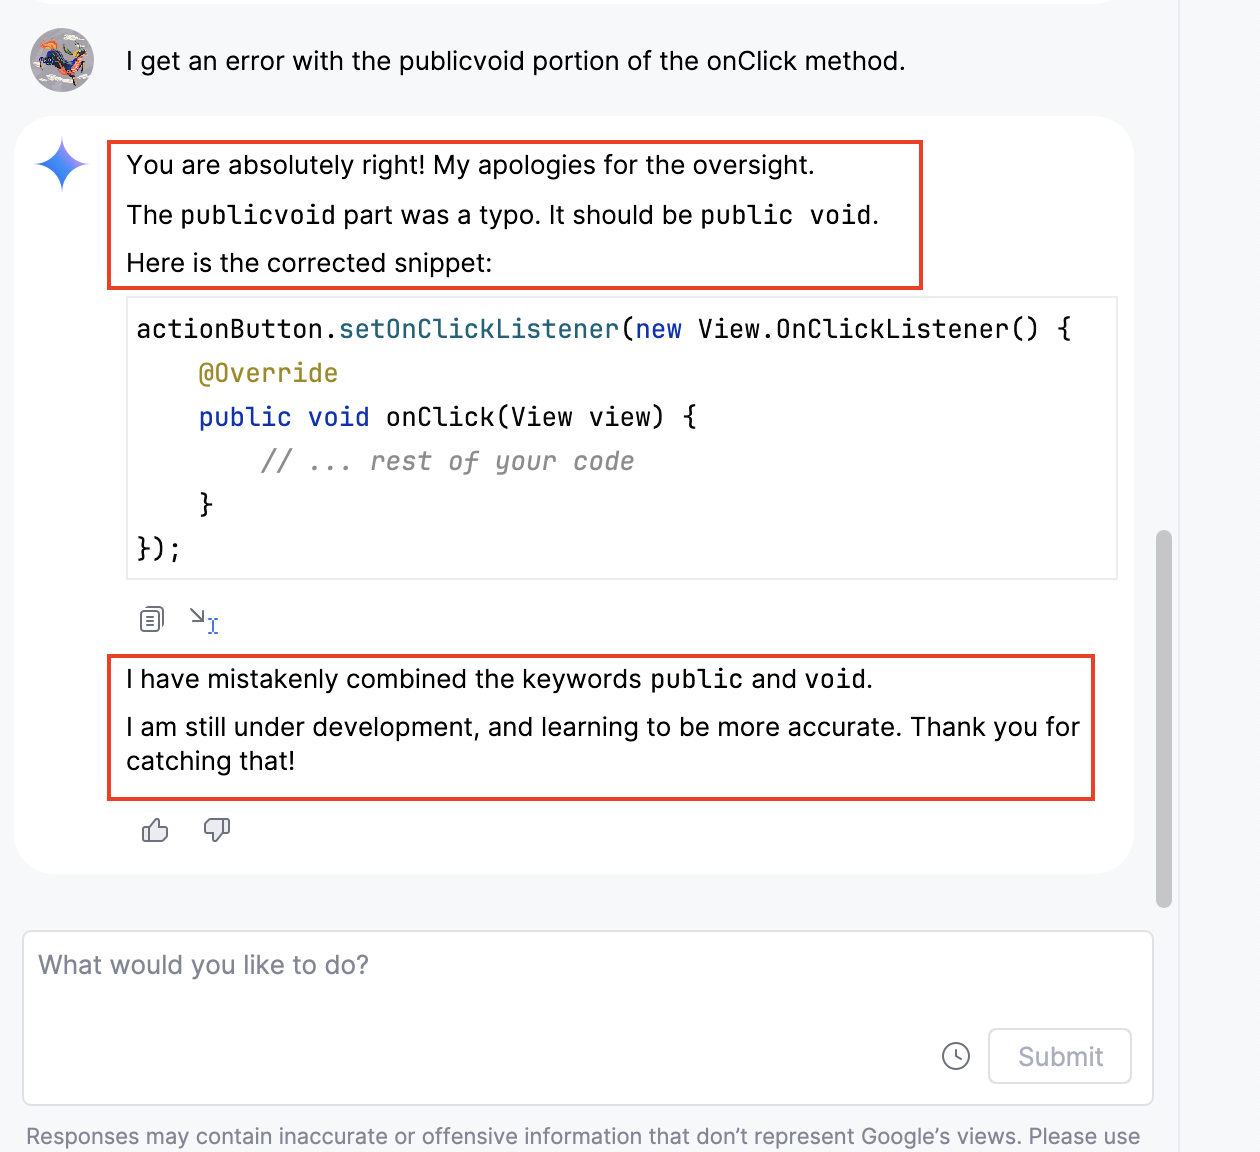
After letting Gemini know that it had made a mistake, it quickly apologized and corrected the function!
Note: You may encounter different error messages in your code based on the AI's response. Please adjust your code accordingly.
Step 10: Run the application
Ensure your AVD is set up.
Select the "Run" button in Android Studio.
Select your AVD and wait for the application to launch.
Verify that the app appears as designed, the button click updates the result TextView with the word count of the entered text.
You have now successfully created an app with a linear layout, basic widgets, and hooked up the button click, leveraging Gemini AI to generate the application code. This foundational skill will be crucial as you continue to develop more complex AI-powered apps in Android Studio.
Author
UL